
How to Do Brow Lamination at Home for Beginners

Table of Contents
- What Is Brow Lamination and How Does It Work?
- Brow Lamination Safety Precautions You Must Not Skip
- Step-by-Step Brow Lamination at Home for Beginners
- How Long Does Brow Lamination Last?
- Brow Lamination Aftercare Tips for Long-Lasting Results
- Common Mistakes That Ruin Brow Lamination (and How to Fix Them)
- Brow Lamination vs Tinting: What's the Difference?
- Conclusion
- Frequently Asked Questions
Last Updated: September 11, 2026
What Is Brow Lamination and How Does It Work?
Brow lamination is a chemical straightening treatment that relaxes the bonds in eyebrow hair so it can be brushed upward and set into a fuller, fluffier shape. The process uses a lifting cream, a neutralising lotion, and a nourishing oil to reset the hair's structure for several weeks.
This guide covers how to do brow lamination at home for beginners, from patch testing to aftercare.
The chemistry matters more than most tutorials admit. A lamination cream contains thioglycolic acid, the same active used in hair perms. It breaks disulphide bonds inside the hair cuticle, which is why the brow can be reshaped at all. A neutralising lotion then rebuilds those bonds in the new position. Get the ratio or the timing wrong and you risk over-processing, which shows up as frizzy, brittle hairs rather than fluffy brows.
That is the honest trade-off: lamination works, but it is a chemical process, not a styling trick. The Dutch food and consumer product safety authority guidance on cosmetic safety treats these products as cosmetics, and that framing matters when you apply them near your eyes.
Brow Lamination Safety Precautions You Must Not Skip
The single most important brow lamination safety precaution is a patch test 24 to 48 hours before every treatment, even if you have used the same kit before. Skipping it is how mild irritation becomes a chemical burn. According to cosmetic safety regulations, patch testing is crucial for identifying potential allergic reactions before full application.
A few non-negotiables:
- Never leave lifting cream on longer than the kit instructs, hoping for a stronger lift
- Keep product at least 1 cm away from the lash line and eye itself
- Do not laminate over broken, sunburnt, or freshly waxed skin
- Stop immediately if you feel stinging, not just warmth
- Do not laminate more often than every 6 to 8 weeks
If you have sensitive eyes or a history of allergic reaction to hair dye, treat at-home lamination with real caution. A common mistake is assuming "gentle formula" means "no risk." It does not.
Step-by-Step Brow Lamination at Home for Beginners
Here is the full process, start to finish. Set aside about 45 minutes for your first attempt and work in good light with a mirror you can get close to. Read the kit instructions through once before you touch anything, because processing times differ between brands and you will not have a free hand to read once product is on.
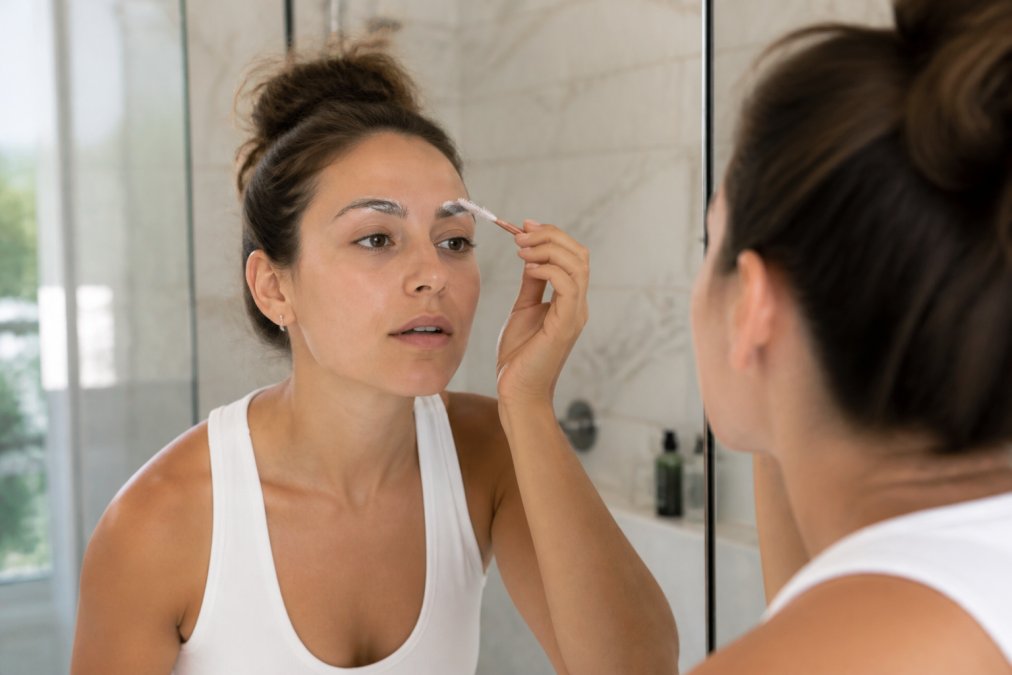
Step 1: Patch Test 24-48 Hours Before
Apply a small amount of lifting cream behind your ear or on your inner forearm, then wait. If redness, itching, or swelling appears, do not proceed. This step is boring and it is the one that protects you. Test the neutraliser separately too; some reactions come from the second step, not the first, and testing them together tells you nothing about which one caused a problem.
Step 2: Cleanse, Map, and Prepare Your Brows
Remove all makeup and oil with a gentle cleanser, then dry the brow area completely. Any residual oil stops the lifting cream from penetrating evenly, which is the usual cause of a patchy lift.
Before you open the kit, map your brows. This is the step beginners skip and the one that decides whether the result looks balanced:
- Hold a straight edge vertically against the outer edge of your nose. Where it crosses your brow is where the brow should start.
- Angle the edge from the nose past the outer edge of your iris. That point marks the arch.
- Angle it from the nose past the outer corner of your eye. That point marks where the brow should end.
- Mark all three points lightly with a brow pencil on each side, then compare the two sides before you commit.
Brush hairs upward with a spoolie and check your natural symmetry. Trim only hairs that stick out well past the others, and tweeze only obvious strays. Over-tweezing before a lamination leaves gaps that the lift will make more obvious, not less.
Step 3: Apply Lifting Cream, Neutralise, and Nourish
Work on one brow at a time so you are never guessing how long product has been sitting.
- Section the brow. Use a spoolie to brush hairs upward and slightly outward, following the direction you want them to set.
- Apply the lifting cream. Use a clean spoolie or the kit's applicator to coat every hair from root to tip, keeping the product at least 1 cm back from the lash line. Coat the whole brow in one pass rather than dabbing; uneven coverage is what produces a lift that looks half-done.
- Time it exactly. Follow the kit's stated processing time and set a timer. Most lifting creams sit for somewhere between 5 and 12 minutes depending on hair thickness and the brand's formulation; fine or sparse brows usually need the shorter end, coarse hair the longer end. Never extend past the maximum the kit allows.
- Remove thoroughly. Wipe the cream away with a dry cotton pad or the kit's tool, working in the direction the hairs were brushed. Remove every trace before moving on; leftover lifting cream keeps working under the neutraliser.
- Apply the neutralising lotion. Coat the brow the same way, again keeping clear of the eye, and time it for the full duration the kit states. Do not shorten this step; the neutraliser is what rebuilds the disulphide bonds in their new position, and cutting it short is how a lift collapses within days.
- Remove and nourish. Wipe the neutraliser away, then apply the nourishing oil to restore hydration to the hair cuticle.
Repeat the whole sequence on the second brow.
Step 4: The First 24 Hours Decide the Result
Keep the brow area completely dry for the first 24 hours. No washing over the brows, no cleanser, no makeup, no steam. The bonds are still stabilising, and water during this window is the single most common reason a home lamination fades within a week. Sleep on your back the first night so you are not pressing the hairs flat against the pillow.
How Long Does Brow Lamination Last?
Brow lamination typically lasts 4 to 6 weeks, depending on your hair growth cycle and how well you care for it. Because eyebrow hairs shed and regrow on their own schedule, the lift fades gradually rather than ending suddenly.
Fine or sparse brows tend to lose the effect faster. Coarser hair holds the shape longer but also resists the initial lift, which is why processing time is not one-size-fits-all.
Brow Lamination Aftercare Tips for Long-Lasting Results
Keep the area dry for the first 24 hours, since water can undo the setting before the bonds fully stabilise. After that, these brow lamination aftercare tips make the biggest difference:
- Avoid oil-based cleansers and makeup removers on the brow area
- Skip saunas, steam rooms, and heavy sweating for 48 hours
- Brush brows upward daily with a clean spoolie
- Apply a light nourishing oil every few days to keep hairs hydrated
- Sleep on your back where possible for the first night
Hydration is the quiet hero here. Dry hair breaks and frizzes, which undoes the smooth finish you paid for.
Common Mistakes That Ruin Brow Lamination (and How to Fix Them)
Most failures come down to timing and preparation, not bad kits. Here is what goes wrong, why it happens at the level of the hair itself, and what to do about it.
| Mistake | Why It Happens | The Fix |
|---|---|---|
| Over-processing | Lifting cream left on past the kit's maximum | Follow kit timing exactly; set a timer and remove on the dot |
| Chemical burn | Product sitting on skin, or applied too close to the lash line | Keep 1 cm from the lash line; patch test before every treatment |
| Patchy lift | Uneven application, or oil left on the brow before starting | Cleanse and dry fully; coat every hair root to tip in one pass |
| Frizzy finish | Skipped nourishing oil, or neutraliser cut short | Always finish with oil; time the neutraliser for its full duration |
| Fast fade | Oil-based cleansers and makeup removers breaking down the set | Switch to oil-free products on the brow area |
| Brows stuck flat | Hairs not brushed into the upward direction before the neutraliser set | Brush and set the direction before neutralising, not after |
How to Reverse an Over-Processed Lamination
None of the top-ranking guides explain this, and it is the question people search for after a bad result. There is no chemical reversal; you cannot un-break a disulphide bond that has already been destroyed. What you can do is stop the damage from compounding:
- Stop all chemical treatments immediately. No re-lamination, no tinting, no perming until the hair has fully grown out.
- Drop the lifting cream entirely for at least 8 to 12 weeks. The hair needs to shed and regrow before it can take another treatment safely.
- Condition aggressively. A nourishing brow oil applied every day, not every few days, helps the remaining hair look less brittle while it recovers.
- Avoid heat and friction. Skip brow dryers, harsh rubbing with a towel, and anything that pulls at the hairs.
- See a brow professional if the skin is affected. Redness, blistering, or persistent soreness is a skin injury, not a hair problem, and it needs a qualified assessment rather than a home remedy.
A common pattern is that the brows look worst in weeks two and three, then improve as new hairs come through. Expect the recovery to take roughly as long as a full hair growth cycle, not a few days.
Long-Term Hair Health: Why You Should Cycle Treatments
Repeated chemical processing has a cumulative effect. Each lamination breaks and rebuilds the disulphide bonds, and the hair does not fully recover between sessions; it just grows out and is replaced. Laminating every 4 weeks, back to back, keeps the same hairs under chemical stress for their entire lifespan, which is how brows that looked fine after the first treatment start looking thin and wiry after the fourth or fifth.
A safer rhythm is to laminate, then leave a genuine gap before the next session. Most practitioners suggest spacing treatments so the brow has a full growth cycle between them, which in practice means roughly every 8 to 10 weeks rather than the 4 to 6 weeks the lift visually lasts. If you want to keep the look between sessions, use a clear brow gel and a spoolie rather than reaching for the lifting cream again.
Brow Lamination vs Tinting: What's the Difference?
Lamination changes the shape and direction of the hair; tinting changes its colour. They solve different problems, and many people combine them for the fullest result.
Lamination is the better choice if your brows are wiry, grow downward, or look sparse because the hairs lie flat. Tinting helps if your brows are pale or have gaps that need visual filling. Neither replaces the other, and doing both in one session is common in salons.
Conclusion
At-home brow lamination delivers real results when you respect the chemistry and the clock, but it demands patience with patch testing and aftercare that most beginners underestimate. Kyro Beauty offers all-in-one brow and lash kits designed for salon-quality shaping and tinting at home, with gentle formulas suited to sensitive eyes and a fast application that fits a busy routine. Backed by 2000+ five-star reviews, the kits give you the tools to shape, set, and maintain your brows. Shop the Kit and get salon-quality brows on your own schedule.
Frequently Asked Questions
Can I do my own brow lamination at home?
Yes, you can do brow lamination at home with an all-in-one kit that includes a lifting cream, neutralizing lotion, and nourishing oil. The key is to follow the processing times exactly, do a patch test 24-48 hours beforehand, and avoid over-processing. Beginners should start with a kit designed for home use, such as those from Kyro Beauty, which includes clear instructions and pre-measured sachets to reduce the risk of chemical burn.
How long does brow lamination last when done at home?
A home brow lamination typically lasts 4 to 6 weeks, depending on your hair growth cycle and aftercare. Because the treatment works on the hair cuticle rather than the follicle, results fade as new hairs grow in. Using a nourishing oil daily and avoiding harsh cleansers on the brow area can help extend the fluffy look.
What ruins brow lamination?
The most common causes of ruined brow lamination are over-processing (leaving the lifting cream on too long), skipping the neutralizing lotion, and using oil-based products in the first 24 hours. Water, steam, and sweat can also weaken the effect if you expose your brows too soon. Always follow the kit's timing and keep the area dry for at least 24 hours after treatment.
How do I maintain my brows after a home lamination treatment?
For brow lamination aftercare, avoid water and steam for 24 hours, then apply a nourishing oil daily to keep hairs hydrated. Brush your brows upward with a spoolie each morning, and avoid oil-based cleansers and makeup removers on the brow area. Exfoliating or using retinoids near the brows can break down the lift faster, so keep those products away from the treated hairs.
