
How to Apply Press-On Lashes Naturally

Table of Contents
- Preparation and Cleaning of Your Natural Lashes
- Tools and Accessories You'll Need
- Step-by-Step Application Process to Apply Press-On Lashes
- Do Press-On Lashes Look Natural
- Tips for Applying Lashes on Sensitive Eyes
- How to Remove Press-On Lashes Safely
- Common Application Mistakes to Avoid
- Tips for Long-Lasting Wear and Lash Maintenance
Last Updated: August 19, 2026
Preparation and Cleaning of Your Natural Lashes
Your natural lashes must be clean, dry, and free from residue to ensure proper adhesion and a seamless appearance. Remove any eye makeup with an oil-free cleanser, as oils from makeup, skincare, or natural sebum prevent the self-adhesive band from bonding properly. Gently wipe your eyelids and lash line with a soft, lint-free cloth, paying special attention to the inner and outer corners where oils accumulate.
Once clean, let your lashes dry completely for at least 5-10 minutes. Moisture prevents long-lasting wear. Kyro Beauty emphasizes this preparation phase because it directly impacts how natural your lashes look and how long they stay in place.
Tools and Accessories You'll Need
You'll need precision tweezers with a slight curve for better control, an applicator tool with a thin, flat edge to position clusters exactly, and an oil-free cleanser for both preparation and removal. A magnified mirror with good lighting is essential to see your lash line clearly and avoid misalignment.
Kyro Beauty includes essential application tools in its press-on lash kits, designed for precise placement. Having the right tools reduces application time and improves accuracy, translating directly to a more natural appearance.
Step-by-Step Application Process to Apply Press-On Lashes
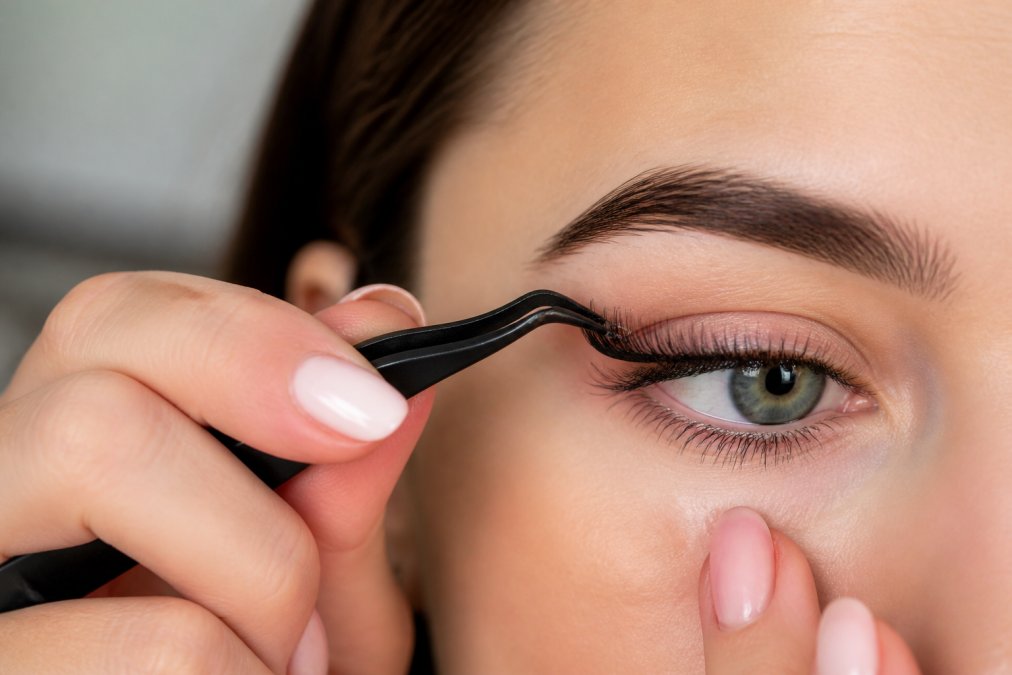
Step 1: Assess Your Natural Lash Line
Identify where your natural lashes are thickest and thinnest. Most people have fuller lashes in the center and sparser lashes toward the corners. This observation guides where you'll place clusters for maximum natural blending.
Step 2: Start with the Outer Corner
Begin placing clusters at the outer corner, working inward. This prevents accidentally knocking off already-placed clusters. Angle outer corner clusters slightly outward to follow your natural lash curl and create a lifted effect.
Step 3: Position Clusters with an Upward Motion
Using tweezers, position a lash cluster just above your natural lash root. The self-adhesive band should sit as close as possible to the base of your natural lashes without touching eyelid skin. Press down gently with your applicator tool using an upward motion.
Step 4: Work Toward the Inner Corner
Continue placing clusters from outer to inner corner, spacing them 2-3mm apart for a seamless appearance. Clusters placed too close together look dense and artificial; too far apart leaves visible gaps.
Step 5: Fill Any Sparse Areas
After placing main clusters, assess your lash line. Add smaller clusters or individual lash fibers to fill gaps. This blending step separates natural-looking applications from obvious ones.
Step 6: Check the Seal
Run your applicator tool gently along the entire lash band to ensure each cluster is firmly bonded. A solid seal prevents lifting and ensures longevity.
Measuring and Trimming for Your Eye Shape
Hold a cluster up to your eye and compare its length to your natural lash line. If too long, trim the outer edge carefully with small scissors, removing only a few fibers at a time. Ensure the cluster's curl matches your natural lash curvature, mismatched curl looks obviously artificial.
Positioning Clusters Correctly
Close your eye gently and identify where your natural lashes sit, this is your placement guide. Position clusters directly along this line, not above it on eyelid skin. The lash root should be as close as possible to your natural lash root to create the illusion that cluster fibers are growing directly from your lash line.
Angle each cluster to match your natural lash direction: inner corner lashes angle slightly inward, center lashes angle straight up or slightly outward, outer corner lashes angle outward more dramatically. Matching these angles creates a unified, natural appearance.
Securing and Blending
Press each cluster down with gentle but firm pressure for 2-3 seconds to allow the self-adhesive bond to set. Use larger clusters in the center where natural lashes are thickest and smaller clusters toward the corners for a gradual transition that looks grown-in. prevent caking foundation.
Run your finger along the lash line to feel for gaps or lifts. If detected, press that cluster down again. The goal is a seamless line with no visible separation between natural lashes and clusters.
Do Press-On Lashes Look Natural
Well-applied press-on lashes absolutely look natural when you follow proper positioning, spacing, and blending strategies. The difference between natural and artificial appearance depends on cluster density, placement accuracy, and lash curl matching.
Kyro Beauty's press-on lash clusters are designed with natural lash density and curvature in mind, blending more easily than heavily dramatic clusters. The key insight: use multiple small clusters rather than fewer large ones. A single large cluster looks obviously applied; multiple small clusters distributed across your lash line create naturally full lashes.
Tips for Applying Lashes on Sensitive Eyes
Press-on lashes are gentler on sensitive eyes than traditional lash glue since they require no adhesive chemicals. Patch-test the self-adhesive band on a small lash line area before full application, waiting 5-10 minutes for any irritation.
Use only oil-free products during preparation and removal. Avoid applying if your eyes are already irritated, dry, or inflamed. When positioning clusters, be extra gentle around the delicate inner corner with gentle, firm pressure, not aggressive pressing.
If you experience itching, redness, or burning, remove clusters immediately. Don't push through discomfort.
How to Remove Press-On Lashes Safely
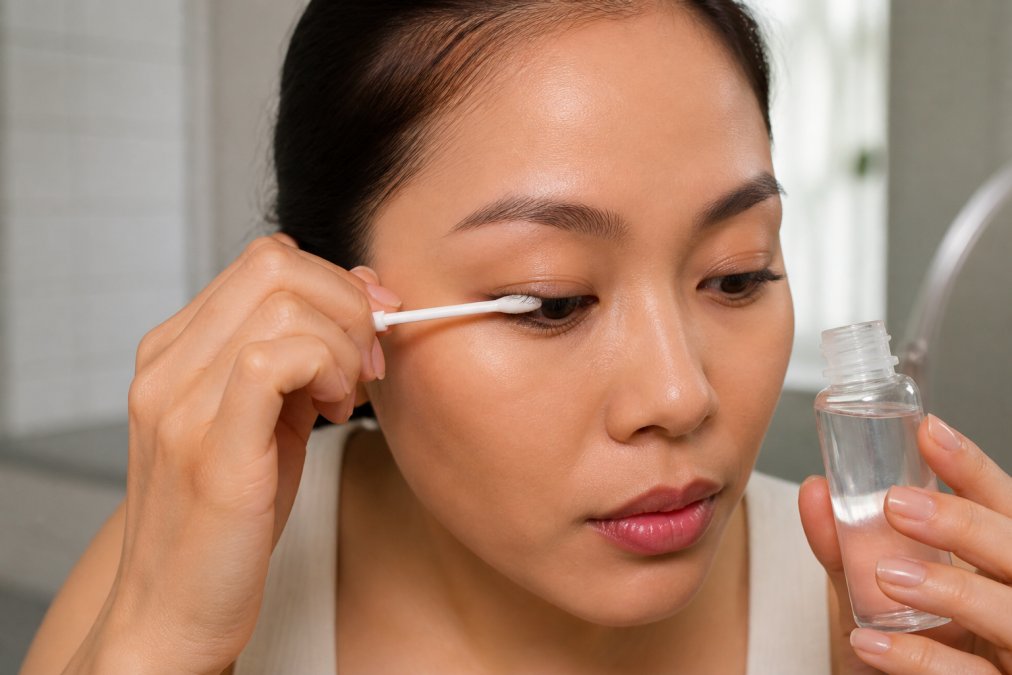
Apply oil-free cleanser along the lash root and let it sit for 30-60 seconds to soften the adhesive bond. Using your applicator tool or tweezers, gently lift the outer corner of the cluster and work slowly along it, allowing the bond to release gradually. If resistance occurs, apply more cleanser and wait another 30 seconds. Never force a cluster off.
After removing all clusters, use a fresh cotton pad with oil-free cleanser to remove remaining residue. Rinse thoroughly with lukewarm water and apply lightweight eye cream or lash serum to nourish your natural lashes.
Store removed clusters in a clean, dry container. Most can be reused 5-10 times with careful removal and proper storage.
Common Application Mistakes to Avoid
Skipping Preparation
Applying clusters to unclean or wet lashes prevents proper bonding. Your clusters will feel loose, shift throughout the day, and separate from your natural lash line. Always clean and dry thoroughly before application.
Placing Clusters Too Close Together
Spacing clusters too tightly creates an obviously artificial, dense appearance. Your natural lashes have gaps between fibers. Aim for 2-3mm between clusters.
Positioning Clusters Above the Lash Line
Placing clusters on eyelid skin rather than along your natural lash line creates a visible gap that immediately reveals the application. The cluster should sit as close as possible to your natural lash root.
Using Mismatched Curl
If your natural lashes have gentle curl and you apply dramatically curved clusters, the mismatch is obvious. Choose clusters matching your natural lash curl, or gently bend overly dramatic clusters before application.
Applying Too Much Pressure
Excessive force doesn't improve adhesion, it irritates your eye and damages natural lashes. Gentle, firm pressure for 2-3 seconds is sufficient.
Neglecting the Blending Step
After placing all clusters, fill gaps and adjust angles. This blending step separates natural-looking applications from obvious ones.
Tips for Long-Lasting Wear and Lash Maintenance
Press-on lashes last 5-10 wears with proper care. Avoid excessive water exposure during the first 24 hours while the self-adhesive bond sets. After 24 hours, normal showering is fine, though chlorine and saltwater degrade adhesive over time.
Don't use oil-based products near your lash line while wearing clusters. Avoid rubbing your eyes or pulling on lashes. Sleep on your back when possible to prevent pressure on lashes.
Limit wear to 6-8 hours daily when starting, extending as your technique improves. Maximum recommended wear is 12 hours per day. Remove clusters every night to protect natural lash health and extend cluster lifespan.
Applying press-on lashes naturally is a skill that improves with practice. The fundamentals remain consistent: clean and dry your lash line, position clusters carefully with proper spacing, and remove them gently using oil-free products. Kyro Beauty's press-on lash kits feature self-adhesive bands and precision tools that make the process faster and more forgiving than traditional glue-based alternatives. Shop the Kit and discover how professional-grade lash enhancement fits seamlessly into your daily routine.
Frequently Asked Questions
What is the trick to applying press-on lashes so they look natural?
The key is proper lash mapping and cluster placement along your natural lash line. Start by measuring clusters to fit your eye shape, trim the outer edge to match your eye's curve, and position each cluster at the base of your natural lashes rather than on top of them. Use an upward and outward motion when placing, and blend the synthetic fibers with your natural lashes by gently combing through. Avoid placing clusters too densely or too far from the lash root, which creates gaps or a bulky appearance. Practice with a few clusters first to build confidence before creating a full lash look.
Do press-on lashes look natural with the right application technique?
Yes, when applied correctly, press-on lashes can achieve a seamless blend with your natural lashes. The difference between a natural look and an obvious one comes down to cluster size, placement precision, and how well you match the lash curl to your natural lash curvature. Self-adhesive bands eliminate the visible glue line that can make lashes appear fake. Choose lash clusters that complement your lash density and eye shape, and take time to position each one at the natural lash line rather than above it. With proper technique, most people won't notice you're wearing lashes, they'll just see fuller, enhanced eyes.
Are press-on lashes safe for sensitive eyes?
Press-on lashes can be safe for sensitive eyes when you follow proper application and removal protocols. Before wearing any new lashes, perform a patch test on a small area of skin near your eye to check for allergic reactions. Use an oil-free cleanser to prepare your natural lashes, as oils can interfere with adhesion and irritate sensitive skin. If using adhesive, opt for formulas designed for sensitive eyes. Remove lashes gently using a dedicated lash removal tool or soft applicator rather than pulling, and always cleanse the area thoroughly afterward. If you experience redness, itching, or discomfort, discontinue use and consult a healthcare professional.
How long do press-on lashes typically last with proper care?
Press-on lash clusters can last 2-4 weeks with consistent care and proper application technique. Longevity depends on how often you wear them, how well you maintain them between applications, and your natural lash shedding cycle. To extend wear time, avoid excessive moisture immediately after application, remove eye makeup carefully with oil-free products, and store lashes in their original tray to maintain lash curl. Gently comb through your natural lashes daily to prevent tangling, and avoid rubbing your eyes. If clusters start to lift or lose their seal, remove them promptly to prevent damage to your natural lashes. Waterproof formulas typically last longer than standard adhesives.
This article was written using GrandRanker
