
How to Do a Lash Lift at Home Safely

Table of Contents
- What You'll Need: Tools and Materials for a Safe Lash Lift
- Preparation and Cleaning of the Eye Area
- Step-by-Step Application Process for Your Lash Lift
- Best Lash Lift Tools for Beginners
- Lash Lift Aftercare Tips for Long-Lasting Results
- How Long Do Lash Lifts Last and What to Expect
- Common Mistakes to Avoid When Lifting Lashes at Home
- Conclusion
Last Updated: August 20, 2026
What You'll Need: Tools and Materials for a Safe Lash Lift
Before beginning a lash lift at home, gather the right equipment. The essentials include silicone pads in various sizes (small, medium, and large), lash adhesive designed for lifting, perm lotion, setting solution, rinse solution, micellar water or gentle cleanser, cotton buds, tweezers, a timer, and patch test supplies.
Invest in sterile applicators, lint-free cotton pads, and a magnifying mirror, trying to apply silicone pads without clear visibility invites mistakes. Some kits come pre-assembled; others require sourcing components separately.
Quality silicone pads matter significantly. Cheap pads don't hold the curve properly, leading to uneven lifts or slipped applications. Look for pads that grip without stickiness, maintain shape throughout processing, and come in enough size options for different lash types.
Use a visible timer, not your phone. Chemical processing waits for no one, over-processing causes brittle or frizzy lashes, while under-processing leaves minimal lift.
Prepare your workspace with good lighting, a clean surface, and a comfortable position where you can see your eye without straining.
Preparation and Cleaning of the Eye Area
Meticulous preparation is the foundation of a safe lash lift. Your lashes won't lift evenly if they're dirty, oily, or coated with residue.
Remove all makeup, especially mascara and eye shadow, using micellar water or a gentle eye cleanser. Work the cleanser along the lash line and between the lashes, mascara residue interferes with adhesion and can trap moisture against the lash root.
After cleansing, rinse thoroughly with clean water and pat dry with a lint-free cotton pad. Moisture prevents silicone pads from adhering properly and dilutes the perm lotion, reducing effectiveness.
Use a specialized lash prep solution to degrease the lash line. Your skin naturally produces oils that migrate to the lash line, and this buildup interferes with results. This step is especially important if you have oily skin or live in a humid climate.
Let your eye area air-dry completely for at least 2-3 minutes after cleansing. Rushing to apply silicone pads while damp causes poor adhesion and uneven lifts.
Step-by-Step Application Process for Your Lash Lift
A lash lift at home requires precision and patience through multiple stages. Each step builds on the previous one.
Step 1: Patch Test and Safety Precautions
Conduct a patch test 24 to 48 hours before your full application. Apply a small amount of perm lotion and setting solution to the inside of your wrist or behind your ear. Watch for redness, itching, swelling, or allergic reaction.
This step is non-negotiable, especially if you have sensitive eyes or a history of chemical reactions. An allergic reaction can cause eyelid swelling or eye irritation.
During application, wear gloves to protect your hands. Keep solutions away from your eyes, if any gets in, flush immediately with clean water for at least 15 minutes and seek medical attention.
Position a mirror so you can see your eye clearly without straining. Ensure your workspace is well-ventilated.
Step 2: Apply Silicone Pads and Secure the Lashes
Select the silicone pad size that matches your eye shape and lash length. Most people use different sizes for inner, middle, and outer lash areas.
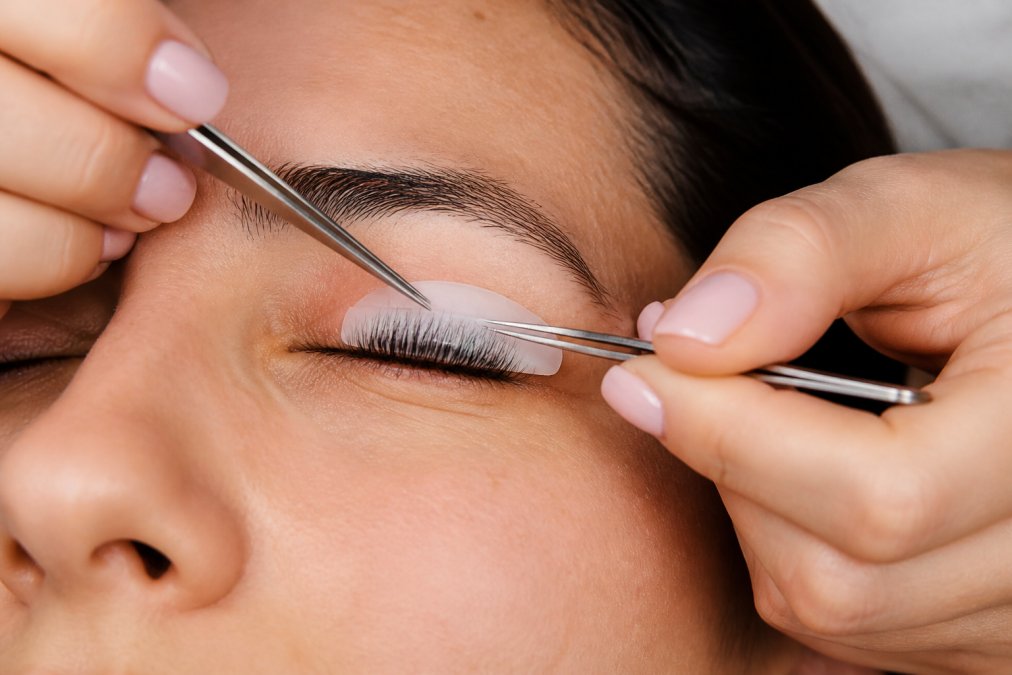
Apply a thin layer of lash adhesive to the back of the silicone pad, not your eyelid. Press the pad gently onto your closed eyelid, positioning your natural lashes on the pad's curved surface with the root at the base.
Use a cotton bud to gently press the lashes onto the pad, working from the inner corner outward. Take your time, a slipped pad mid-processing means an uneven lift or failed attempt.
Check that all lashes rest on the pad surface. Use tweezers to reposition any stragglers. The adhesive will set in about 2-3 minutes.
Step 3: Apply Perm Lotion and Processing
The perm lotion breaks the disulfide bonds in hair protein, lifting your lashes. Timing is critical.
Apply the perm lotion evenly along the lash line where lashes meet the silicone pad, using a small applicator or cotton bud. Saturate the lashes without dripping solution into your eye.
Set your timer for the processing time specified in your kit, typically 10 to 15 minutes. Over-processing by even 5 minutes results in brittle, frizzy, or breaking lashes.
Sit still during processing. Any movement can shift the pad or cause lotion to drip. If you feel burning or significant discomfort, rinse immediately and stop.
Step 4: Rinse and Apply Setting Solution
When your timer sounds, rinse the perm lotion away thoroughly with clean water. Use a cotton pad to gently remove the lotion while keeping your eye closed. Incomplete rinsing leaves chemical residue that interferes with the next step.
Apply the setting solution, which neutralizes the perm lotion and reforms the disulfide bonds in a lifted position. Apply it the same way as the perm lotion, evenly along the lash line.
Set your timer again, typically 5 to 10 minutes. The setting solution locks in your lift, don't skip or rush this step.
When the timer sounds, rinse thoroughly with clean water. Your lashes should have a visible curl.
Step 5: Remove Pads and Apply Aftercare
Gently peel the silicone pad away from your eyelid slowly and carefully. If the pad doesn't come away easily, apply a tiny amount of micellar water around the edges to help release the adhesive.
Your lashes will have a new curve and lift. Some slight stiffness immediately after is normal and settles within hours.
Apply a nourishing lash serum or oil to condition your lashes after chemical processing. This crucial step extends the life of your lift and prevents lash damage.
Best Lash Lift Tools for Beginners
Certain tools make the process significantly easier and safer for newcomers. The difference between a frustrating first attempt and a successful one often comes down to equipment quality.
Kyro Beauty's lash lift kits are designed specifically for at-home application, with pre-measured solutions and silicone pads sized for different eye shapes. The all-in-one approach removes guesswork and reduces mistakes.
Look for kits with clear instructions and timing guidelines specific to each step. Color-coded bottles or numbered steps prevent confusion during application.
A magnifying mirror is essential, not optional. Cotton buds designed for eye application are thinner and more precise than standard swabs. Tweezers with a fine, angled tip make lash repositioning easier. repairing skin barriers.
A visible timer keeps you accountable to precise processing times. Seconds matter, a 2-minute difference can mean the difference between a beautiful lift and over-processed lashes.
Lash Lift Aftercare Tips for Long-Lasting Results
How you treat your lashes after the lift determines longevity and lash health for future treatments.
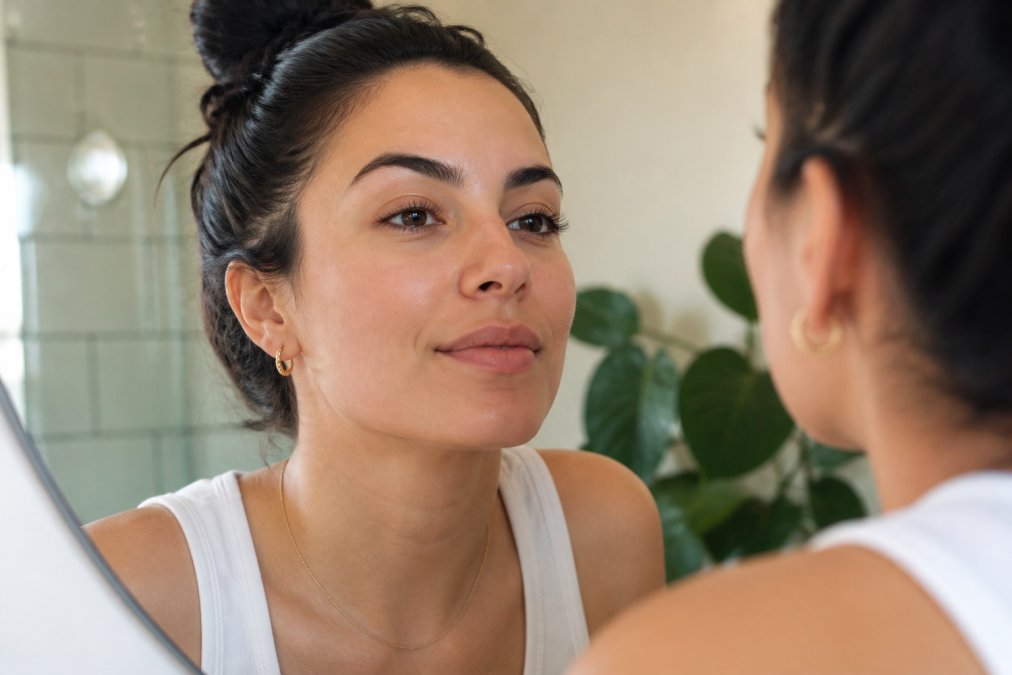
For the first 24 hours, avoid water, steam, and humidity. Your lashes are still setting, and moisture softens the newly formed curl. Don't shower, steam your face, or apply water-based products near your eyes. This window is critical, skipping it is a common reason lifts don't last as long as expected.
After 24 hours, resume normal washing gently. Avoid rubbing or pulling at your lashes. Use your fingers rather than brushes near the lash line to prevent friction.
Condition your lashes regularly with a lash serum or nourishing oil. Apply 2-3 times per week, or daily if lashes feel dry. This prevents brittleness and breakage.
Avoid mascara for at least 48 hours after your lift. When you do use it, choose water-based formulas that are easier to remove without tugging.
Sleep on your back when possible during the first week. Side-sleeping can press lashes against the pillow, gradually flattening the curl. A silk or satin pillowcase reduces friction if you can't avoid side-sleeping.
Avoid eyelash curlers for at least two weeks after your lift. Your lashes are already curved, and curlers can over-bend them or cause breakage.
How Long Do Lash Lifts Last and What to Expect
Understanding the lash growth cycle helps manage expectations. Lashes naturally shed and regrow continuously.
A lash lift typically lasts 6 to 8 weeks, aligning roughly with your natural lash growth cycle. As lashes grow out, new unglifted lashes emerge at the lash line, gradually replacing lifted lashes. The lift doesn't fade abruptly, it gradually becomes less pronounced.
Duration depends on your natural lash growth rate, aftercare adherence, application quality, and lash health. Some see lifts lasting closer to 10 weeks with diligent aftercare and slower growth. Others see fading by week 5 with neglected conditioning.
The full effect develops over 24 to 48 hours as the curl fully sets. Don't mistake this settling for fading.
New lashes growing in won't have the lift, creating a mixed appearance as treatment progresses. Some find this acceptable; others prefer refreshing every 6 weeks for consistent results.
Common Mistakes to Avoid When Lifting Lashes at Home
Understanding common pitfalls helps you avoid them.
Skipping or rushing cleansing is the most common preparation mistake. Dirty or oily lashes don't adhere to silicone pads properly, leading to uneven lifts or slipped pads. Spend 5 minutes to properly cleanse and degrease.
Over-processing is the most common application mistake. Longer processing doesn't equal better results. Over-processed lashes become brittle, frizzy, and prone to breaking. Respect the timing guidelines.
Applying too much adhesive when securing the silicone pad causes excess to drip into your eye or creates a messy removal. A thin, even layer is sufficient.
Neglecting the 24-hour no-water rule after application softens the newly set curl, reducing lift longevity. Plan your lash lift for a day when you can keep your face dry.
Skipping the patch test is risky. Chemical sensitivities can develop, and even previous tolerance doesn't guarantee future reactions.
Using incompatible products reduces effectiveness or causes unpredictable reactions. Stick with a complete kit designed to work together.
Not conditioning your lashes after the lift compounds over time. Unconditioned lashes become dry and brittle, breaking more easily and losing curl faster.
Conclusion
Learning how to do a lash lift at home safely is achievable with proper preparation, precise timing, and disciplined aftercare. The process requires patience more than skill.
Kyro Beauty's all-in-one lash lift kits remove the complexity of sourcing compatible components and provide pre-measured solutions calibrated for at-home application. With clear timing guidelines, properly sized silicone pads, and gentle formulations designed for sensitive eyes, the kits make the process more forgiving for first-time users. Shop the Kit and join thousands of customers who've brought salon-quality lash lifts into their homes.
Frequently Asked Questions
Can you do a lash lift on yourself at home?
Yes, you can do a lash lift at home safely with the right kit and careful attention to instructions. The key is proper preparation, patch testing for allergic reactions, and following processing times precisely. Many people successfully perform lash lifts at home using professional-grade kits. Start with a test on a small section of lashes to build confidence before treating all lashes.
What safety precautions should I take before a lash lift at home?
Always perform a patch test 24-48 hours before your full application to check for allergic reactions to the perm lotion and setting solution. Protect your eye area from chemical exposure by using silicone pads correctly and avoiding contact with the eyelid skin. Wear gloves, ensure good ventilation, and never exceed the recommended processing time, as over-processing damages lash health. If you have sensitive eyes or a history of reactions to lash products, consult before proceeding.
How long do lash lifts last when done at home?
A properly applied at-home lash lift typically lasts 6-8 weeks, depending on your natural lash growth cycle and aftercare. Results may vary based on lash type, hair texture, and how well you follow aftercare instructions. Avoid water and steam for the first 24-48 hours after application to ensure the lift sets properly. With proper maintenance and lash lift aftercare tips, you can maintain the curl and lift throughout the entire duration.
What is the best DIY lash lift kit for beginners?
Look for all-in-one kits that include clear instructions, pre-measured solutions, silicone pads in multiple sizes, and applicators. The best lash lift tools for beginners feature easy-to-follow steps, safety documentation, and gentle formulas suitable for sensitive eyes. Choose kits from reputable beauty brands that provide detailed guidance on application time and patch testing. Professional-grade kits designed for home use often deliver better results than budget options, as they contain properly balanced chemical solutions.
This article was written using GrandRanker
