



7 Best Dip Powder Nail Kits for Beginners in 2026

Table of Contents
- Quick Comparison: Best Dip Powder Nail Kits for Beginners in 2026
- What to Look for in a Beginner Dip Powder Kit
- Top Dip Powder Kits for Beginners: Reviews and Pricing
- How to Apply Dip Powder Nails at Home: Step-by-Step
- Dip Powder vs Gel Nails Comparison: Which Lasts Longer?
- Dip Powder Nail Removal Steps: Safe At-Home Method
- Allergy and Sensitivity Awareness: What Beginners Should Know
- Conclusion
- Frequently Asked Questions
Last Updated: September 26, 2026
Quick Comparison: Best Dip Powder Nail Kits for Beginners in 2026
The best dip powder kits for beginners in 2026 balance price, ease of use, and durability without requiring a UV lamp. According to Byrdie's 2026 kit roundup, the Modelones Dip Powder Nail Starter Kit leads on value at around €25.50, while the AZUREBEAUTY kit offers the longest wear at roughly €31.70.
| Kit | Approx. Price | Best For | Key Strength |
|---|---|---|---|
| Modelones Starter Kit | €25.50 | All-in-one value | 19 pieces, 4 shades |
| AZUREBEAUTY Kit | €31.70 | Long wear | Up to 3 weeks chip-free |
| Kiara Sky Kit | Contact for pricing | Salon-grade finish | Vitamin-infused formula |
| Saviland Kit | €21.50 | Tight budgets | Full liquid set included |
| SNS Starter Kit | Contact for pricing | Colour range | 110+ DIY shades |
| Kiss Dip Color System | Contact for pricing | Simplicity | Compact, quick-dry |
What to Look for in a Beginner Dip Powder Kit
Buy a kit with all three liquids, a fine-milled powder, and a proper brush, missing components are the biggest reason beginners abandon dip powder. A complete starter set saves you from buying base coat, activator, and top coat separately, which often cost more than the kit itself.
Check these seven things before you buy:
- Full liquid set: base coat, activator, and top coat must all be included
- Fine-milled powder: coarse powder creates lumpy, uneven layers
- Brush quality: a dedicated powder brush prevents cross-contamination
- No UV lamp: true dip systems cure chemically, not under light
- Colour count: two to four shades is enough to start
- Ingredient list: look for HEMA-free or low-methacrylate formulas if you have sensitive skin
- Refillability: a system you can top up with single powders beats a sealed one-off box
The cost-per-manicure math nobody shows you
A starter kit looks expensive next to one salon visit, but the comparison only makes sense per manicure. A beginner kit with four powders and a full liquid set delivers eight to twelve manicures before the liquids run low, the powders last far longer than the base and activator.
Ingredients worth avoiding
Methacrylates are the allergens to watch for in dip liquids, and HEMA (2-hydroxyethyl methacrylate) is the most commonly flagged. It is not banned, but repeated skin contact with uncured HEMA is a well-documented route to sensitisation. If a brand does not publish its ingredient list, look elsewhere. HEMA-free and lower-methacrylate systems exist at every price point now, so sensitivity is no longer a reason to skip dip powder entirely.
What a beginner kit does not need
Skip anything marketed on shade count alone: a 30-colour box with thin pigment and a weak brush will frustrate you faster than a four-shade kit with dense powder and a proper brush. You also do not need a UV or LED lamp, dust collector, or professional e-file to start, those are upgrades for later.
Top Dip Powder Kits for Beginners: Reviews and Pricing
Each kit below earns its place for a different reason, and the right pick depends on whether you prioritise price, wear time, or colour range.
Modelones Dip Powder Nail Starter Kit
Modelones packs 19 pieces into a beginner set, including four nude, pink, and brown powders plus the full liquid system. At €25.50, it is the strongest value on this list (Byrdie's 2026 review). The dedicated powder brush keeps application clean. The one catch: apply thin layers, or the powder clumps at the cuticle.
AZUREBEAUTY Dip Powder Nail Kit
If longevity is your priority, AZUREBEAUTY is the pick. Its high-pigment formula and chip-resistant finish hold for up to three weeks without a UV lamp. It is the #1 ranked kit in the dip manicure category on Amazon's Best Sellers list. The trade-off is speed: the liquids dry fast, so work one nail at a time.
Kiara Sky Dip Powder Kit
Kiara Sky is the salon-trusted option, and Prizm Nails Spa's 2026 rankings name it best for quality. The kit includes three professional colours and a vitamin-infused formula that supports nail health. It costs more and you contact the brand for pricing, so it suits buyers who want a professional-grade system from day one.
Saviland Dip Powder Nail Kit
Saviland ships a complete liquid set with multiple powder jars. The fast-drying formula works on natural and artificial nails. Packaging feels less premium, but a large user community means plenty of troubleshooting help.
SNS Dip Powder Starter Kit
SNS invented the dipping powder category, and its refillable system gives access to over 110 DIY colours. That colour library is unmatched. The flip side is complexity: the professional system can overwhelm a total novice, so budget extra practice time.
Kiss Dip Color System Kit
Kiss wins on simplicity: the compact kit uses a simplified base-and-top-coat process with beginner-friendly brushes and a quick-dry formula. Fewer colours ship in the starter set, but for a first manicure with minimal fuss, it is hard to beat.
How to Apply Dip Powder Nails at Home: Step-by-Step
Applying dip powder at home takes about 45 minutes once you know the sequence. The method is simple, but technique decides whether the finish lasts three days or three weeks.
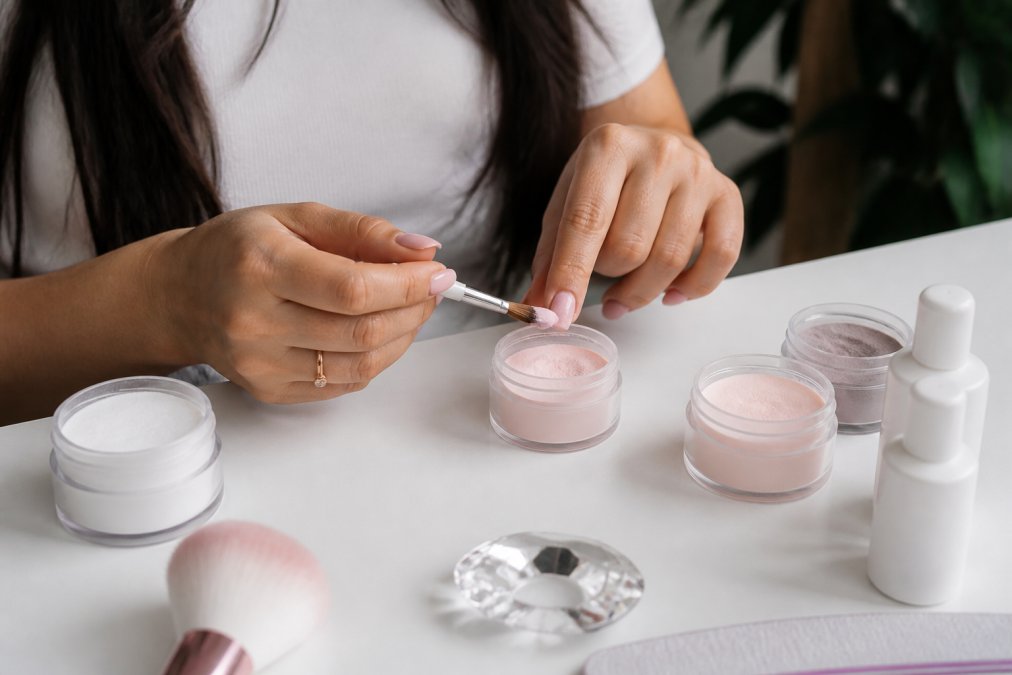
- Prep the nail bed: push back cuticles, buff the nail plate, and wipe with dehydrator
- Apply a thin base coat, stopping short of the cuticle
- Dip at a 45-degree angle into the powder, then tap off excess
- Repeat base-and-dip for two to three layers
- Brush on activator and let it set
- File and buff to shape the apex and smooth the surface
- Seal with top coat and let it dry fully
Visual troubleshooting: reading your layers
Most beginner problems come down to one question, is this layer too thick or too thin? You cannot feel it through the brush, so learn to read it visually.
| What you see | What it means | What to do |
|---|---|---|
| Base coat looks milky and opaque | Too thick | Wipe the brush and reapply a thinner pass |
| Base coat looks wet and glossy, nail still visible | Correct | Dip immediately |
| Powder looks patchy or see-through after one dip | Too thin, or powder is coarse | Add another thin base-and-dip layer |
| Powder mounds at the cuticle or sidewalls | Base pooled near the skin | File back before the next layer |
| Surface feels bumpy after two dips | Uneven base or trapped air | Buff smooth before adding more powder |
| Nail looks bulky and rounded like a dome | Too many layers | Stop at three; file the apex down |
Why lifting happens (and how to stop it)
Lifting almost always starts at the cuticle or the sidewalls, and it almost always traces back to one of four causes:
- Base coat touching the skin. Any liquid on the cuticle creates a lip that catches and peels. Leave a hairline gap.
- Incomplete prep. Oils and cuticle remnants stop the base from bonding. Dehydrate, then buff, then dehydrate again.
- Flooding the sidewalls. The base pools in the curves beside the nail and never cures evenly.
- Skipping the activator cure time. Activator needs to set before you file. Rushing this step leaves soft powder underneath that lifts within days.
How long each step should actually take
Beginners often rush the wrong parts. Prep should take five to seven minutes per hand, longer than most expect. The dip sequence is fast, roughly one to two minutes per nail once you have the rhythm. Filing and buffing is slowest at ten to fifteen minutes total, and it is where the finish goes from homemade to salon-grade.
Dip Powder vs Gel Nails Comparison: Which Lasts Longer?
Dip powder typically outlasts gel, holding up to three weeks versus gel's one to two, because the powder-and-activator bond creates a harder surface. Gel stays glossier and cures under a UV or LED lamp, while dip needs no lamp.
| Factor | Dip Powder | Gel |
|---|---|---|
| Typical wear | Up to 3 weeks | 1-2 weeks |
| UV lamp | Not required | Required |
| Removal | Acetone soak-off | Acetone soak-off |
| Finish | Dense, matte to glossy | High-shine |
| Best for | Durability, busy schedules | Frequent colour changes |
Dip Powder Nail Removal Steps: Safe At-Home Method
Safe removal means soaking, not picking. Ripping dip powder off strips the top layers of the nail plate, leaving them thin and weak for months.
- File the top coat down until the powder surface is broken
- Soak cotton pads in acetone and press onto each nail
- Wrap each fingertip in foil and wait 10 to 15 minutes
- Gently push off softened powder with an orange stick
- Buff lightly and apply cuticle oil
Allergy and Sensitivity Awareness: What Beginners Should Know
Dip powder allergies are real and rising among at-home users. The culprit is usually methacrylate in the liquid system, not the powder itself, repeated skin contact with uncured liquid triggers sensitisation over time.
- Keep liquids off the skin, not just off the nail
- Never brush activator over surrounding skin
- Ventilate your workspace
- Patch-test a new liquid set before a full manicure
- Choose lower-sensitivity or HEMA-free formulas where available
Conclusion
Getting a salon-quality dip manicure at home comes down to choosing a kit that matches how you actually use your nails, then applying it with clean, thin layers. The kits above cover every skill level, from beginner-friendly options to professional systems.
Frequently Asked Questions
What is the best dip powder nail kit for beginners in 2026?
For beginners, the Modelones Dip Powder Nail Starter Kit is often cited as a strong overall option, offering a complete 19-piece set with four nude and pink shades, base coat, activator, and top coat. The AZUREBEAUTY kit is a strong alternative if you prioritize longevity, with a chip-resistant finish that lasts up to three weeks. Both are beginner-friendly and require no UV lamp.
How long do dip powder nails typically last?
Dip powder manicures generally last up to three weeks without chipping when applied correctly. This durability comes from the powder and activator forming a hard, protective layer over the nail. Proper nail bed preparation, including buffing and dehydrating, helps maximize wear time. If you notice lifting at the edges, avoid picking at it; instead, follow safe removal steps to prevent nail damage.
Are dip powder kits safe for natural nails?
Yes, dip powder kits are safe for natural nails when used as directed. The process does not require UV curing, which reduces exposure to UV light. However, improper removal, such as peeling or biting off the powder, can damage the nail plate. Always use an acetone soak-off method and give your nails breaks between applications. If you have sensitive skin, check ingredient lists for potential allergens like acrylates.
How do you remove dip powder nails at home safely?
To remove dip powder safely, start by buffing the top coat with a fine-grit file to break the seal. Soak cotton pads in acetone, place them on each nail, and wrap with foil. Let sit for 10-15 minutes, then gently push off the softened powder with a cuticle stick. Avoid forcing or scraping, which can thin the nail plate. Finish with a nourishing cuticle oil to restore moisture.
If you love salon-grade results at home and want the same convenience for your eyes and brows, Kyro Beauty builds all-in-one lash and brow kits with no glue required, shower-proof formulas, and gentle application for sensitive eyes. Our press-on lashes and lifting kits deliver fast, long-lasting enhancement backed by 2000+ five-star reviews. Get started with Kyro Beauty and enjoy salon-quality lashes and brows without the salon visit.
