



How Long Do Press-On Eyelashes Last? 2026 Guide

Table of Contents
- How Long Do Press-On Lashes Last?
- Factors That Affect Press-On Lash Longevity
- How to Make Press-On Lashes Last Longer
- How to Remove Press-On Lashes Without Damage
- Do Press-On Lashes Look Natural?
- Environmental Factors: Humidity, Sweat, and Travel
- Cost-Per-Wear and Lash Health
- Frequently Asked Questions
Last Updated: September 10, 2026
How Long Do Press-On Lashes Last?
Most people asking how long do press on eyelashes last find the answer is between five and ten days with proper care, though some wearers stretch a single application to two weeks. That range depends heavily on adhesive quality, application technique, and how well you protect the lash band from moisture and oil. If you have ever peeled off a strip after two days and wondered what went wrong, the answer usually sits in one of those three factors, not in the product itself. This guide from Kyro Beauty breaks down exactly what determines wear time and how to get the longer end of that range.
Press-on lashes are pre-glued or glue-applied lash strips and clusters designed for temporary wear, as opposed to semi-permanent extensions bonded lash-by-lash in a salon. The distinction matters because it sets your expectations: press-ons are a DIY lash extension alternative built for repeat, at-home application, not a three-week commitment.
Here is what most guides get wrong. They treat longevity as a fixed product spec when it is really an outcome of your routine. Two people using identical lashes can get wildly different results based on how they prep their natural lashes and whether they touch the lash band after application.
Below, we will show you exactly how to prep, apply, and maintain press-on lashes so they hold through showers, workouts, and full workdays.
Factors That Affect Press-On Lash Longevity
Adhesive Type and Curing Time
The adhesive you use is the single biggest variable in lash retention. Glue-free press-on lashes rely on pre-applied tacky strips or a bond-and-seal system, while traditional lash adhesive requires a short curing time before it sets fully. Rushing that curing window is a common mistake: if you blink heavily or expose the lashes to steam too soon, the bond never forms properly and the strip lifts at the corners within a day.
A bond-and-seal routine, where you apply an adhesive layer and then a sealing coat, typically delivers longer wear than adhesive alone because the seal protects the bond from moisture and oil. If your lashes use a separate adhesive, give it the full recommended curing time before you do anything else. For wearers with sensitive eyes, a hypoallergenic adhesive formulated for delicate skin reduces the risk of irritation without sacrificing hold.
Netherlands Food and Consumer Product Safety Authority (NVWA) cosmetics safety guidance
Eye Shape and Lash Mapping
Eye shape affects how long do press on eyelashes last, and most guides skip this entirely. Almond and monolid eyes tend to hold lash strips well because the natural lash line offers a fairly even surface for the band to sit against. Hooded eyes present a different challenge: the fold of the eyelid can brush against the lash band throughout the day, gradually loosening the inner corner. Round eyes often need a shorter band length to avoid the strip poking at the outer edge.
Lash mapping, the practice of matching lash length and curl to your eye shape, is not just about looks. A band that fits your lash line properly has less tension at the corners, and less tension means fewer premature lifts. If you have struggled with press-ons popping off at the inner corner, the fix is often a shorter, better-mapped strip rather than more adhesive.
How to Make Press-On Lashes Last Longer
Pre-cleansing is the step that separates a five-day wear from a two-day wear. Natural oils, moisturiser residue, and leftover makeup all prevent adhesive from bonding. Clean your lash line with a mild, oil-free cleanser and let it dry completely before application.
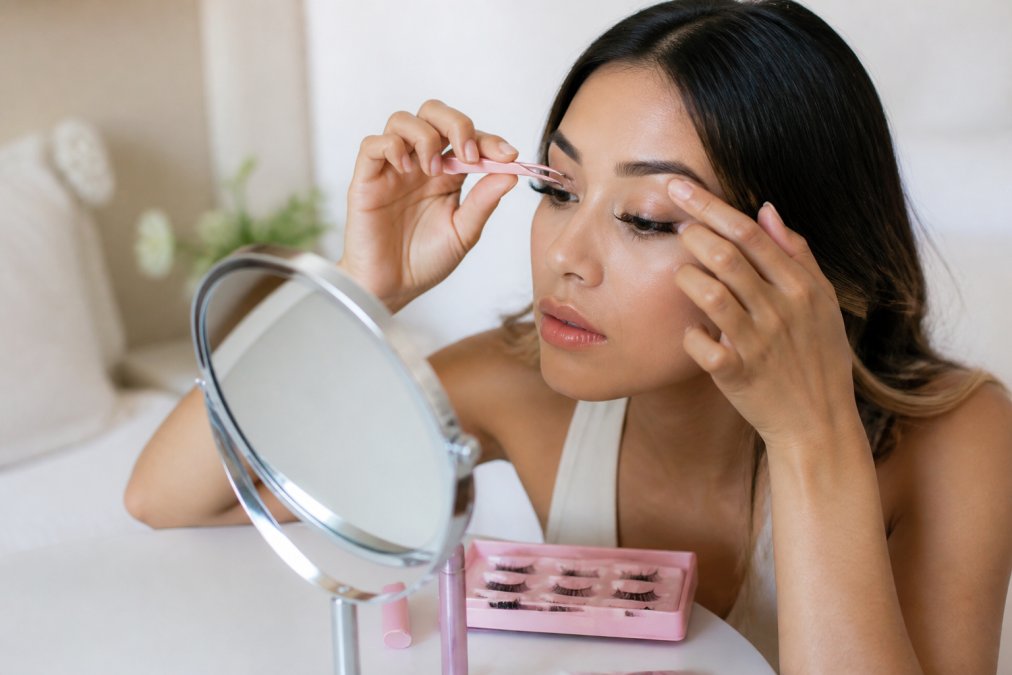
Pre-Cleansing and Application Technique
Follow this sequence for the strongest bond:
- Remove all eye makeup and cleanse the lash line with an oil-free product.
- Let lashes dry fully, at least a minute, since any moisture weakens adhesion.
- Curl your natural lashes lightly so they blend with the strip.
- Apply adhesive or use the pre-glued band, then wait the full curing time.
- Press the strip from the centre outward, holding each corner for a few seconds.
- Avoid touching or adjusting the band for the first several minutes.
The applicator tool matters more than people expect. Using a proper applicator keeps your fingers off the adhesive and places the strip accurately the first time, which reduces the fiddling that breaks the bond.
Daily Maintenance Routine
A short daily routine extends wear significantly:
- Keep water off the lashes for the first few hours after application.
- Avoid oil-based cleansers and makeup removers near the eyes, since oil dissolves adhesive.
- Sleep on your back or use a silk pillowcase to reduce friction on the lash band.
- Brush lashes gently with a spoolie each morning to keep them aligned.
- Skip waterproof mascara, which is hard to remove without disturbing the bond.
How to Remove Press-On Lashes Without Damage
Removing press-on lashes safely means dissolving the adhesive rather than pulling. Ripping a strip off dry is the fastest way to damage your natural lash cycle and cause lash shed. The mechanism is simple: cyanoacrylate and tacky-strip adhesives form a bond that is stronger than the anchor point of a natural lash in its growth phase. When you pull, the lash gives way before the adhesive does.
Safe Removal Steps
- Saturate a cotton pad with an oil-based remover or micellar water. Oil breaks the adhesive polymer bond; water alone does not.
- Hold it against the closed eye for 20 to 30 seconds to soften the adhesive. For bond-and-seal systems, allow up to 45 seconds.
- Gently slide the strip downward from the outer corner, never pulling straight out. The outer corner is where lifting starts, so it releases first.
- Wipe away any adhesive residue with a clean pad, working along the lash line rather than across it.
- Cleanse the lash line and let it rest overnight before reapplying.
If a strip resists, add more remover and wait. Forcing it is how people lose natural lashes. A common pattern is that wearers who rush removal see more lash shed in the following week than those who take the full 30 seconds per eye.
Avoiding Adhesive Residue and Natural Lash Damage
Leftover adhesive residue clogs the base of your natural lashes and can pull them out during the next application. After removal, check along the lash line for any tacky spots and remove them with a gentle cleanser. Giving your natural lashes a full day of rest between wears supports the natural lash cycle and reduces the cumulative stress that leads to thinning.
A less obvious risk is cumulative traction. Even correct removal puts mild stress on the follicle, and daily reapplication without rest days can thin the lash line over months. Most practitioners suggest at least one rest day per week if you wear press-ons continuously.
Signs it is time to remove your lashes: visible lifting at the corners, a tacky or gritty feel along the band, irritation or redness at the lash line, or any lash clusters that have shifted out of place. Do not try to re-glue a lifting strip over old adhesive; remove, clean, and start fresh. long-lasting beauty formulas.
When to Stop and Seek Advice
If you notice persistent redness, swelling, itching, or a stinging sensation that continues after removal, stop using the product and consult a pharmacist or GP. Cosmetic reactions are reportable in this market, and the Netherlands Pharmacovigilance Centre Lareb collects reports on adverse cosmetic reactions, including those affecting the eye area. Keeping the product packaging and batch number makes any report more useful.
Netherlands Pharmacovigilance Centre Lareb reporting on cosmetic reactions
Do Press-On Lashes Look Natural?
Yes, when the length, curl, and mapping suit your eye shape. The bulky, obviously fake look people associate with press-ons usually comes from choosing a strip that is too long, too thick, or too uniform in length. Modern press-on lashes use synthetic fibers that mimic natural lash taper, and lash clusters applied in a wispy pattern blend far better than a single heavy strip.
For everyday wear, choose a length close to your natural lashes and a curl that matches your lash line. If you are coming from salon extensions, expect press-ons to sit slightly closer to the lash line and feel lighter, which many wearers actually prefer. Volume comes from how you layer clusters, not from thickness alone.
Environmental Factors: Humidity, Sweat, and Travel
Humidity and sweat are the two environmental factors that shorten wear most, and they are the ones competitors rarely address. The mechanism matters: most lash adhesives cure by losing moisture or solvent, so high ambient humidity slows the cure and leaves the bond soft for longer. Sweat introduces salt and oil that gradually weaken the bond from the outside in. Together they can cut wear from ten days to three or four.
Humidity and the Curing Window
In a humid bathroom or during a warm, damp spell, adhesive can take noticeably longer to set. A practical rule is to add 50 percent to the recommended curing time when relative humidity is high, and to apply lashes in a dry room rather than straight after a shower. If you live in a coastal or low-lying area where damp air is common, a humidity-resistant formula is worth the extra cost.
Sweat and Exercise
Sweat is the bigger problem for active wearers. Salt residue sits on the lash band and slowly breaks the adhesive edge, which is why lifting often starts at the inner and outer corners after a workout. If you train most days, apply lashes on a rest day, avoid touching the band with sweaty hands, and blot the lash line with a clean tissue after exercise rather than rubbing it. A bond-and-seal routine holds up better here because the seal layer resists moisture ingress.
Travel and Climate Shifts
Travel adds its own pressures. Cabin air is dry, which is fine for adhesive, but a hotel shower, a change in humidity, and a packed schedule test the bond. A shower-proof formula and a small touch-up kit in your bag handle most of it. For frequent flyers, applying lashes the night before travel, after a full cure, gives the strongest result. If you are moving between a dry climate and a humid one, expect the first day in the new climate to be the weakest point.
Cost-Per-Wear and Lash Health
Cost-per-wear is the metric salon regulars rarely calculate, and it changes the whole comparison. A single professional extension appointment runs a significant amount and needs a fill-in every few weeks, so the cost recurs indefinitely. A press-on kit, by contrast, gives you multiple applications from one purchase. Divide the kit cost by the number of wears and the per-wear figure drops sharply, especially with bundle options that include more treatments.
The honest limitation: press-ons do not last as long per application as salon extensions, so you reapply more often. For budget-conscious wearers who want salon-quality results at home without a recurring appointment, the trade-off usually favours press-ons. The other factor is lash health. Because press-ons are removed and reapplied, your natural lashes get rest periods that continuous extensions do not allow, which supports the natural lash cycle over time.
| Factor | Press-On Lashes | Salon Extensions |
|---|---|---|
| Wear per application | 5-10 days | 2-3 weeks |
| Reapplication | At home, minutes | Salon appointment |
| Cost pattern | One-time kit, many wears | Recurring per visit |
| Natural lash rest | Between wears | Limited |
Before committing to a full kit, patch-test any adhesive on a small area of skin to check for sensitivity, particularly if you have reacted to lash glue before. Kyro Beauty offers press-on lashes with no glue required and a super-fast application process, designed to be gentle on sensitive eyes.
Frequently Asked Questions
Do press-on lashes damage eyelashes?
Press-on lashes do not damage natural lashes when applied and removed correctly. The key is to avoid pulling or tugging at the lash line. Use a gentle oil-based cleanser to dissolve adhesive, then slide the lash strip away without force. This protects your natural lash cycle and prevents premature lash shed. Always test adhesive on a small area first if you have sensitive eyes.
Are press-on eyelashes reusable?
Yes, most press-on eyelashes are reusable for multiple wears if you clean them properly. After removal, gently peel off adhesive residue with tweezers or fingers, then wipe the lash band with a lint-free cloth and a bit of alcohol-free makeup remover. Store them in their original tray to keep the shape. With good care, you can get several wears from one set, making them a cost-effective option.
Can I sleep with press-on lashes?
You can sleep with press-on lashes, but it may shorten their lifespan. Friction against pillows can loosen the adhesive or distort the lash band. If you sleep on your back or use a silk pillowcase, they are more likely to stay put. For maximum longevity, remove them before bed and reapply the next day. If you must keep them on, avoid face-down sleeping and gently brush them in the morning.
What factors affect the lifespan of press-on lashes?
Several factors affect how long press-on lashes last: adhesive type and curing time, application technique, daily maintenance, environmental humidity and sweat, and your natural lash cycle. Oil-based cleansers break down adhesive faster, so avoid them near the lash line. Proper pre-cleansing and a good bond and seal routine can extend wear. On average, expect 3 to 7 days with careful care.
Press-on lashes reward a little preparation: clean lashes, correct mapping, and patience during curing. Get those right and the five-to-ten-day range becomes the norm rather than the exception. Kyro Beauty builds all-in-one lash and brow kits with shower-proof, glue-free press-on lashes and gentle formulas for sensitive eyes, plus bundle options that lower your cost per wear. Shop the Kit and get salon-quality results at home, backed by 2000+ five-star reviews.
