



How Long Does At-Home Eyebrow Perm Last? 2026 Guide

Table of Contents
- What At-Home Eyebrow Perm Results Actually Look Like
- How Long Does an At-Home Eyebrow Perm Last?
- What Factors Affect How Long Your Eyebrow Perm Lasts
- Brow Lamination Aftercare Routine: The First 48 Hours and Beyond
- How Often Can You Do Brow Lamination Safely?
- Best Products for Brow Lamination Longevity
- DIY vs Salon: What Changes About Longevity
- Conclusion
- Frequently Asked Questions
Last Updated: September 14, 2026
What At-Home Eyebrow Perm Results Actually Look Like
An at-home eyebrow perm, also called brow lamination, relaxes brow hairs so they can be brushed into a fuller, upward shape. The groomed, semi-permanent look typically holds for several weeks, never as long as marketing photos suggest.
Here's what most guides skip: the "perm" isn't permanent, and it doesn't sit on the skin. The setting solution re-forms bonds inside each brow hair, a distinction that explains almost everything about longevity. This guide from Kyro Beauty covers the realistic timeline, the factors that shift it, and the aftercare that protects your investment.
According to Sugarlash Pro's 2026 trend report, brow lamination demand keeps climbing, with a visible shift toward softer, more natural results. That shift matters for longevity. Gentler processing preserves brow health, and healthier brow hairs hold their shape longer.
Below: exactly how long an at-home eyebrow perm lasts, why some people see fading in under two weeks, and how to stretch your results safely.
How Long Does an At-Home Eyebrow Perm Last?
Most at-home eyebrow perm results last 4 to 6 weeks, with some users reaching 8 weeks when aftercare is consistent. That range comes from the Australian Beauty School's 2025 guide, which notes that early fading usually traces back to skin type and individual hair growth cycles rather than the kit itself.
The Industry Benchmark: 6 to 8 Weeks
The standard professional expectation sits at 6 to 8 weeks, according to Dollface Boston's 2025 treatment guide. Some clinics report results stretching from 4 up to 12 weeks depending on biological factors and client aftercare, as seen in Kats Eyes and Nails' service documentation.
| Timeframe | What You'll See | Main Cause |
|---|---|---|
| Weeks 1-3 | Full, defined shape | Fresh chemical processing |
| Weeks 4-6 | Softening, slight droop | New hair growth at the root |
| Weeks 6-8 | Partial return to natural pattern | Hair growth cycle |
| Week 10+ | Noticeable fade for most | Full growth cycle turnover |
Why Some Users See Fading in 10 to 14 Days
A vocal minority reports the laminated effect becoming unnoticeable within 10 to 14 days, even with careful aftercare. user discussions on r/Eyebrows document this pattern repeatedly. The usual culprits: oily skin breaking down the setting solution faster, fine hair that resists re-forming, or a growth cycle that pushes new hairs through quickly.
What Factors Affect How Long Your Eyebrow Perm Lasts
Longevity isn't fixed. Four variables decide whether you get four weeks or eight: hair growth cycle, skin's oil production, aftercare discipline, and kit strength.
Your Natural Hair Growth Cycle
Each brow hair cycles through growth, transition, and rest phases. The setting solution holds hair in its styled position, but new hairs emerge unstyled and push older hairs out of alignment. Faster cycles mean faster visible fading, regardless of how well you followed instructions.
Skin Type and Oil Production
Oily skin is the quiet killer of brow lamination retention: sebum migrates onto the hairs and gradually relaxes the bonds the setting solution created. With combination or oily skin, expect the lower end of the range and plan maintenance accordingly; dry skin types often report results closer to 8 weeks.
Brow Lamination Aftercare Routine: The First 48 Hours and Beyond
The first 48 hours decide how much of your result survives. Keep brows completely dry for 24 to 48 hours after applying the perming solution, as professional aftercare guidance consistently emphasises. Water exposure during this window disrupts the disulphide bonds before they have fully re-set, which is why the shape collapses rather than fades gradually.
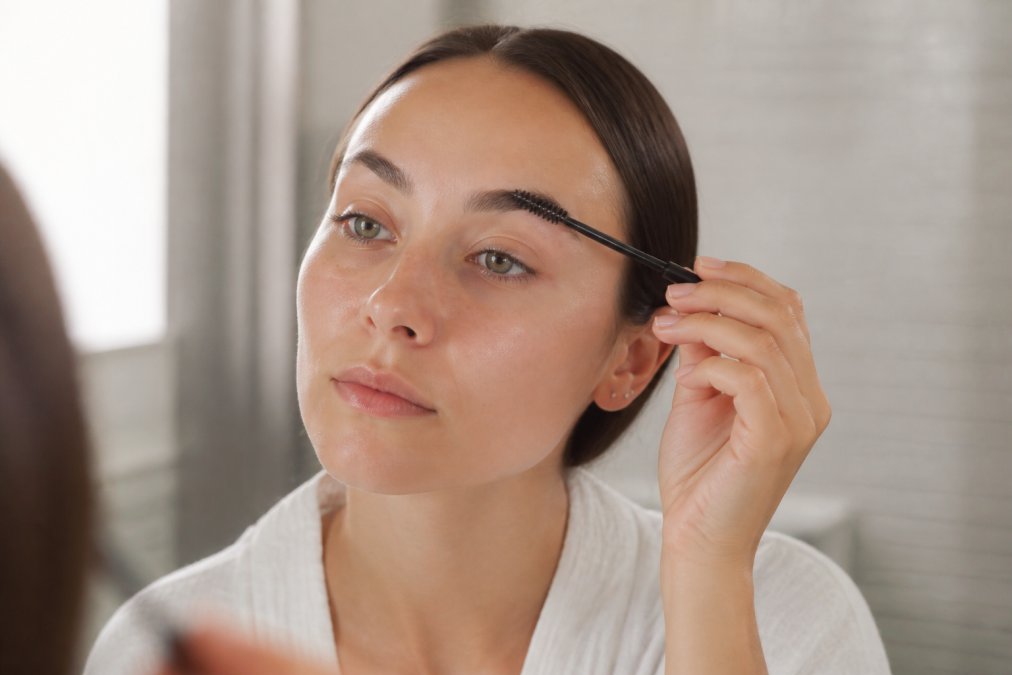
Why the 48-Hour Rule Exists (The Mechanism)
Thioglycolic acid, the active ingredient in most perming solutions, breaks the disulphide bonds that give each brow hair its natural curl pattern. The neutralising lotion then rebuilds those bonds in the new, brushed-up position. That rebuilding continues for roughly 24 to 48 hours, during which the bonds remain vulnerable to water, heat, and friction. It's the same chemistry as hair perming, which is why the aftercare window mirrors a salon perm's.
The First 48 Hours: A Step-by-Step Protocol
- Hours 0-24: No water, steam, or sweating. Skip the shower or use a cool, low-pressure rinse with your face angled away from the stream. No saunas, hot yoga, or swimming.
- Hours 24-48: Water contact is lower-risk but still best avoided. To wash your face, use a damp cotton pad around, not on, the brow area.
- Throughout: Do not touch, rub, or sleep face-down. Friction physically distorts the setting bonds before they have cured.
Beyond 48 Hours: The Ongoing Routine
- Avoid oil-based cleansers and heavy moisturisers on the brow area, oils are the single biggest aftercare mistake and break down the setting bonds faster than anything else
- Brush brows daily with a clean spoolie to train the shape and distribute natural sebum evenly
- Keep brows hydrated with a light, oil-free brow conditioner containing keratin or panthenol
- Sleep on your back where possible to avoid friction against the pillowcase
- Book your next session no sooner than 6 weeks out
Ingredient Safety: What to Check Before You Buy a DIY Kit
Most at-home guides skip this, but the ingredient list is where DIY kits diverge most sharply. Two categories matter:
Thioglycolic acid (TGA) is the traditional perming agent. Effective, but most associated with over-processing, irritation, and the sharp chemical smell users complain about. Concentrations vary widely, and a kit that doesn't state its concentration is a red flag.
Safer alternatives include cysteamine-based and ammonium thioglycolate formulations, gentler on the cuticle and less odorous. Some newer kits use a lower-pH, slower-acting formula that trades longer processing for a wider margin of error, a real advantage for first-timers.
Also check for:
- A separate neutralising lotion (not a combined all-in-one step, which is harder to time correctly)
- Clear processing times for fine versus coarse hair, a single time for all hair types is a warning sign
- Patch-test instructions, if the kit does not tell you to patch-test 24 hours ahead, treat that as a gap you need to fill yourself
How Often Can You Do Brow Lamination Safely?
Wait a minimum of 6 weeks between chemical brow lamination treatments, per Signature Brows Downey's 2025 safety guidance. That interval lets the hair cuticle recover from processing. Stacking treatments closer together is how people end up with brittle, snapping brow hairs.
If results fade before week 6, don't re-laminate. Reach for tinting, which adds colour without chemical restructuring, or a brow gel to bridge the gap. Hair health compounds: brows treated on a sensible schedule hold their shape better each cycle.
Best Products for Brow Lamination Longevity
Products used between treatments matter as much as the kit. Look for oil-free cleansers, a brow conditioner with keratin or panthenol, and a setting serum that supports the cuticle rather than coating it. Avoid mineral oil, coconut oil, or heavy silicones in the brow area, they relax the setting bonds prematurely.
What to Look For in an At-Home Kit
For at-home kits, check the ingredient list before buying. A well-formulated kit includes a neutralising lotion and separate setting solution, plus clear processing times for fine versus coarse hair. RevitaLash's 2025 guidance notes timing errors are the leading cause of DIY damage, which is why all-in-one kits with measured sachets and timing cards are safer for first-timers.
Troubleshooting: When the Result Goes Wrong
This is the section most guides leave out, and the one at-home users need most. Here's what to do when the result isn't what you expected.
If your brows look too sharp, dark, or angular immediately after processing: The most common panic. Initial intensity is normal, the setting solution has just re-formed the bonds and any tint is at full strength. Don't fix it in the first 48 hours. After that window, soften the look by:
- Brushing the brows with a clean spoolie in the direction against the set pattern to relax the angle slightly
- Using a small amount of oil-free brow gel to weigh the hairs down into a softer shape
- Applying a light layer of translucent brow powder in a shade lighter than your natural brow to diffuse the darkness
- Avoiding further tinting for at least 4 weeks
The sharpness fades on its own within 5 to 7 days as bonds relax and the tint oxidises to a more natural tone.
If your brows are over-processed (frizzy, brittle, snapping, or visibly damaged): Stop all chemical treatments immediately. Don't re-laminate, tint, or use any product containing thioglycolic acid on the area. Instead:
- Apply a nourishing brow oil or castor oil nightly to support the hair cuticle
- Avoid heat styling, harsh cleansers, and friction on the brow area
- Let the damaged hairs grow out completely, this typically takes 6 to 8 weeks, sometimes longer
- Book a consultation with a brow professional before your next attempt Targeted protein treatments can also help to repair damaged brow hairs by reinforcing the structural integrity of the follicle while you wait for the natural growth cycle to restore your brow shape.
If the result faded within 10 to 14 days: This usually traces back to oily skin, fine hair, or a fast growth cycle rather than the kit. Don't re-process. Bridge the gap with brow gel or tinted brow mascara, and consider whether a salon treatment with a stronger formulation suits your hair type better.
Corrective Steps for a Failed DIY Attempt
If you've over-processed at home, the priority is damage control, not correction. No product reverses over-processing, the cuticle has been chemically altered and must grow out. The practical steps:
- Stop all chemical processing for a minimum of 6 weeks, ideally 8.
- Support the hair with nightly oil application and a gentle, sulphate-free cleanser.
- Protect the area from sun, heat, and friction.
- Document what went wrong, processing time, product used, hair type, so you can adjust next time.
- Consider a professional assessment before your next at-home attempt, especially if your brows are thin or previously tinted.
DIY vs Salon: What Changes About Longevity
A salon treatment and a well-executed at-home kit produce comparable longevity when processing time is right. The real difference is error tolerance: a professional assesses your hair texture and adjusts timing on the spot; at home, you follow a fixed instruction card.
DIY wins on cost per treatment and convenience; it loses on corrective ability. Over-process at home and you can't undo it. That's why patch testing 24 hours ahead isn't optional, and why a gentler formulation makes sense if your brows are thin or previously tinted.
For most people doing this at home, the practical answer is a kit built for beginners: measured solutions, conservative processing times, and clear troubleshooting guidance. Kyro Beauty's brow and lash kits are designed around exactly that principle, with all-in-one shaping and tinting components and a formula that's gentle on sensitive eyes, so a first attempt is far less likely to end in over-processed brows.
Conclusion
The honest answer: an at-home eyebrow perm lasts 4 to 6 weeks for most people, stretching toward 8 with disciplined aftercare and the right skin type. Chasing the advertised 8-week maximum on oily skin is a losing game; working with your own growth cycle is not.
Kyro Beauty builds at-home brow and lash kits for people who want salon-quality results without the salon schedule. Every kit includes measured solutions for consistent processing, a gentle formula suitable for sensitive skin, and shower-proof results that hold through travel, workouts, and full workdays. With over 2,000 five-star reviews, the results speak for themselves.
Shop the Kit and get brows that hold their shape for weeks, not days.
Frequently Asked Questions
How long does an at-home eyebrow perm last compared to a salon treatment?
At-home eyebrow perm results typically last the same 6 to 8 weeks as salon treatments, according to industry benchmarks. The main difference is application precision, not longevity. A salon professional assesses your hair growth cycle and adjusts processing times, which reduces the risk of over-processing. With a good DIY kit and careful timing, you can achieve comparable retention. Some users report fading as early as 10 to 14 days, but this usually points to aftercare gaps or individual hair growth cycles rather than the kit itself.
What can shorten the life of my brow lamination?
Water exposure in the first 24 to 48 hours is the biggest culprit. Getting brows wet before the setting solution fully cures weakens the lift. After that window, oil-based cleansers, harsh exfoliants, and frequent steam sessions break down the chemical bonds faster. Your natural hair growth cycle also plays a role: brow hairs shed and regrow on a 4 to 12 week cycle, so new hairs come in straight while laminated ones remain styled. Following a consistent brow lamination aftercare routine minimizes these effects.
How often can you do brow lamination without damaging your brows?
Professionals recommend waiting at least 6 weeks between chemical brow lamination treatments. This gives your brow hairs time to recover from the processing solution and reduces the risk of over-processing, which can cause breakage or a chemical burn. If your results have faded but your brows still look healthy, you can use a tint or brow gel to bridge the gap. Never re-laminate within 4 weeks, even if the lift seems weak, because the hair cuticle needs time to rebuild.
What if I hate my at-home eyebrow perm result?
First, don't panic. The effect is temporary and will soften within 1 to 2 weeks as the hair relaxes. Avoid trying to reverse it with more chemicals, which risks damage. Instead, brush brows flat with a spoolie and apply a heavy moisturizer or brow oil to relax the curl faster. If the result looks too dark or sharp, it may be tint residue rather than the perm itself; gentle cleansing with a mild oil-based cleanser can lift excess pigment. If you experience redness, itching, or a chemical burn, stop all products and consult a dermatologist.
