



How to Choose the Right Nail Kit for Beginners

Table of Contents
- Start With Your Skill Level, Not the Kit
- Gel vs Acrylic Nail Kits: Which System Suits a Beginner?
- Essential Tools for DIY Manicures: The Three-Part System
- How to Prep Nails for Long-Lasting Results
- Matching the Curing Lamp to Your Nail Kit
- Safety First: Allergies, Sensitivities, and Skin-Friendly Formulas
- Budgeting for Your First Nail Kit
- Conclusion
- Frequently Asked Questions
Last Updated: October 1, 2026
Start With Your Skill Level, Not the Kit
The global artificial nails market hit $1.59 billion in 2025 and is set to reach $1.68 billion in 2026, according to Fortune Business Insights artificial nails market report. That growth is driven by people just like you: beginners searching for a nail kit for beginners who want salon results at home.
Here's the hard part. Most beginners overestimate their skill level, and that mismatch leads to frustration, wasted money, and bad manicures. So before you browse a single product page, be honest about where you stand.
Ask yourself three questions:
- Have you ever shaped your own nails with a file?
- Can you paint a clean line without flooding the cuticle?
- Do you know the difference between a base coat and a top coat?
If you answered "no" to two or more, start simple. A basic starter set with press-ons or gel polish strips lets you build confidence fast.
If you've done your own nails before, a full gel kit with a curing lamp is a realistic next step.
The key insight: match the kit to your hands-on experience, not to the results you want. Skill grows with repetition. The right nail kit for beginners meets you where you are today.
Gel vs Acrylic Nail Kits: Which System Suits a Beginner?
Gel kits win for beginners. They cure fast under a UV/LED light, they're easier to control, and mistakes are less punishing.
Acrylic systems use a liquid monomer and a polymer powder that you shape into a bead. That takes practice. Brush sizes 6 to 16 are standard, and sizes 8 or 10 suit most beginners, according to Gina's Nails Supplies beginner acrylic guide.
| System | Skill Needed | Cure Method | Removal | Best For |
|---|---|---|---|---|
| Gel polish | Low | UV/LED lamp | Soak-off in acetone | Beginners wanting polish that lasts |
| Acrylic | Medium to high | Air dry | File and soak | Strong extensions |
| Press-on | Very low | None | Gentle peel or soak | Fast, glue-free wear |
Essential Tools for DIY Manicures: The Three-Part System
Think of your kit as three systems working together: prep, application, and finishing. Industry experts recommend this exact split, per AU Nails beginner supplies guide, and it's the fastest way to spot a kit that's missing something.
Check for these before you buy:
- Cuticle pusher and buffer included
- A dehydrator or primer for the nail plate
- Base coat and top coat, not just color
- A file with the right grit for natural nails
How to Prep Nails for Long-Lasting Results
Prep is where manicures succeed or fail. Clean, dry, shaped nails hold polish for weeks. Rushed prep means chips by day three.
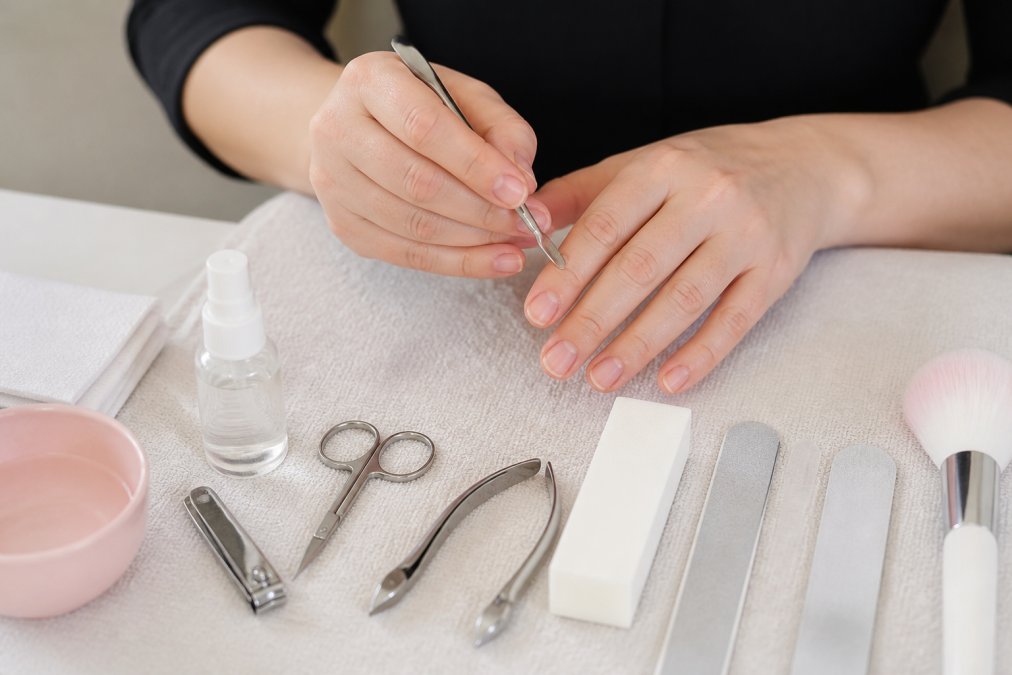
Follow these steps in order:
- Remove old polish and wash your hands.
- Push back the cuticles gently with a cuticle pusher.
- Buff the nail plate to remove shine.
- Wipe each nail with a dehydrator to strip oils.
- Shape the free edge with a grit file.
- Apply a thin base coat and cure it.
Matching the Curing Lamp to Your Nail Kit
Your lamp must match your gel. That sounds obvious, but it is the single most common reason a first kit fails, and most guides stop at "check the wattage." Here is the mechanism behind the match.
Check three things before you buy:
- Wavelength range: Does the lamp state 365 nm and/or 405 nm, and does the gel name the same range?
- Cure time: Does the gel specify a time, and does the lamp's wattage support it?
- Compatibility statement: Does the kit explicitly name the lamp it pairs with, or is it a generic bundle?
- Apply one thin coat of base gel to a single nail.
- Cure for the stated time.
- Press the surface with a clean orange stick. It should feel hard and dry, not tacky or movable.
- If it stays tacky, add 30 seconds and re-test. If it still stays tacky, the lamp and gel are mismatched.
Safety First: Allergies, Sensitivities, and Skin-Friendly Formulas
The three habits that prevent it:
-
Never let wet product touch the skin around the nail. Flooded cuticles are the number one exposure route.
-
Cure fully, every time. Uncured product is the allergen, not the cured film.
-
Work in thin layers. Thick beads cure unevenly and leave wet product underneath.
-
HEMA (2-hydroxyethyl methacrylate): a common gel monomer strongly associated with allergic contact dermatitis. Many newer "HEMA-free" gels replace it with larger-molecule monomers that are less likely to penetrate skin.
-
HPMA, EMA, and other acrylates: also potential sensitizers. HEMA-free does not automatically mean acrylate-free.
-
Cyanoacrylate: the adhesive in most press-on and glue-on systems. Reactions are less common but do occur, particularly with repeated use.
A patch-test protocol that actually works:
- Apply a small amount of the product to a discreet area, the inner wrist or behind the ear, and cure it if it is a gel.
- Leave it for 48 hours without washing the area aggressively.
- Check for redness, itching, or swelling at 24 and 48 hours.
- If there is any reaction, do not use the product on your nails. A wrist reaction predicts a nail-fold reaction.
A note on "clean" and sustainable formulas. Consumer demand for skin-safe and lower-impact formulas is rising, and it is pushing brands toward HEMA-free and refillable options. Treat these as risk-reduction tools, not guarantees. A HEMA-free gel can still sensitize you if you flood the cuticle or under-cure it. Technique matters more than the label.
Budgeting for Your First Nail Kit
Spend on prep and curing, save on color. That's the rule.
Where beginners overspend:
- Buying ten colors before mastering one
- Upgrading brushes before learning bead control
- Replacing a working lamp for a fancier one
Where beginners underspend:
- A quality dehydrator
- A proper cuticle pusher
- A lamp that actually cures
Conclusion
Choosing a nail kit gets easier once you stop shopping by color and start shopping by skill, safety, and system. Match the kit to your experience, pick gel or press-on for your first set, and never cut corners on prep or curing.
Frequently Asked Questions
What should be included in a beginner nail kit?
A complete beginner nail kit should cover three areas: prep tools (nail file, buffer, cuticle pusher, dehydrator or primer), application tools (base coat, gel polish or acrylic system, and a compatible curing lamp if using gel), and finishing tools (top coat, cleanser, and lint-free wipes). Starter kits that bundle these items are increasingly common. Check that the kit matches your chosen system, since gel and acrylic require different products and techniques.
Is it cheaper to do your own nails at home?
At-home manicures can reduce long-term costs compared to regular salon visits, especially once you have your core tools. A starter kit usually costs more upfront because it includes the lamp, brushes, and multiple products. After that, you mainly replace consumables like polish, primer, and files. The real savings depend on how often you would otherwise visit a salon and how many applications you get from each kit. Check current pricing on Kyro Beauty's website for bundle options.
What is the difference between gel and acrylic nail kits for beginners?
Gel kits use a liquid polish that hardens under a UV or LED curing lamp. They are easier to control for beginners and give a glossy finish. Acrylic kits mix a liquid monomer with a polymer powder to form a sculptable bead that air-dries. Acrylic allows more shaping and extension but has a steeper learning curve and requires brush control. Many beginners start with gel because it is more forgiving and needs fewer tools, then move to acrylic once they are comfortable.
Are at-home nail kits safe for natural nails?
Yes, when used correctly. The main risks come from improper prep, over-filing, or uncured gel touching the skin, which can cause contact dermatitis. A 2025 NCBI review noted that understanding nail and skin reactions from manicures helps improve safe usage. Choose kits with HEMA-free formulas if you have sensitive skin, always cure gel fully, and avoid pushing back cuticles too aggressively. If you notice redness or itching, stop using the product and let your nails recover.
How long does a DIY manicure last compared to a salon visit?
A well-applied DIY gel manicure typically lasts one to two weeks, similar to a salon gel manicure, if you prep properly and seal the free edge. Acrylic extensions can last two to three weeks with proper aftercare. The biggest factors are nail prep, correct curing, and avoiding harsh chemicals without gloves. Press-on and stick-on options generally last a few days to a week, depending on the adhesive and your daily activities.
What tools are essential for a beginner nail technician?
Start with a 180/240 grit file, a buffer block, a cuticle pusher, and a dehydrator or primer for prep. For application you need a base coat, your chosen color system, and a top coat. If you use gel, a UV/LED curing lamp is non-negotiable, and manicurist Syreeta Aaron advises checking the lamp's compatibility with your kit. Add lint-free wipes, acetone for removal, and a small brush for cleanup. These cover the core steps without overspending.
