



Long-lasting press-on lashes for travel: A guide

Table of Contents
- Do press-on lashes look natural for everyday wear
- How long do press-on lashes last when traveling
- How to apply press-on lashes for beginners: travel-ready technique
- Keeping press-on lashes secure through travel conditions
- Removing and storing press-on lashes while traveling
- Troubleshooting common application failures on the road
- Packing and travel logistics for press-on lash kits
- Frequently Asked Questions
Last Updated: August 31, 2026
Do press-on lashes look natural for everyday wear
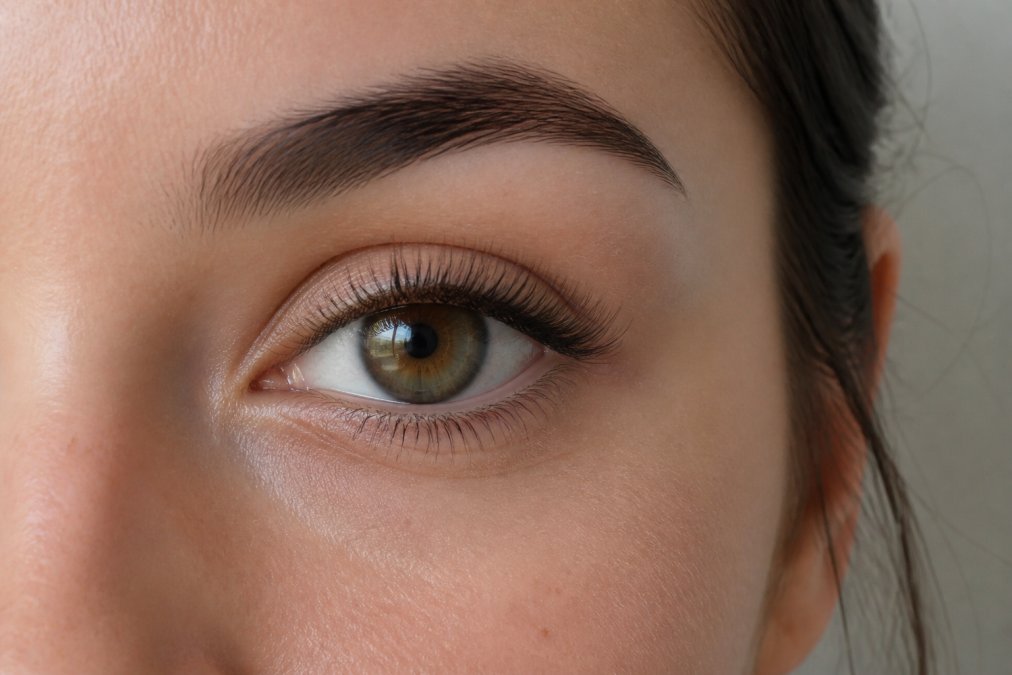
Press-on lashes can absolutely look natural for everyday wear when applied correctly. The difference between a natural appearance and an obviously fake look comes down to application technique, cluster density, and choosing the right style for your eye shape. Modern formulations, like those from Kyro Beauty, are designed with a self-adhesive band that sits flush against your natural lash line when positioned properly.
The key to achieving a seamless blend is understanding under-the-lash application. This technique places the cluster band beneath your natural lashes rather than on top of them, creating an integrated look that enhances rather than replaces your lashes. When done this way, the synthetic fibers fuse visually with your own lashes, and observers see volume and length rather than an obvious enhancement.
For everyday wear, selecting the right lash length and volume matters significantly. Longer clusters (12-14mm) with moderate volume work better for natural aesthetics than ultra-dramatic styles. The lash band itself should be virtually invisible once positioned, which means choosing clusters with a thin, flexible band rather than thick plastic ones.
How long do press-on lashes last when traveling
Long lasting press on lashes for travel typically hold for 5-7 days with proper care, though individual results vary based on your lash type, activity level, and environmental exposure (the American Academy of Dermatology). The self-adhesive band on pre-glued clusters loses its grip gradually as oils, moisture, and friction accumulate.
The durability you experience depends heavily on the initial application. Clusters positioned correctly under the lash line, with proper bond and seal technique, will outlast those applied hastily or placed too high. Many travelers find that their lashes remain secure for the first 3-4 days, then begin to loosen slightly by day 5-6.
Reusable clusters offer better longevity than single-use options if you're willing to invest in proper removal and storage. When you remove them carefully with an oil-free cleanser and store them in a clean, dry container, quality clusters can last through 3-5 applications.
Environmental factors significantly impact how long your lashes stay put. Chlorinated water from pools weakens the adhesive bond faster than fresh water (peer-reviewed research). Saltwater from ocean swimming is even more aggressive. High humidity environments can soften the band, though waterproof formulas resist this better than standard options. Activity level matters too, travelers who spend their days hiking, swimming, or in high-sweat situations will see shorter wear time than those on business trips with minimal physical exertion.
How to apply press-on lashes for beginners: travel-ready technique
Preparation and sizing
Before you apply any cluster, ensure proper sizing for your eye. Measure your eye width from the inner corner to the outer corner, this measurement determines which cluster size will work best. Most people fall into the standard size range, but some eyes are narrower or wider.
Prepare your natural lashes by cleaning them thoroughly with an oil-free cleanser or micellar water to remove any makeup residue, oils, or dust. Dry your lashes completely with a clean, lint-free cloth. This preparation step takes two minutes but dramatically improves how long your lashes stay put.
Assess your eye shape next. Almond-shaped eyes work with most cluster styles. Hooded eyes benefit from clusters placed slightly higher on the lash line to peek out from under the hood. Round eyes look better with clusters that have more length at the outer corners. Small eyes should avoid overly dense clusters.
Have your application tools ready: tweezers with a firm grip, a magnifying mirror or well-lit bathroom, and the clusters themselves. Keep a backup cluster of the same style nearby in case your first attempt doesn't position correctly.
Step-by-step application for stability
Step 1: Position your first cluster at the inner corner. Hold your tweezers at a slight angle and gently lift your upper lash line. Place the cluster band directly under your natural lashes, starting at the inner corner. Press gently and hold for 5-10 seconds to allow the adhesive to set.
Step 2: Apply mid-lash clusters. Move toward the center of your eye and apply 2-3 clusters across the lash line, spacing them evenly. Each cluster should sit flush against your natural lashes with no gaps or overlaps.
Step 3: Finish with outer corner clusters. Apply one or two clusters at the outer corner, ensuring they blend seamlessly with the mid-lash clusters and angle slightly upward to create a lifted, open-eyed effect.
Step 4: Check your work. Open your eyes and look straight ahead in the mirror. You should see a natural lash line with no visible band, no gaps, and no clusters sticking out at odd angles. Once you're happy with the placement, wait 15-20 minutes before touching your eyes or applying makeup.
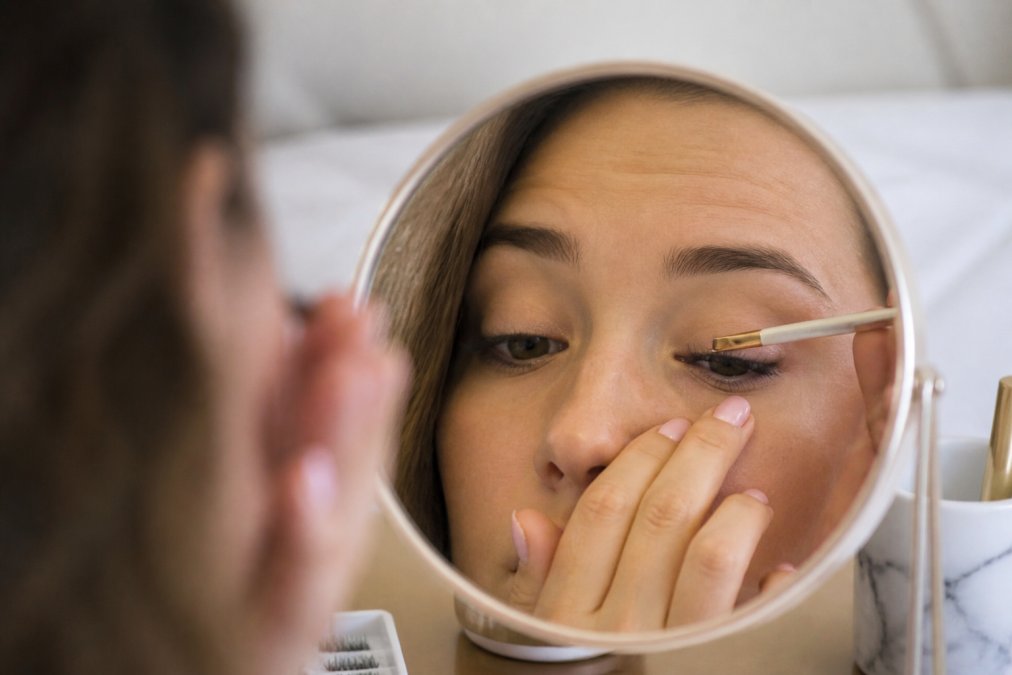
For travel, practice this technique at home first. Apply your clusters the night before you travel so you can assess the fit and comfort before you're on a plane or in a hotel.
Keeping press-on lashes secure through travel conditions
Travel introduces moisture, temperature changes, and physical activity that challenge lash adhesion. The self-adhesive band on pre-glued clusters is waterproof, but "waterproof" doesn't mean "immune to all water exposure." Repeated wetting and drying, especially in chlorinated or saltwater environments, weakens the bond over time.
During flights, the cabin's low humidity can actually help your lashes stay put. However, keeping your eyes moisturized with a gentle lubricating drop helps prevent the discomfort that comes from rubbing your eyes, which loosens clusters.
For swimmers or beach travelers, waterproof formulations are essential. If you plan to swim, look specifically for waterproof clusters or avoid water activities on days when you're wearing them.
Sleep position matters during travel. Sleeping face-down on a pillow puts pressure on your lashes and can loosen clusters. Try sleeping on your back or using a silk pillowcase, which creates less friction than cotton. This small adjustment can extend your wear time by a full day or more.
Heat exposure from hot showers, saunas, or direct sun can soften the adhesive band temporarily (peer-reviewed research). Avoid very hot water on your face for the first 24 hours after application. Once the adhesive fully cures, it becomes more heat-resistant.
Physical activity and sweating don't significantly impact lash adhesion if your clusters are applied correctly. The key is ensuring the band sits perfectly under your natural lashes from the start.
Removing and storing press-on lashes while traveling
Proper removal is critical for both lash longevity and eye health. Never pull or yank at your lashes. Instead, use an oil-free cleanser or specialized lash remover to gently dissolve the adhesive bond.
Apply the cleanser to a cotton pad and hold it against your lash line for 10-15 seconds. This softens the adhesive enough that you can gently peel the cluster away from your natural lashes. Work slowly from the inner corner toward the outer corner, supporting your skin as you go. Once all clusters are removed, use another cotton pad with cleanser to wipe away any remaining adhesive residue.
After removal, clean your natural lashes with a gentle, oil-free cleanser and pat them dry. Avoid touching or rubbing your eyes for the rest of the day, giving your natural lashes a chance to recover.
For storage, keep removed clusters in a clean, dry container. If you're using reusable clusters, gently remove any remaining adhesive residue with tweezers or a specialized adhesive remover. Store them in their original packaging or a small cosmetic case away from heat, direct sunlight, and moisture. Properly stored clusters remain usable for 3-5 applications.
During travel, pack a small removal kit: oil-free makeup remover, cotton pads, tweezers, and a small storage container. Keep this kit in your carry-on bag so you have access immediately upon arrival.
:::tip If you're traveling for more than a week and wearing clusters daily, plan for at least one "lash rest day" where you don't wear them. This gives your natural lashes a break and reduces the cumulative stress on your lash line.
Troubleshooting common application failures on the road
The most common application failure is improper sizing or positioning. If your clusters feel uncomfortable or keep loosening, you likely applied them too high on the lash line or chose the wrong size. Remove them completely, clean your lashes, and reapply using the under-the-lash technique, positioning the band lower than you instinctively think is correct.
If one cluster keeps shifting while others stay put, the problem is usually uneven pressure during application. Press and hold for the full 10 seconds, not just a quick tap. Remove that cluster, clean both the cluster band and your lash line, and reapply with consistent pressure.
Clusters that feel itchy or cause irritation often indicate either incorrect placement or an adhesive sensitivity. If it's a placement issue, remove and reposition. If you suspect sensitivity, switch to a different cluster brand or skip lash wear for a few days.
If your natural lashes feel weak or damaged after removing clusters, you've likely been pulling them out rather than dissolving the adhesive properly. Use more cleanser, wait longer for the adhesive to soften, and peel gently.
Clusters that don't stay put at all, even with correct application and sizing, may be old or defective. Check the expiration date on your kit.
Packing and travel logistics for press-on lash kits
Travel-ready lash kits should include clusters, removal supplies, and backup options. Pack at least two pairs of clusters in your carry-on bag, one pair you're wearing and one backup pair in case you need to change them mid-trip. In your checked luggage, pack additional pairs and a full removal kit.
Clusters are delicate and can be damaged by pressure or heat. Store them in their original packaging or a small cosmetic case with padding. Don't throw them loose into your luggage where they can get crushed.
Include an oil-free makeup remover or specialized lash remover in your travel kit. A small bottle (30-50ml) takes up minimal space and lasts through multiple removal sessions.
Pack tweezers, cotton pads, and a small mirror. If your hotel bathroom has limited lighting, a small LED mirror or headlamp helps you see what you're doing during application or removal.
For longer trips (more than a week), pack enough clusters for the entire duration plus extras. Keep your clusters in carry-on luggage rather than checked bags to minimize the risk of loss or damage.
Store everything in a waterproof pouch or small cosmetic case. This protects your clusters and removal supplies from accidental spills and keeps everything organized.
Long lasting press on lashes for travel require proper technique, realistic expectations about durability, and smart packing. Kyro Beauty's pre-glued lash clusters are designed specifically for convenience and durability, with self-adhesive formulations that eliminate the need for additional glue and waterproof options that handle travel's moisture challenges. By mastering under-the-lash application, choosing the right cluster style for your eye shape, and packing a complete removal kit, you can maintain salon-quality lashes throughout your trip. Start with a practice application at home, then travel with confidence knowing your lashes will look polished and natural from arrival to departure. Shop the Kit to get started with a complete travel-ready lash solution.
Frequently Asked Questions
How long do press-on lashes last during a week of travel?
High-quality pre-glued lash clusters typically last 5-7 days with proper application and care, even through flights, showers, and daily activities. The waterproof hold depends on the adhesive formula and how well you apply them. Reusable clusters can last multiple wears if removed and stored correctly. For extended trips, pack a backup kit or extra clusters in case you need to reapply mid-journey.
Do press-on lashes look natural enough for professional settings?
Yes, when applied correctly, modern press-on lashes create a seamless blend with your natural lashes and look professional in close-up interactions. The key is choosing the right lash length and volume for your eye shape, sizing them properly to your lash line, and using the under-the-lash application technique. Beginner-friendly kits often include guidance on lash mapping to ensure a natural appearance that works for business meetings and everyday wear.
Are press-on lashes safe for sensitive eyes during travel?
Pre-glued, self-adhesive lash clusters are gentler than traditional lash glue because they require no additional bonding agent. However, if you have sensitive eyes, check that the product is free of harsh chemicals and formulated for sensitive skin. Travel-friendly kits from reputable brands often include oil-free cleansers and are designed to minimize irritation. Always patch-test before a long trip, and keep a gentle cleanser handy to remove them if irritation occurs.
What's the best way to pack press-on lashes for a flight?
Store clusters in their original case or a small, sealed container to protect them from moisture and dust. Pack them in your carry-on bag rather than checked luggage to avoid pressure damage. Keep them in a cool, dry area away from humidity, which can weaken the adhesive bond. Include a small bottle of oil-free cleanser and removal tool if needed. Travel-friendly lash kits are designed to fit easily in a toiletry bag, making them ideal for frequent travelers.
This article was written using GrandRanker
