



DIY Brow Lamination Kit vs Salon: Cost & Results

Table of Contents
- DIY Brow Lamination Kit vs Salon: Quick Comparison
- What Is Brow Lamination?
- Cost Breakdown: DIY vs Salon
- How Long Does Brow Lamination Last?
- Best Brow Lamination Kit for Beginners
- Brow Lamination Aftercare Tips
- Safety Risks and Skin Sensitivity
- DIY vs Professional Results: What to Expect
- Frequently Asked Questions
Last Updated: September 1, 2026
DIY Brow Lamination Kit vs Salon: Quick Comparison
Choosing between a DIY brow lamination kit and professional salon treatment depends on cost, convenience, and your comfort with chemical processing. A professional treatment typically costs €30-€40 per session, while a quality DIY kit ranges from €30-€50 for multiple applications. This comparison covers everything you need to decide which route suits your brows, budget, and lifestyle.
What Is Brow Lamination?
Brow lamination is a semi-permanent chemical treatment that lifts and sets brow hairs in a brushed-up position, creating a fuller, more defined appearance (peer-reviewed research). The process uses a perming solution to soften the hair structure, followed by a fixing lotion that locks the new shape in place. A nourishing serum then conditions the hairs after processing.
The result is a "fluffy brow" effect lasting 4 to 8 weeks (peer-reviewed research). The chemical process temporarily alters the hair cuticle by breaking down disulfide bonds in the hair protein, then reforms those bonds in the new lifted position. Results are temporary and reversible, no permanent alteration occurs.
Cost Breakdown: DIY vs Salon
DIY Kit Costs
A single DIY brow lamination kit typically costs €30-€50 and provides 3 to 5 treatments. Cost per treatment works out to roughly €10-€16. Over a year with treatments every 6 weeks, you'd spend approximately €85-€130 on DIY.
Hidden costs include time spent learning the technique, risk of over-processing requiring professional correction, and potential product waste.
Salon Service Costs
Professional brow lamination typically ranges from €30-€40 per treatment. At Pierôt Coiffures, "Lamination Brow Naturel" costs €30, while "Lamination Brow Color" costs €40. Over a year, you'd spend approximately €260-€346.
Salon costs include professional expertise, guaranteed results, no risk of chemical burns, and often additional services like shaping or tinting.
Cost Comparison Table
| Factor | DIY Kit | Professional Salon |
|---|---|---|
| Cost per treatment | €10-€16 | €30-€40 |
| Annual cost (6-week cycle) | €85-€130 | €260-€346 |
| Learning curve | Steep | None |
| Risk of error | High | None |
| Corrective treatment cost | Additional €30-€50 | Often included |
| Time investment per treatment | 20-30 minutes | 20-30 minutes |
DIY offers significant savings if you're willing to accept the learning curve and potential mistakes.
How Long Does Brow Lamination Last?
Most brow lamination results last between 4 and 8 weeks, depending on your natural hair growth cycle and aftercare. KYRO Beauty's DIY Brow Lamination Kit delivers results lasting up to 8 weeks when you use the nourishing serum consistently and avoid excessive moisture in the first 24 hours.
Several factors influence longevity:
Hair growth cycle. Your brows naturally shed and regrow on a 4 to 8-week cycle. As new, unprocessed hairs emerge, the overall lamination effect gradually softens.
Aftercare quality. Brows exposed to excessive water, steam, or harsh brushing lose their lamination effect faster. Consistent use of aftercare serums extends longevity.
Hair texture. Fine, straight brows hold the lamination effect longer. Thick, coarse, or curly brows may lose lift after 4 to 5 weeks.
Chemical processing history. Previously colored, bleached, or laminated brows may not hold results as long.
Scheduling a new treatment every 6 weeks keeps your brows consistently laminated.
Best Brow Lamination Kit for Beginners
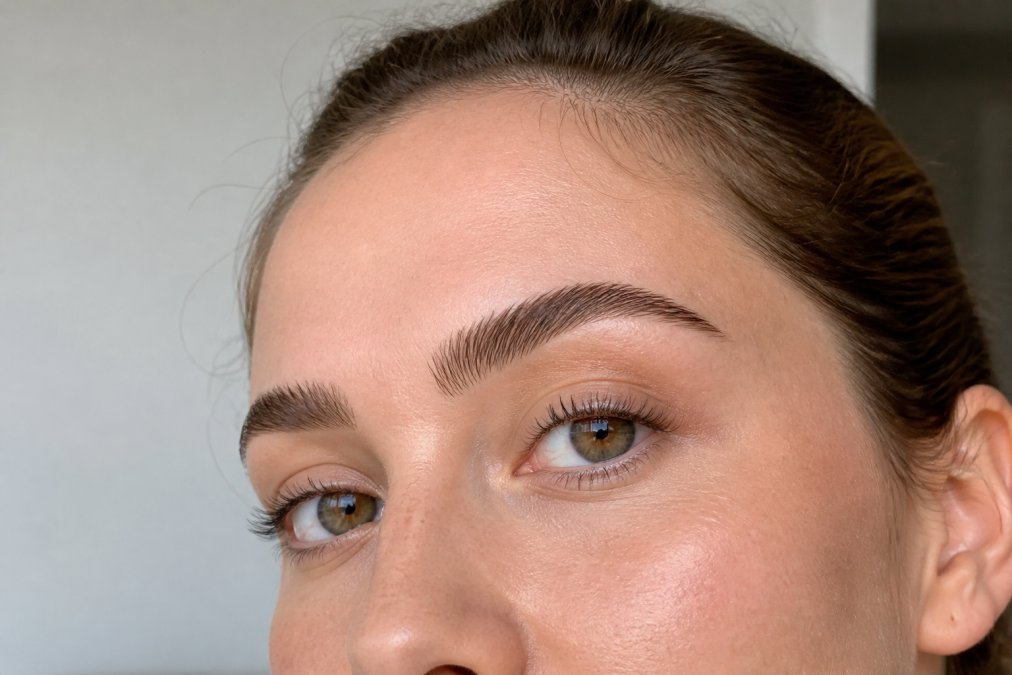
The KYRO Beauty DIY Brow Lamination Kit is a strong choice for beginners. It uses hygienic single-use sachets that eliminate measuring errors. The 3-step process is straightforward: apply perming solution, fix with neutralizing lotion, and finish with nourishing serum. The kit includes reusable pads designed for brow application and clear timing instructions.
The Mikah Amsterdam Brow Lamination Kit (€34.95) is another solid option with a low-odor, vegan formula, though it requires a 24-hour patch test before use. The Nanobrow Lamination Kit (€30.95) is the most affordable but may be less forgiving for first-time users.
For beginners, prioritize kits with single-use sachets, clear timing instructions, included aftercare serum, and positive reviews from first-time users.
Brow Lamination Aftercare Tips
The first 24 hours after treatment are critical for lasting results.
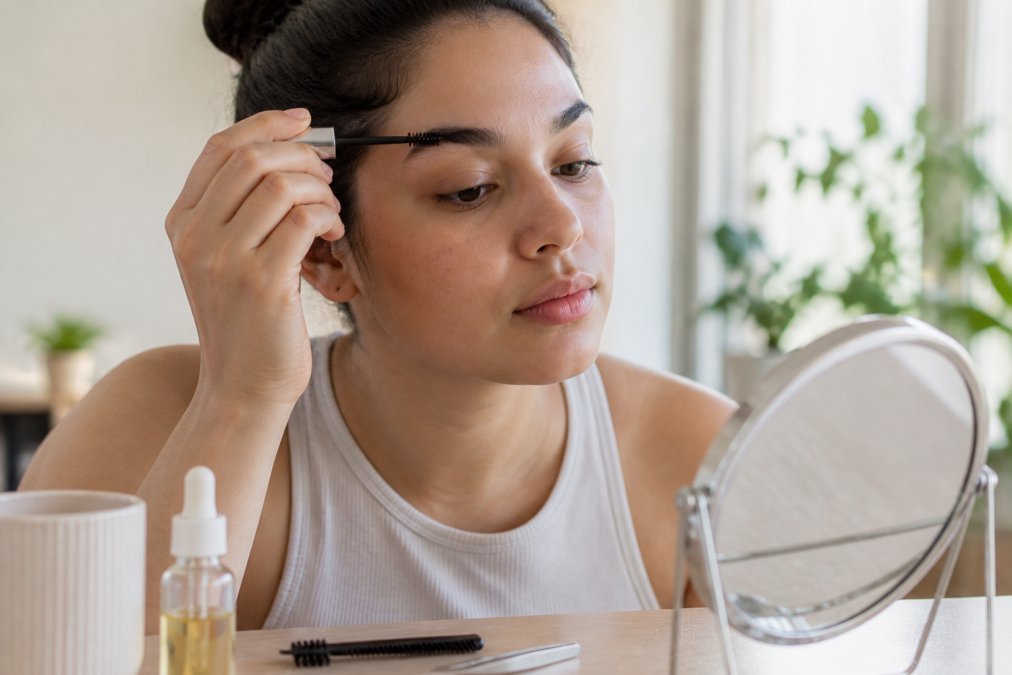
Avoid all moisture for the first 24 hours. Water, steam, sweat, and humidity interfere with the chemical bond. Skip showers, the gym, saunas, and humid environments.
Don't brush or comb your brows for at least 48 hours. The hairs are settling into their new position. After 48 hours, use a soft spoolie with gentle, downward strokes.
Apply nourishing serum daily, starting day 2. This keeps hair hydrated and extends results. Use the serum included in your kit or a lightweight brow oil.
Avoid oil-based products for the first week. Oils break down the chemical bond prematurely.
Sleep on your back or side, not face-down. Use a silk pillowcase if you're a face-down sleeper to reduce friction.
Skip tinting or additional treatments for at least 48 hours.
Use a gentle cleanser around the brow area. Pat dry gently; don't rub.
After the first week, continue using nourishing serum 2 to 3 times weekly to maintain conditioning and extend the lamination effect.
Safety Risks and Skin Sensitivity
Brow lamination involves chemical processing, which carries real risks if not handled carefully.
Chemical burn risk. The perming and fixing solutions are caustic. If left on too long, they can burn delicate skin. Professional technicians monitor timing precisely. DIY users sometimes misread instructions or lose track of time, leading to over-processing. value of grooming tools.
Allergic reactions. The chemicals can trigger contact dermatitis, especially in people with sensitive skin or a history of reactions to hair dyes. A patch test 24 hours before treatment can identify sensitivity.
Eye irritation. Solutions can irritate eyes if they contact the eye surface. Professionals use protective barriers; DIY applicators sometimes accidentally get solution in the eye.
Over-processing and hair damage. Leaving solution on too long or applying too frequently can permanently damage brow hair, making it brittle and prone to breakage.
Skin barrier compromise. Repeated chemical treatments without adequate recovery time can damage your skin's natural barrier, leading to dryness and increased sensitivity.
Risk mitigation strategies:
Always perform a patch test 24 hours before treatment. Apply a small amount to your inner forearm or behind your ear and wait 24 hours.
Follow timing instructions exactly. Set a timer and don't guess.
If you have sensitive skin, reactive eyes, or previous allergic reactions to hair products, consider professional application.
Never apply treatment more frequently than every 6 weeks.
If you experience burning, intense itching, or vision changes, rinse immediately with cool water and seek medical attention if symptoms persist.
DIY vs Professional Results: What to Expect
Professional salon results are reliable because technicians have performed the treatment hundreds of times. They understand how different hair types respond to chemicals and can assess your brows beforehand to recommend a tailored treatment plan. Results are consistent and last the full 6 to 8 weeks. If something goes wrong, the salon typically corrects it at no additional cost.
DIY results depend entirely on your skill level. First-time users frequently see uneven lift between brows due to varying application pressure or timing. Experienced DIY users, those who've done the treatment 3 or more times, often achieve results nearly identical to professional treatments.
Corrective costs. Failed DIY treatments require either waiting 6 to 8 weeks for regrowth or paying €30-€40 for professional correction, which cuts into DIY savings.
Time and convenience. Both take 20-30 minutes of active application. DIY offers scheduling flexibility; salon treatment requires appointments but guarantees results.
Longevity. Professional treatments often last closer to 8 weeks, while DIY treatments average 6 weeks, partly due to higher-quality formulations and more precise application.
Choose DIY if you're willing to accept a learning curve and potential first-attempt failures. Choose professional if you want guaranteed results and consistency over cost savings.
Choosing between a DIY brow lamination kit and professional salon treatment depends on your comfort with chemical application, budget, and risk tolerance. DIY kits offer significant savings and flexibility but require careful attention to instructions. Professional treatments guarantee results and eliminate over-processing risk but cost 2 to 3 times more annually.
Start with a professional treatment if you're new to brow lamination, this teaches you what good results look like. Once you've experienced the process, a quality DIY kit becomes a cost-effective maintenance option. Kyro Beauty's brow lamination kits combine beginner-friendly instructions with professional-grade formulas, making them an an excellent entry point for anyone considering the DIY route.
Frequently Asked Questions
Q: Does DIY brow lamination work as well as a salon treatment?
A: DIY brow lamination can deliver strong results when you follow instructions carefully, but salon treatments typically offer more consistent outcomes because professionals have years of experience with different brow types and hair textures. The main difference is precision: a professional assesses your brow shape, adjusts processing time, and applies solutions evenly. At home, uneven application or timing errors can result in under-processed or over-processed brows. Many users report salon-quality results from DIY kits, but the learning curve is real. Your first attempt may not match a professional result, though subsequent applications usually improve.
Q: What safety risks come with DIY brow lamination kits?
A: The primary risk is chemical burn from the perming solution if left on too long or applied incorrectly. Brow lamination uses alkaline solutions that alter the hair cuticle structure, so over-processing can damage brow hairs permanently and irritate skin. Patch testing 24 hours before use is essential, especially if you have sensitive skin or a history of reactions to hair treatments. Other risks include uneven lifting, brittle brows, and eye irritation if solution contacts the eye area. Always wear the provided gloves, avoid contact with eyes, and stop immediately if you experience burning or severe itching.
Q: How long does brow lamination last compared to other brow treatments?
A: Brow lamination typically lasts 4 to 8 weeks, depending on your brow hair growth cycle and aftercare routine. Most kits claim results lasting 6 to 8 weeks, though individual results vary. Your natural hair growth pushes treated brows out of shape as new hair grows in, which is why the effect fades gradually. This is longer-lasting than brow tinting alone (3-4 weeks) but shorter than microblading (12-18 months). The semi-permanent nature means you'll need repeat treatments to maintain the fluffy, lifted look, but you avoid the commitment of permanent tattooing.
Q: What should I look for in a high-quality brow lamination kit?
A: Choose kits with clear, step-by-step instructions and hygienic single-use sachets to avoid contamination. Look for formulas described as vegan, cruelty-free, or low-odor if you have sensitivities. Check that the kit includes a patch test, perming solution, fixing lotion, nourishing serum, and application tools. Read reviews specifically mentioning results lasting 6-8 weeks and ease of use. Avoid kits with vague instructions or no aftercare guidance. Kits designed for beginners often include reusable pads and clear timing guides, which reduce the risk of over-processing or uneven application.
Q: Is brow lamination safe for sensitive skin?
A: Brow lamination can be safe for sensitive skin if you choose a gentle formula and perform a patch test 24 hours before full application. The perming solution is the most likely culprit for irritation, so opt for kits marketed as hypoallergenic or low-irritant. If you have a history of allergic reactions to hair treatments, chemical straighteners, or perms, approach brow lamination cautiously. Always apply a small amount of the perming solution behind your ear or on your inner arm first. If redness, swelling, or itching develops within 24 hours, do not proceed with the treatment. Salon professionals can also perform a patch test before your appointment.
This article was written using GrandRanker
