



Affordable Salon Quality Brow Lift: DIY Kits Reviewed

Table of Contents
- What Is Brow Lamination and How Does It Compare to Traditional Brow Lifts?
- Affordable Salon Quality Brow Lift Kits: Top Options Compared
- How Long Does Brow Lamination Last and What Results Can You Expect?
- Brow Lamination Aftercare Tips for Maximum Longevity
- DIY Brow Lift Safety: What You Need to Know Before Starting
- Cost-Benefit Analysis: DIY vs. Professional Salon Brow Lifts
- Troubleshooting Common Issues with At-Home Brow Lamination
- Conclusion
Last Updated: August 15, 2026
What Is Brow Lamination and How Does It Compare to Traditional Brow Lifts?
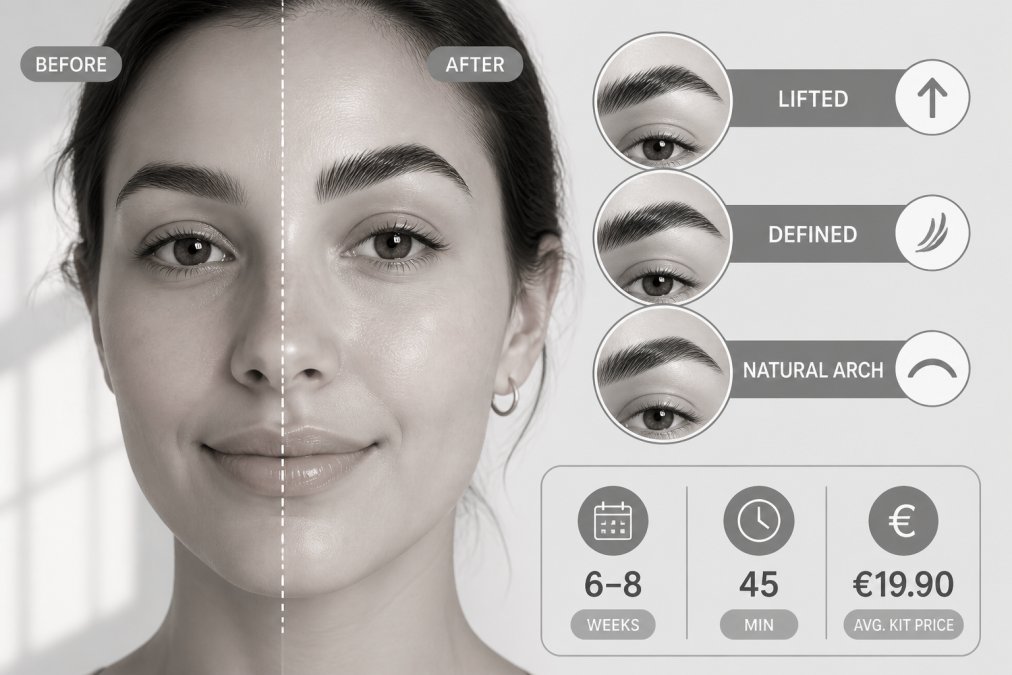
Brow lamination is a semi-permanent treatment that lifts, shapes, and sets eyebrow hairs in a uniform direction, creating a fuller, more defined arch. Unlike traditional brow lifts that involve invasive procedures or permanent tattooing, brow lamination uses a chemical process similar to a lash lift. The treatment applies a relaxing solution to soften the hair, then sets it upward with a neutralizing solution and nourishing oil. Results last 6 to 8 weeks, depending on your natural brow growth cycle and aftercare.
A surgical brow lift repositions skin and tissue, creating lasting changes that can last years but require downtime and recovery. Brow lamination is non-invasive, requires no downtime, and delivers temporary but dramatic results. For most people seeking affordable salon-quality results without commitment or risk, lamination is the more practical choice.
The process involves three main steps: preparation, processing, and nourishment. Brow hairs are cleansed and dried, then the relaxing lotion softens the hair structure for repositioning. After 5-10 minutes, the solution is removed and hair is brushed upward into the desired shape. A neutralizing solution locks the hair in place, followed by nourishing oil that restores moisture and shine.
Affordable Salon Quality Brow Lift Kits: Top Options Compared
The market for at-home brow lamination kits has expanded significantly, offering genuine alternatives to expensive salon treatments. Quality kits deliver results comparable to professional treatments when applied correctly.
1. Kyro Beauty DIY Brow Lamination Kit, Best Overall for Beginners
Kyro Beauty's DIY brow lamination kit delivers salon-quality results at home with an 8-week duration. The kit is designed for beginners with a straightforward 3-step process and contains enough product for up to 4 complete treatments, making the per-treatment cost extremely economical.
The formula contains nourishing components like keratin, collagen, and vitamin E, typically found only in premium salon treatments. It's free from parabens, silicones, gluten, phthalates, and GMOs, addressing concerns for users with sensitive skin. The simple brush applicator and clear timing guidelines make application straightforward.
One practical consideration: the kit requires a 24-hour dry period after treatment, so apply it on an evening when you can stay home the next day.
2. Nanobrow Lamination Kit, Best for Multiple Uses
Nanobrow's lamination kit is reliable for both professional and home use, with results lasting up to 6 weeks. Each kit allows for multiple complete treatments, making it cost-effective when spread across several applications. The formula nourishes and revitalizes hair during treatment, addressing the concern that the chemical process can leave brows feeling dry or brittle.
The kit works particularly well for unruly and sparse brows. If your natural brows resist styling or have thin patches, the lamination process lifts existing hairs to create the illusion of fuller brows while the nourishing formula strengthens what you have.
A key requirement is the 48-hour patch test before first use. This ensures you won't experience irritation during the full application.
3. Supercilium Brow & Lash Lamination, Best for Professionals and Advanced Users
Supercilium offers a comprehensive system that handles both brows and lashes in one kit, with results lasting up to 8 weeks. The formula is notably strong and fast-acting, appealing to professionals and experienced home users who understand timing and application precision.
Supercilium offers vegan options for individual solutions. The system is loved by beauty professionals for its reliability across different hair types.
The tradeoff: Supercilium requires more careful timing adjustments depending on hair type and thickness. For beginners without lamination experience, this learning curve might feel steep. For anyone with prior knowledge or professional aspirations, Supercilium's precision is ideal.
4. MyBrow Lash Lift and Brow Lamination Set, Best for Dual Enhancement
MyBrow's combined kit addresses users who want to enhance both lashes and brows with a single purchase. Results last up to 8 weeks, matching the duration of the best single-purpose kits. The dual-purpose design appeals to budget-conscious users, though it commits you to both treatments.
| Kit | Duration | Best For | Per-Treatment Cost | Beginner-Friendly |
|---|---|---|---|---|
| Kyro Beauty | 8 weeks | Beginners, sensitive eyes | Very low (4 uses per kit) | Yes |
| Nanobrow | 6 weeks | Multiple uses, sparse brows | Low | Yes |
| Supercilium | 8 weeks | Professionals, precision users | Moderate | No |
| MyBrow | 8 weeks | Dual lash+brow enhancement | Moderate | Yes |
How Long Does Brow Lamination Last and What Results Can You Expect?
Brow lamination results typically last 6 to 8 weeks, with most users seeing the full effect for about 5-6 weeks before gradual relaxation begins. The exact duration depends on your natural brow growth cycle, aftercare adherence, and hair type.
Within hours of treatment, your brows will appear lifted, fuller, and more defined. The hairs are set in an upward direction, creating the illusion of a higher arch and denser coverage. If you have sparse brows, lamination won't create new hair growth, but it will position existing hairs to maximize coverage. If you have unruly brows, the treatment tames them into a uniform shape that lasts for weeks.
Results gradually fade rather than disappearing overnight. Around week 4-5, you'll notice the brows starting to relax as new, untreated hairs grow through. By week 7-8, most of the lamination effect has faded, and your brows return to their natural state. This predictability makes it easy to plan repeat treatments.
Lamination won't change your brow shape permanently. If your natural brows are asymmetrical, lamination will enhance that asymmetry by lifting both sides equally. If you want to address actual shape differences, combine lamination with other techniques like tinting or microblading.
Brow Lamination Aftercare Tips for Maximum Longevity
Proper aftercare extends the visible effect by 1-2 weeks and ensures the treatment doesn't cause irritation or damage.
The critical first 24 hours: Your brows must remain completely dry for the first full day after treatment. No water, sweat, or steam. The lamination solution is still setting, and moisture can interfere with the bonding process. Plan your treatment for an evening when you can stay home.
Daily care during the lamination period: Once the 24-hour dry period passes, you can resume normal washing. However, avoid oil-based products on your brows, including facial oils, heavy moisturizers, and silicone-based primers. These break down the lamination solution and accelerate relaxation. Stick to lightweight, water-based products.
Brushing and styling: Use a soft spoolie brush to gently brush your brows upward each morning. This reinforces the lamination direction and maintains the lifted appearance. Avoid aggressive brushing.
Hydration and nourishment: Apply the nourishing oil included in your kit 2-3 times per week during the lamination period. This keeps your brow hairs conditioned and maintains the healthy appearance of the treatment.
Makeup considerations: You can wear eyeshadow and eyeliner normally, but avoid heavy brow makeup that requires rubbing or blending over the treated hairs.
DIY Brow Lift Safety: What You Need to Know Before Starting
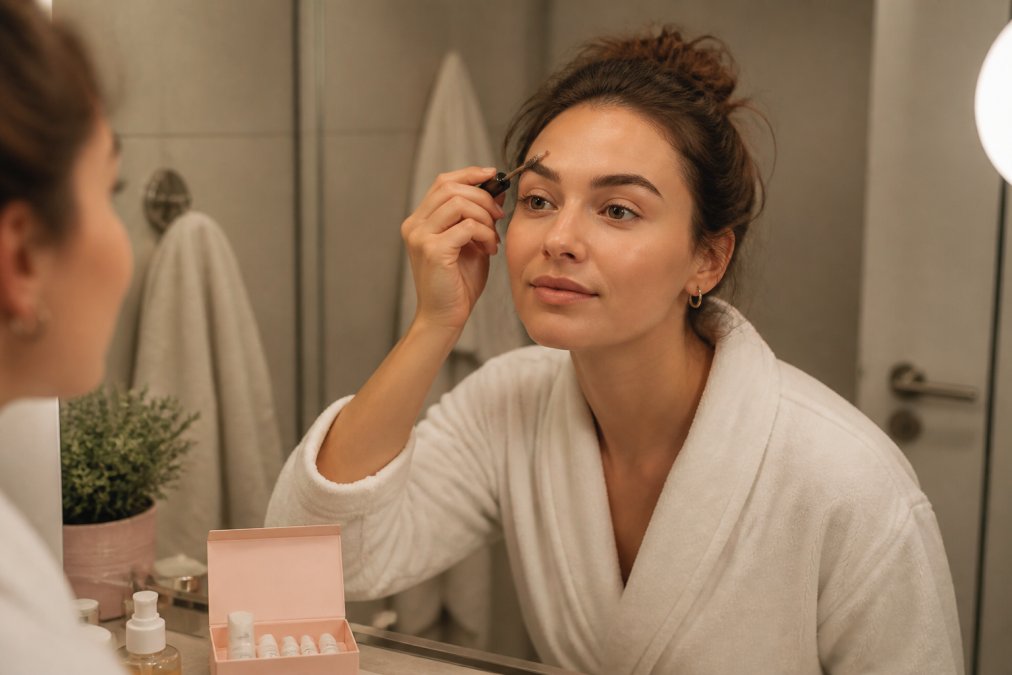
At-home brow lamination is safe when done correctly, but it involves chemical solutions that require respect and careful application. The most critical safety step is the patch test, which should never be skipped.
The patch test protocol: Apply a small amount of the relaxing lotion to the skin behind your ear or on your inner forearm. Wait 48 hours and monitor for any redness, itching, swelling, or irritation. If you experience any reaction, do not proceed with the full treatment.
Application safety: The relaxing and neutralizing solutions should never contact your eyes directly. Wear the protective shields or pads provided in your kit. If solution accidentally contacts your eye, rinse immediately with plenty of water and seek medical attention if irritation persists.
Timing accuracy: Follow the exact timing guidelines for each step. The relaxing lotion typically processes for 5-15 minutes depending on your hair type. Under-processing results in weak lamination; over-processing can damage your brow hairs. Use a timer.
Skin sensitivity considerations: If you have sensitive skin or a history of allergic reactions to beauty products, start with a smaller test application before committing to your full brows.
Professional guidance: If you're unsure about any step, watch instructional videos from the kit manufacturer or consult a professional aesthetician before attempting the treatment yourself.
Cost-Benefit Analysis: DIY vs. Professional Salon Brow Lifts
Professional salon treatments typically range from €50-150 per session. At-home kits range from €30-50 for a single kit that provides 3-4 treatments.
The math: A professional treatment every 6-8 weeks costs €300-900 per year. A single at-home kit at €50 provides 3-4 treatments, meaning you're spending €50-70 per year for equivalent results. You're looking at 80-90% cost reduction by switching to DIY.
What you're trading: The trade-off for DIY is application skill and convenience. A professional aesthetician has performed hundreds of laminations and understands how to adjust timing for different hair types. When you do it yourself, you're responsible for achieving that same result.
The quality question: Quality at-home kits from established brands like Kyro Beauty, Nanobrow, and Supercilium deliver results comparable to professional treatments. The difference isn't in the formula, it's in the application. A careful, patient DIY application produces results equivalent to a professional treatment.
Hidden costs of DIY: Consider the learning curve. Your first treatment might not be perfect. You might need to watch tutorials or do a test treatment on one brow before committing to both. This time investment is typically a one-time cost.
When professional treatment makes sense: If you have extremely sensitive skin, a history of severe reactions to beauty products, or particularly challenging brows (very sparse, very coarse, or asymmetrical), a professional treatment might be worth the investment.
The hybrid approach: Many users start with a professional treatment to understand the results they're aiming for, then switch to DIY for maintenance treatments. This combines professional guidance with long-term cost savings.
Troubleshooting Common Issues with At-Home Brow Lamination
Uneven lifting: If one brow lifts more than the other, the most common cause is uneven application or inconsistent processing time. On your next treatment, apply the relaxing lotion more carefully to both brows simultaneously and use a timer to ensure identical processing times.
Weak or short-lasting lamination: If results fade after 3-4 weeks instead of 6-8, you likely under-processed the relaxing lotion. On your next treatment, increase the processing time by 2-3 minutes.
Overly stiff or crunchy brows: If your brows feel brittle, you over-processed the relaxing solution or didn't apply enough nourishing oil. Apply the nourishing oil more generously and more frequently during the lamination period. Reduce the processing time on your next treatment by 2-3 minutes.
Irritation or redness around the brow area: This indicates a reaction to one of the chemical solutions. Discontinue use immediately and allow the area to heal. On your next attempt, perform an extended patch test and consider switching to a different kit with a gentler formula.
Brows that won't stay in the laminated position: This usually means insufficient neutralizing solution contact or not enough time for the neutralizer to set the hair. Ensure the neutralizing solution thoroughly saturates all brow hairs and allow it to process for the full recommended time.
Conclusion
The affordable salon quality brow lift is no longer an oxymoron. Quality at-home kits deliver genuine results that rival professional treatments when applied correctly, at a fraction of the cost. Kyro Beauty's DIY brow lamination kit stands out for its beginner-friendly approach, long-lasting 8-week results, and nourishing formula that prioritizes brow health alongside aesthetics. With proper aftercare and careful application, you can achieve the lifted, defined, voluminous brows that typically require expensive salon visits. Get started with Kyro Beauty and transform your brow routine, salon-quality results, home application, and savings that let you invest in other aspects of your beauty regimen.
Frequently Asked Questions
Is it safe to do a brow lift at home without professional training?
Yes, at-home brow lamination is safe when you follow the kit instructions carefully and perform a patch test 48 hours before treatment. Most DIY kits are specifically formulated for home use with non-invasive, gentle formulas. Always read the safety guidelines, avoid contact with eyes, and stop immediately if you experience irritation. If you have sensitive skin or a history of allergic reactions, consult a dermatologist first.
How long does brow lamination last, and when should I repeat the treatment?
Most brow lamination treatments last 6 to 8 weeks, depending on your natural brow growth cycle and how well you follow aftercare routines. Results gradually fade as new hairs grow in and older treated hairs shed. Many users schedule treatments every 6 to 8 weeks to maintain a consistent lifted appearance. Proper aftercare, including avoiding oil-based products and keeping brows dry for 24 hours post-treatment, extends longevity.
What makes at-home brow lamination kits different from professional salon treatments?
At-home kits use the same chemical principles as salon treatments but are formulated with gentler, more user-friendly solutions. Professional treatments benefit from a technician's experience and precision, while DIY kits prioritize safety and ease of application. The main difference is application technique and timing adjustments. Many affordable salon quality brow lift kits deliver results nearly identical to professional treatments when applied correctly, making them an excellent cost-effective alternative.
What brow lamination aftercare tips should I follow to keep results longer?
After brow lamination, keep your brows completely dry for 24 hours and avoid oil-based products, makeup, and water during this period. Once healed, brush brows upward daily with a clean spoolie to maintain the lifted shape. Use a nourishing oil or brow serum after the initial 24-hour window to keep hairs healthy. Avoid harsh scrubbing, excessive heat, and chlorinated water for at least a week. These practices help preserve the semi-permanent lift and keep brows looking fuller and more defined.
Can I use affordable brow lamination kits if I have very sensitive eyes or a history of reactions to beauty products?
Most affordable salon quality brow lift kits are hypoallergenic and dermatologically tested, but sensitive skin requires extra caution. Always perform a 48-hour patch test on a small area behind your ear before applying to your brows. Look for kits free from parabens, silicones, and harsh chemicals. If you've had severe reactions to lash glue or other beauty products, consult a dermatologist before use. Brands like Kyro Beauty specifically formulate for sensitive eyes, making them a safer choice for reactive skin.
This article was written using GrandRanker
