



Best Budget Nail Kits: Salon Results at Home

Table of Contents
- What to Look for in a Budget-Friendly Nail Kit
- Comparison Table: Top Budget Nail Kits
- Best at-Home Gel Manicure Starter Kit Options
- How to Apply Gel Nails at Home: Step-by-Step
- Gel Nail Removal Guide for At-Home Kits
- Safety and EU Compliance for Gel Nail Kits
- Conclusion: Choosing Your Budget Nail Kit
- Frequently Asked Questions
Last Updated: October 3, 2026
What to Look for in a Budget-Friendly Nail Kit
The global at-home gel nail kits market was valued at USD 758.67 million in 2024, and the budget-friendly segment is now the fastest-growing part of it, according to Data Bridge Market Research's market report. This guide breaks down the best budget nail kits in the Netherlands, what separates a good starter set from a frustrating one, and how to apply and remove gel nails without wrecking your natural nails.
A budget nail kit is a bundled set of gel polish, a UV-LED lamp, and prep tools designed for at-home manicures.
Here's the tension most buyers miss: a cheap kit that skips prep tools or uses weak curing will cost you more in the long run, because you'll replace it within months.
Essential Tools and Components
A complete at-home gel manicure starter kit needs a UV-LED lamp, a base coat, at least one gel color, a top coat, a buffer, a file, and lint-free wipes.
One bottle of builder gel is enough for 60-80 sets of nails, according to Polish Amsterdam's product benchmarks, so a single kit can carry you through a full year of manicures.
Comparison Table: Top Budget Nail Kits
| Kit | Starting Price | Best For | Standout Feature |
|---|---|---|---|
| Beetles Gel Polish Starter Kit | €25.00 | Testing many colors | Large mini-bottle color range |
| AZUREBEAUTY Dip Powder Kit | €31.70 | Durable alternative to gel | Complete dip liquid system |
| Le Mini Macaron Gel Manicure Kit | €35.00 | Travel and portability | Macaron-shaped USB LED lamp |
| SensatioNail Gel Starter Kit | €36.00 | Complete budget system | Pro-grade lamp and primer included |
| VANREESA Gel Nail Polish Kit | €38.00 | Full tool set | High-power lamp plus manicure tools |
| Sally Hansen Salon Gel Polish Starter Kit | €40.00 | Buying in person | Widely available in stores |
| S&L Gel Nail Polish Starter Kit | €46.00 | Long-term use | High-pigment professional-grade polish |
For Kyro Beauty's current bundle pricing, check our website directly.
Best at-Home Gel Manicure Starter Kit Options
Beetles is our pick for the widest color range at the lowest price, while SensatioNail wins on completeness. Both prove that an at-home gel manicure starter kit doesn't need a salon budget.
Beetles Gel Polish Starter Kit (€25.00) packs a mini LED lamp, base coat, top coat, and a large set of color mini-bottles. The trade-off is real: the lamp is small and low-wattage, so curing takes longer. If you want to experiment with color before investing in better hardware, nothing at this price competes.
SensatioNail Gel Starter Kit (€36.00) includes a pro-grade LED lamp, gel cleanser, and primer. Byrdie's review coverage has consistently named it a leading budget-friendly option for at-home gel manicures. Expect up to two weeks of wear. Removal takes patience.
Le Mini Macaron (€35.00) is the travel pick. Its USB-powered macaron lamp cures one finger at a time, which is slow but genuinely portable. Allure's kit roundup rates it highly for beginners and portability.
AZUREBEAUTY Dip Powder Kit (€31.70) suits anyone who wants a chip-resistant finish without gel polish. It requires practice to get a smooth surface.
How to Apply Gel Nails at Home: Step-by-Step
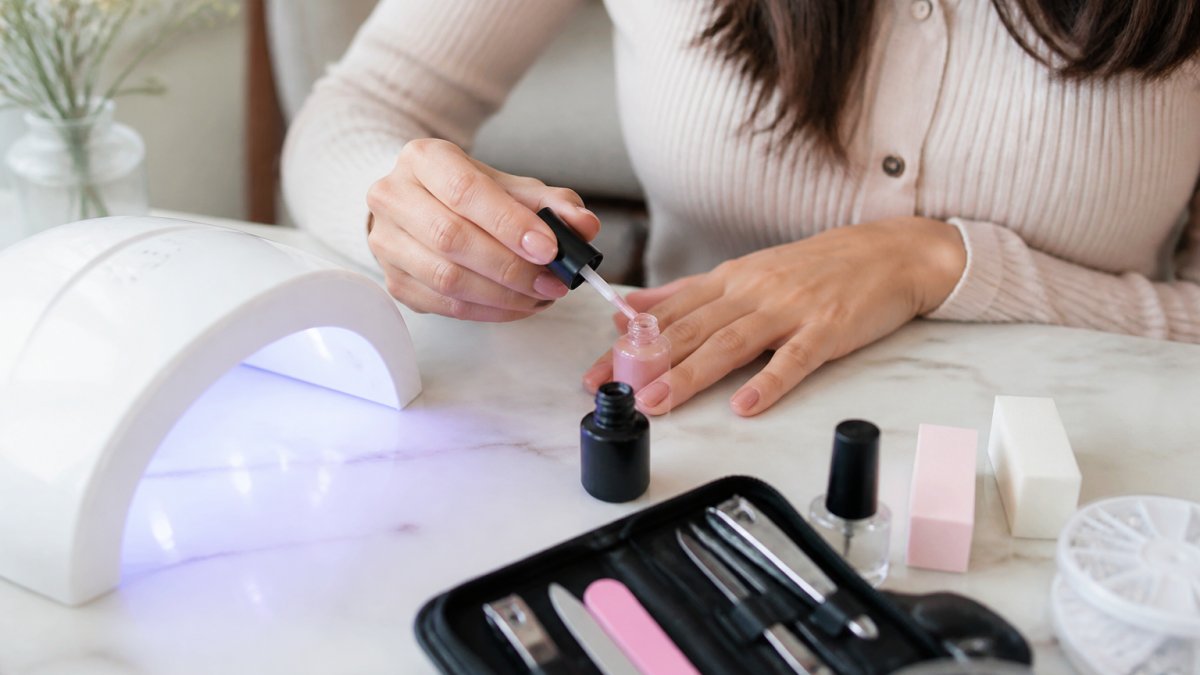
Learning how to apply gel nails at home takes about 45 minutes the first time and 25 minutes once you know the routine. The steps matter more than the products.
- Prep: Push back cuticles, buff the nail surface, and wipe with a dehydrator. [Time: 8 minutes]
- Base coat: Apply a thin layer and cure under the UV-LED lamp. [Time: 2 minutes]
- Color: Apply two thin coats, curing between each. Thin layers cure evenly. [Time: 8 minutes]
- Top coat: Seal the free edge and cure. [Time: 3 minutes]
- Finish: Wipe off the tacky layer with cleanser. [Time: 2 minutes]
Expected Result: A high-gloss, chip-resistant finish that lasts up to three weeks. Professional-grade builder gel manicures reach that three-week mark without chipping, per Polish Amsterdam's performance data.
The most common mistake is flooding the cuticle. It causes lifting within days.
Gel Nail Removal Guide for At-Home Kits
A gel nail removal guide that skips the soak is not a guide, it's a warning. Peeling gel polish off dry strips the nail plate and leaves nails thin and weak for weeks. The removal step is also where most budget kits quietly fail: the kit includes a lamp and colors but no acetone, no foil, and no cotton pads, so the buyer discovers the hidden cost only after the first manicure.
What You Actually Need for Removal
Budget for these separately if your kit doesn't include them:
- Acetone (100%, not nail polish remover): Standard remover is mostly ethyl acetate and water and will not break down cured gel. A 250 ml bottle of pure acetone costs roughly €4-€8 at drugstores, beauty wholesalers, or online.
- Cotton pads or soak-off wraps: Cotton pads are cheaper per use; pre-cut foil wraps are faster but cost more per manicure.
- Aluminium foil: Standard kitchen foil works. Cut into 5 cm squares.
- Cuticle stick or orange stick: Wooden, not metal. Metal tools scrape the nail plate.
- Buffer: 180/240 grit. Coarse files thin the nail.
- Cuticle oil: Restores lipids after acetone exposure.
Step-by-Step Removal
- Break the seal. File the top coat with a 180-grit file until the shine is gone. Do not file into the color layer.
- Soak the pad. Saturate a cotton pad with 100% acetone. Squeeze out excess so it doesn't run onto skin.
- Wrap. Press the pad onto the nail, wrap in foil, and fold the top edge to hold it. Work one hand at a time so the other stays free.
- Wait 10-15 minutes. Set a timer. Checking early and re-wrapping wastes acetone and time.
- Push, don't pull. Use a wooden cuticle stick to push softened gel from the cuticle toward the tip. If it resists, rewrap for another 5 minutes.
- Buff lightly. Remove any residue with a 240-grit buffer using light pressure.
- Oil. Apply cuticle oil and massage in. Acetone strips oils from the nail and surrounding skin.
Timing and Cost Per Removal
A full removal takes 20-30 minutes including soak time. Per-manicure cost of removal supplies is roughly €0.50-€1.00 if you buy acetone and cotton pads in bulk, versus €15-€25 for a salon soak-off. Over a year of biweekly manicures, that difference alone covers the cost of a mid-range kit.
Disposal and Local Rules
Acetone is flammable and should not be poured down the drain in quantity. In most municipalities, small amounts of acetone-soaked cotton pads and foil go in residual waste (restafval), not the organic or plastic recycling stream. Check your local waste authority's guidance, since collection rules vary by municipality. Store acetone in its original container, away from heat, and keep it out of reach of children.
Safety and EU Compliance for Gel Nail Kits
This is the section most budget-kit roundups skip, and it's the one that matters most if you have sensitive skin or react badly to gel products. Cosmetic products sold in the EU, including gel polish and base/top coats, must comply with Regulation (EC) No 1223/2009 on cosmetic products. In practice, that means:
- A responsible person established in the EU must be named on the product or its packaging.
- A full ingredient list using INCI names must appear on the label.
- A batch code and a period-after-opening (PAO) symbol must be present. The PAO is the small open-jar icon with a number of months, typically 12M or 24M for gel polish.
- Restricted substances must stay within the limits set in the regulation's annexes. Methacrylate monomers such as HEMA and HPMA are restricted in cosmetic products, and some photoinitiators used in UV-cured gels have faced scrutiny.
What to Check on the Label
- HEMA-free and HPMA-free claims. These are the two methacrylates most often linked to allergic contact dermatitis in at-home gel users. If a kit advertises HEMA-free, verify the ingredient list rather than trusting the front of the box.
- TPO-free claims. TPO (trimethylbenzoyl diphenylphosphine oxide) is a photoinitiator. Some brands have reformulated away from it; if the label lists it, that's a factual disclosure, not automatically a problem.
- Responsible person address in the EU. A kit shipped from outside the EU without an EU responsible person is not compliant with the cosmetic products regulation and has no clear route for safety complaints.
- Dutch-language or multilingual labelling. Products sold to consumers here should carry information in a language consumers can understand; Dutch or a widely understood EU language is the norm.
Practical Safety Points
- Curing time. Follow the manufacturer's stated time for the specific lamp. Under-curing leaves uncured monomers on the nail and skin, which is the main driver of sensitisation. Over-curing does not make the manicure last longer.
- Skin contact. Uncured gel on skin is the single biggest risk factor for developing an allergy. If gel touches skin, wipe it off before curing, never cure it onto the skin.
- Ventilation. Acetone and methacrylate vapours build up in small rooms. Work near an open window or with a fan moving air across the workspace.
- Patch test. Apply a small amount of base coat to one nail and wait 48 hours before a full set, especially with a new brand.
- Lamp hygiene. Wipe the lamp interior after each use. Dust and cured residue reduce curing efficiency over time.
Sustainability and Packaging
Refillable color systems and recyclable or refillable packaging are appearing across the category, but availability varies widely by brand. When comparing kits, check whether the brand sells individual replacement bottles rather than only full kits, that's the practical test of whether a system is genuinely refillable or just marketed that way. Glass bottles and aluminium lamp housings are more recyclable in most municipal streams than mixed-plastic components.
Conclusion: Choosing Your Budget Nail Kit
If lashes and brows are also part of your routine, Kyro Beauty builds all-in-one kits with no glue required, shower-proof formulas, and application that's gentle on sensitive eyes. Our press-on lashes and lifting kits deliver salon-quality results at home, with bundle options that stretch each kit across more treatments.
Get started with Kyro Beauty and build a routine that looks salon-fresh without the salon appointment.
Frequently Asked Questions
Are at-home gel nail kits safe for your natural nails?
When used correctly, at-home beauty kits are safe. The key is proper preparation and gentle removal. Always follow instructions exactly and never force removal, as that can cause damage. Using a nourishing oil and taking breaks between applications helps maintain beauty health.
What is the most affordable way to do gel nails at home?
A budget-friendly at-home beauty kit can offer significant savings compared to salon visits. For current pricing and options, check our website directly.
How long do DIY gel nail kits typically last?
Kyro Beauty's lash and brow enhancements are designed for long-lasting results, providing salon-quality looks.
Which nail kits are best for beginners in the local market?
Kyro Beauty's all-in-one lash and brow kits are designed for safe and simple application, making them ideal for beginners.
Do I need a UV lamp for all at-home nail kits?
Kyro Beauty's lash and brow kits do not require UV or LED lamps. Always follow the kit instructions for application.
