
How to Apply Press-On Lashes Without Glue

Table of Contents
- Why Glue-Free Press-On Lashes Are Changing the Game
- Lash Application Tools for Beginners: What You'll Need
- Step-by-Step Application Process for Glue-Free Lashes
- How Long Do Press-On Lashes Stay On Without Glue
- How to Remove Press-On Lashes Safely
- Troubleshooting Common Application Issues
- Lash Mapping for Different Eye Shapes
- Conclusion
Last Updated: August 10, 2026
Why Glue-Free Press-On Lashes Are Changing the Game
Press-on lashes without glue eliminate the mess, wait time, and allergic reactions of traditional adhesive methods. They offer faster application, no chemical exposure, and reusability without adhesive residue buildup, making salon-quality results accessible to busy professionals, frequent travelers, and anyone with sensitive eyes.
Glue-free lashes work through the physical structure of the lash band itself, which grips your natural lash line when gently pressed. When applied correctly, they stay put throughout your day and blend seamlessly with your natural lashes. Success comes down to precision placement and understanding how your eye shape interacts with the band.
Lash Application Tools for Beginners: What You'll Need
Essential tools for glue-free application
A curved applicator is your most important tool. This small device positions the lash band precisely along your natural lash line without using your fingers, making placement significantly easier and more accurate.
A lash tray or storage case keeps your lashes clean and organized between applications, protecting the band from damage and extending lash longevity. A magnified mirror with bright lighting lets you see exactly where your lash band sits and catch any gaps. Optional but helpful: a lash comb or brush for separating lashes after application and makeup remover wipes for cleaning your eyelids beforehand.
Quality lash kits, like those from Kyro Beauty, bundle these essentials together so you're not hunting for individual tools.
Preparing your natural lashes and lids
Clean, dry eyelids are non-negotiable for glue-free lashes to stay put. Remove any existing makeup, oils, or residue using gentle makeup remover or micellar water, then wash with lukewarm water and mild cleanser. Pat dry completely and wait a full minute to ensure your lids are moisture-free.
If your natural lashes curl upward, gently brush them downward to create a flatter surface for the lash band to grip. Some people find a light eyeshadow primer helpful, it creates a slightly sticky base without the thickness of glue. Avoid applying moisturizer or eye cream right before lash application, as these create a slippery surface that causes the band to slide.
Step-by-Step Application Process for Glue-Free Lashes
Step 1: Clean and dry your eyelids
This is the foundation. Dirty or damp eyelids will cause your lashes to slip or fall off within hours. Use makeup remover or gentle cleanser to remove all traces of makeup, sunscreen, or oils. Rinse with lukewarm water and pat dry completely, not damp, but completely dry.
Step 2: Position the lash band and find your fit
Hold the lash band up to your eye without touching your eyelid. The band should sit just above your natural lash line. The inner edge should align with your inner corner (near your tear duct), and the outer edge should extend slightly past your outer corner.
Your eye shape determines how the lash band should curve. A curved applicator helps you guide the band into the right position without fighting against your natural eye shape.
Step 3: Apply with gentle pressure and precision placement
Using your curved applicator, position the inner edge of the lash band at your inner lash line and press gently but firmly. Move slowly along the band from inner to outer corner in short, gentle squeezes rather than one long press. When you reach the outer corner, hold the pressure for 3-5 seconds to ensure it's properly secured.
The entire application should take 30-60 seconds once you master the technique.
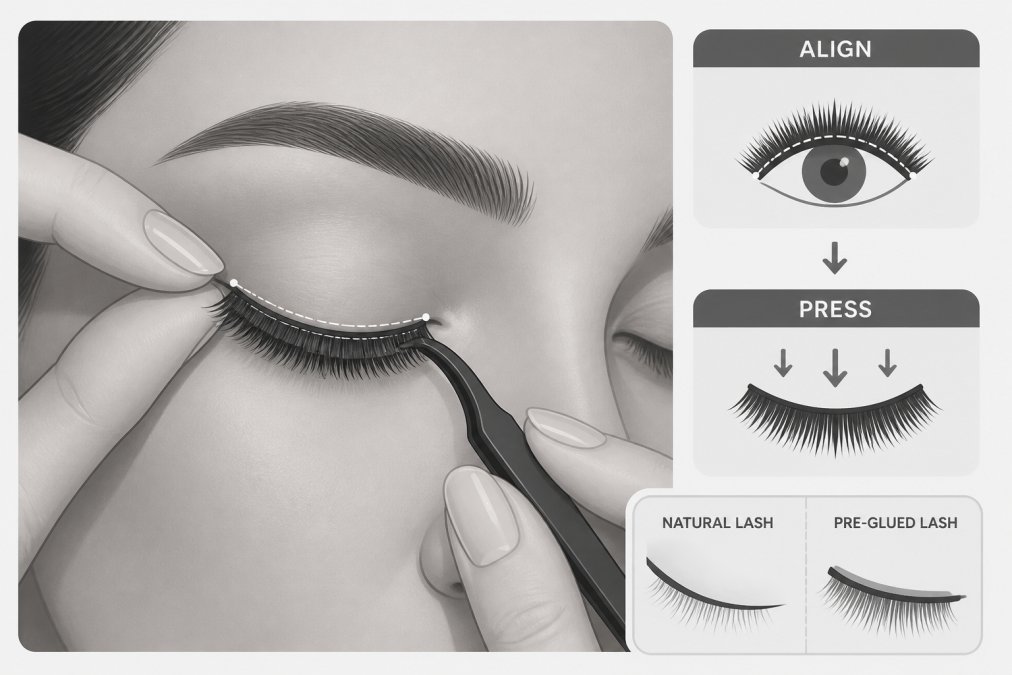
Step 4: Blend with your natural lash line
Gently comb through both your natural lashes and the false lashes together. This blends them visually and eliminates gaps that make falsies obvious. After combing, blink several times. Your eye should feel comfortable. If you feel tugging or irritation, gently adjust by pressing the band closer to your lash line or repositioning the inner or outer edge.
How Long Do Press-On Lashes Stay On Without Glue
Lash longevity and what affects wear time
Press-on lashes without glue typically stay secure for 6-12 hours of normal activity. Eyelid cleanliness at application is the most critical factor. The quality of the lash band itself is second, a well-constructed band with proper density and curvature grips your natural lash line more effectively.
Your natural lash health also matters. Strong, healthy natural lashes provide a better anchor point. Eye shape plays a role too; hooded or heavily-folded eyelids may cause the lash band to slip more easily.
Sleep hygiene and maintaining your lashes overnight
Wearing press-on lashes without glue overnight is possible but requires care. Sleep on your back if possible, or avoid pressing your face into your pillow. Side-sleeping and face-down sleeping increase the likelihood of lash band slippage.
Many people prefer to remove their lashes before bed and reapply them in the morning. This extends lash lifespan significantly and gives your natural lashes a break. For frequent travelers and busy professionals, the ability to remove and reapply lashes quickly without adhesive mess is a major advantage.
How to Remove Press-On Lashes Safely
Removal techniques to prevent lash loss and damage
Wet your eyelids with lukewarm water or makeup remover to soften the contact between the lash band and your natural lashes. Gently pull the outer corner of the lash band away from your eye slowly and steadily. As the outer edge lifts, continue pulling toward the inner corner. The entire band should come away in one smooth motion.
Always pull at an angle that follows your natural lash line. Pulling downward creates tension on your natural lashes and risks breakage.
Lash maintenance after removal
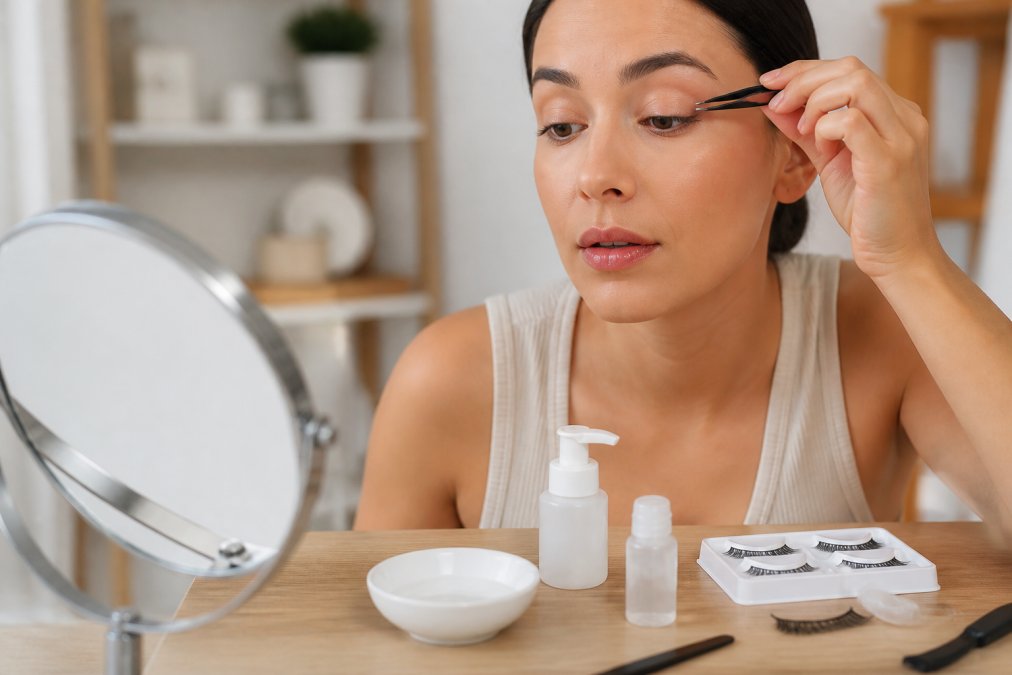
Soak your false lashes in lukewarm water for 2-3 minutes to soften any remaining residue or debris. Gently wipe the lash band with a soft cloth or cotton pad. If there's stubborn residue, use a dedicated lash cleanser or gentle makeup remover on the band only.
Store your lashes in a clean, dry lash tray or case away from direct sunlight and heat. Properly maintained lashes can be worn 15-20 times before showing significant wear. Apply a nourishing lash serum or eye cream to your natural lashes after removal, especially if you wear false lashes frequently.
Troubleshooting Common Application Issues
Lashes feel bulky or uncomfortable
Bulkiness usually means the lash band is sitting too far away from your natural lash line, creating a visible gap. Remove the lashes and reapply with the band positioned closer to your natural lashes.
Another cause is lashes that are too long or voluminous for your eye shape. A lash that works beautifully on larger eyes may feel heavy on smaller eyes. The solution is trying different styles until you find one that feels natural and comfortable.
Lashes won't stay put throughout the day
If lashes slip or fall off before evening, the problem is almost certainly dirty eyelids at application, insufficient pressure during placement, or a lash band that doesn't match your eye shape.
Clean your eyelids again, more thoroughly than before, removing all traces of oil, makeup, and residue. If cleanliness isn't the issue, focus on applying firm pressure and holding for 3-5 seconds, especially at the outer corner. If both are solid and lashes still slip, you may need a different lash style.
Eye sensitivity and allergic reactions
Press-on lashes without glue eliminate the most common irritant: lash adhesive. If your eyes feel itchy or irritated after application, remove the lashes immediately and wait at least an hour before reapplying.
Before your next application, spend extra time cleaning your eyelids with a gentle, fragrance-free cleanser. If irritation persists, the issue may be the synthetic material itself. Never share lashes with other people, as this introduces bacteria and increases infection risk.
Lash Mapping for Different Eye Shapes
Finding the right lash style for your eye shape
Lash mapping is selecting and positioning lashes based on your specific eye anatomy. There are broadly four eye shapes: round, almond, hooded, and monolid.
Round eyes look best with lashes that add length at the outer corners, creating the illusion of a more almond-shaped eye. Almond eyes are naturally balanced and work well with most lash styles, your advantage is flexibility. Hooded eyes have a natural fold that covers part of the lash band; choose lashes with longer fibers that extend above the hood line and apply the band slightly higher. Monolid eyes lack a visible crease; lashes with varying fiber lengths create dimension and definition.
Customizing lash placement and volume
For everyday wear, choose lashes with moderate volume and length that blend naturally with your natural lashes. For special occasions, go bolder with maximum volume and length.
Volume customization depends on your natural lash density. If you have naturally sparse lashes, choose fuller false lashes. If you have naturally dense lashes, a moderate-volume false lash complements rather than overwhelms.
Placement customization involves adjusting where the lash band sits slightly. Moving it up or down by a millimeter changes how the lashes interact with your eye shape. Experiment within your first few applications to find the exact position that feels most comfortable and looks most natural.
Press-on lashes without glue work best when you understand the fundamentals: clean eyelids, precise placement, the right lash style for your eye shape, and safe removal. With the techniques covered here, you have everything you need to achieve salon-quality results at home, consistently.
Kyro Beauty's press-on lash kits come with all the tools you need, including the curved applicator and storage case, plus detailed guidance tailored to different eye shapes and preferences. The no-glue approach means faster application, zero chemical exposure, and the flexibility to wear and remove your lashes on your schedule. Shop the Kit to get started with a complete system designed for beginners and experienced users alike.
Frequently Asked Questions
Can I apply press-on lashes without glue?
Yes. Modern press-on lashes come in glue-free designs with pre-glued strips or adhesive bands built into the lash itself. These eliminate the need for separate lash adhesive and make application faster and safer. Simply clean your eyelid, position the lash band on your natural lash line, and apply gentle pressure for a few seconds. Pre-glued strips are reusable and work best when your lids are clean and dry.
How long do press-on lashes stay on without glue?
Glue-free press-on lashes typically last 6-12 hours with proper application, depending on your eyelid moisture, activity level, and sleep position. If you sleep face-down or have naturally oily skin, wear time may be shorter. To extend longevity, keep your lids clean and dry before application, avoid touching or rubbing your eyes, and store lashes properly after removal. Many users find they last through a full workday and evening.
Are press-on lashes damaging to natural lashes?
When applied and removed correctly, glue-free press-on lashes are gentler on natural lashes than traditional glued lashes. The key is using a soft touch during removal: gently peel the lash band away from your eye rather than pulling sharply. Avoid leaving lashes on for extended periods beyond their intended wear time. Allow your natural lashes to rest between applications. If you experience sensitivity or lash loss, test for allergies to any adhesive residue and give your lashes a break for a few days.
Do I need special skills to apply press-on lashes at home?
No special skills are required. Glue-free press-on lashes are designed for beginners. The most important steps are cleaning your eyelids thoroughly, positioning the lash band carefully along your natural lash line, and applying gentle, even pressure. Start with a lash style that matches your natural lash length and density. Practice your first application in good lighting, and you'll find it becomes quicker and easier each time.
This article was written using GrandRanker
