
How to Achieve Natural Lash Curl: A Complete Guide

Table of Contents
- Understanding Your Natural Lash Structure
- How to Use an Eyelash Curler Correctly
- Heated Eyelash Curler Benefits and Safety
- How Long Does a Lash Lift Last and Maintaining Results
- Natural Remedies and Oils for Lash Health
- Common Mistakes When Curling Lashes
- Troubleshooting Droopy Lashes and Curl Retention
- Frequently Asked Questions
Last Updated: August 16, 2026
Understanding Your Natural Lash Structure
Your eyelashes are complex structures with their own growth cycle and genetic blueprint. Each lash grows from a follicle at a specific angle determined largely by genetics, some people naturally have a c-curl (gentle curve), others an m-curl (pronounced), and many have straight lashes that resist curl. This curvature is influenced by follicle shape, strand thickness, and humidity.
Lash structure consists of three layers: the cuticle (outer protective layer), the cortex (middle layer containing proteins), and the medulla (inner core). When you apply heat or mechanical pressure, you temporarily alter the protein structure in the cortex, which is why curls don't last indefinitely. The lash gradually returns to its natural state as moisture breaks down the temporary curl.
Hair type matters significantly. Finer lashes hold curl more easily because they require less force to bend, while thicker, coarser lashes are naturally more resistant. If you have naturally straight lashes, you're fighting genetic programming, so your approach needs to account for this reality rather than expecting temporary results to perform like permanent ones.
How to Use an Eyelash Curler Correctly
The mechanical eyelash curler delivers immediate, visible results when used properly, but most people use them incorrectly, which is why curls drop within hours.
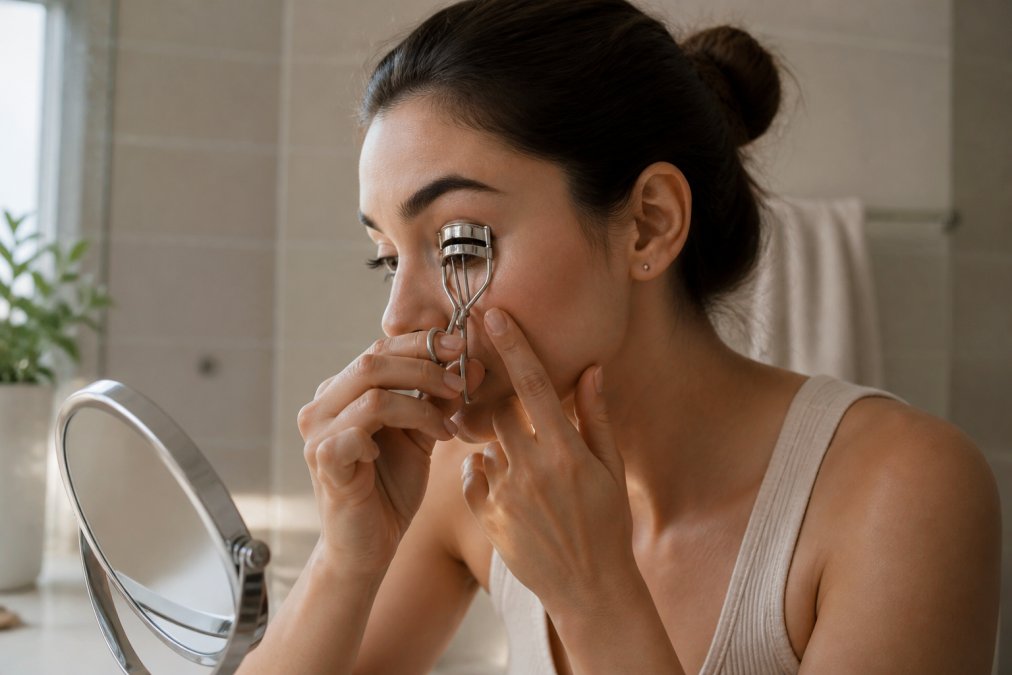
The key is positioning and pressure. Position the curler so the silicone pads sit at the very base of your lash line, where the lash emerges from the follicle. Close gently and hold for 5-10 seconds. Move the curler slightly higher and repeat, then do it once more at the tip. This three-step approach, base, middle, tip, creates a graduated curl that looks natural rather than a harsh crimp. Pressure should feel firm but never painful.
Temperature matters too. A room-temperature curler works, but warming it slightly under warm water before use helps the curl hold longer. The warmth temporarily softens the protein structure, making lashes more receptive to curl. Let it cool while in position, and the curl sets more effectively.
Choosing the Right Curler for Your Eye Shape
Your eye shape determines which curler will actually work for you. The curler's pad size and curvature need to match your eye's natural curve.
Round eyes with prominent lids need a curler with a gentler curve and wider, flatter pad. Almond-shaped eyes can typically handle more aggressive curves. Hooded or deeper-set eyes need a smaller curler that fits into the tighter space without hitting your eyelid.
Silicone pads are equally important. Worn or hardened pads don't grip evenly, crushing some lashes while barely bending others. Replace pads every 3-4 months, or if the rubber becomes stiff or shiny. Good silicone should be soft and slightly tacky.
The Pump Technique for Optimal Curl
The pump technique separates a professional-looking curl from a flattened mess. Instead of squeezing the curler shut and holding for 30 seconds, use gentle, rhythmic pumps, almost like pulsing the curler closed and slightly open repeatedly.
Start at the base and pump 3-4 times, holding each pump for about 2 seconds. Move to the mid-lash and repeat. Finish at the tip with 2-3 gentle pumps. This distributes pressure evenly and prevents the harsh, over-curled look. It also protects lash health, sustained pressure for 30 seconds can weaken the lash structure over time, especially with daily use.
Heated Eyelash Curler Benefits and Safety
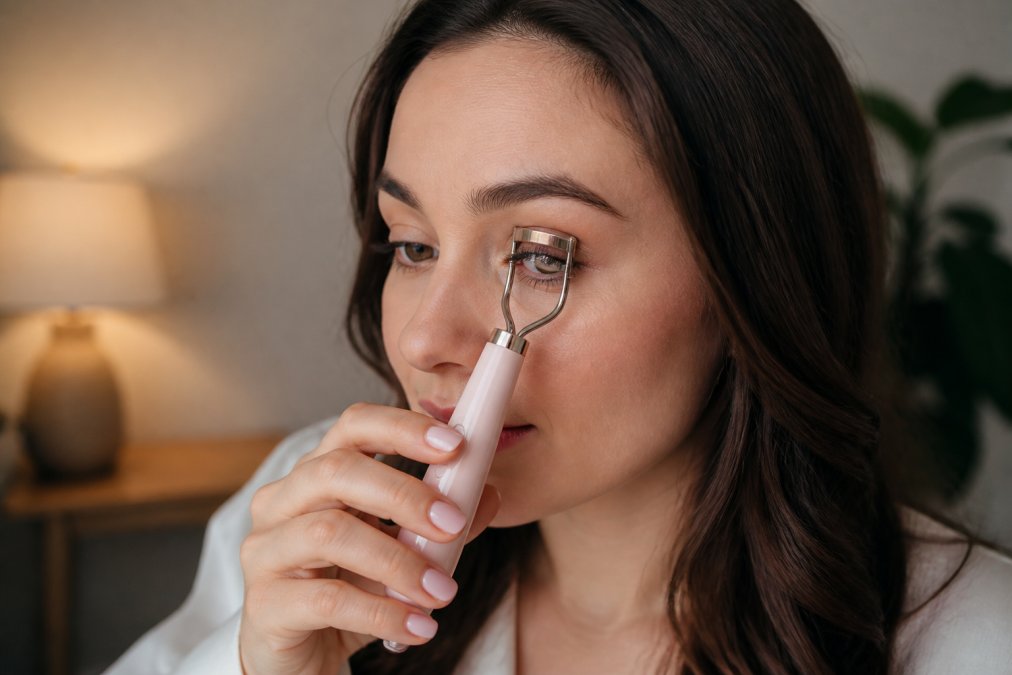
Heated eyelash curlers offer longer-lasting curl and a more polished finish. Heat temporarily softens the protein structure in your lashes, making them more receptive to curl, and helps set the curl more effectively as it cools.
Most heated curlers operate at 40-50°C, warm enough to be effective but cool enough to be safe when used correctly. A curl from a heated curler typically lasts 8-12 hours compared to 4-6 hours from a mechanical curler alone.
Always check the temperature before using it on your lashes. A quick test on your inner wrist tells you if it's too hot. Never leave the heated curler on your lashes for more than 10 seconds, and always use the device's built-in safety features, such as automatic shut-off timers.
If you have naturally moist eyes or live in a humid climate, the curl will fade faster because moisture breaks down the temporary protein bond. Heated curlers work better in drier climates and for people with naturally drier eyes.
Heated curlers are particularly valuable for stubborn, straight lashes. If your lashes naturally resist curl, the combination of gentle heat and pressure is more effective than mechanical pressure alone.
How Long Does a Lash Lift Last and Maintaining Results
A lash lift is a semi-permanent treatment that chemically processes your natural lashes into a lifted position. Unlike a mechanical curl that lasts hours, a lash lift typically lasts 6-8 weeks, the duration of your natural lash growth cycle.
A technician applies a chemical solution that breaks down the disulfide bonds in the lash protein. Your lashes are wrapped around a silicone pad or rod to set them in a lifted position while a fixing solution reforms those bonds in the new shape. The result is that your natural lashes maintain that lifted curve for weeks, even when you shower, exercise, or sleep.
Longevity depends on several factors. Fine lashes hold the lift longer because the chemical process affects them more thoroughly, while thick, coarse lashes sometimes resist the process and the lift fades faster. As new lashes grow in at the base, they emerge straight, so you'll notice the lift gradually fading over 6-8 weeks as more unlifted lashes replace the treated ones.
Humidity and moisture exposure affect how long a lift lasts. If you live in a very humid climate or spend significant time in water, the lift may fade faster because moisture weakens the chemical bonds. This is why lash technicians recommend avoiding water for the first 24-48 hours after a lift.
Professional vs. DIY Lash Lift Kits
Professional lash lifts are performed by trained technicians in a controlled environment with medical-grade chemical solutions, proper ventilation, and expertise to match chemical strength to your specific lash type. A professional lift is safer, more effective, and produces consistent results. The trade-off is cost and convenience.
DIY lash lift kits offer convenience and lower cost. These kits contain chemical solutions formulated for at-home use, typically gentler than professional-grade formulas. Results vary widely based on skill level and instruction adherence. If you apply the solution unevenly or leave it on too long, you risk damaging your lashes.
For people new to lash lifts, a professional treatment first is worth the investment. You'll see what a proper lift looks like, understand how long it lasts for your specific lash type, and get professional guidance on aftercare.
Natural Remedies and Oils for Lash Health
Your lash health directly impacts how well they hold curl. Healthy lashes are stronger, more resilient, and more responsive to curling treatments.
Castor oil is the most well-known natural remedy for lash health. It's rich in fatty acids and vitamin E, which nourish the lash follicle and strengthen individual strands. Apply castor oil to your lashes before bed with a clean spoolie brush. Over several weeks, you'll notice noticeably thicker, stronger lashes that hold curl better.
Coconut oil is heavier than castor oil and can feel greasy or cause irritation. Argan oil is lighter, making it a good option if you're concerned about heaviness. It contains antioxidants and vitamin E, supporting lash follicle health without greasiness.
Consistency is key with any oil treatment. Most people notice improvement after 4-6 weeks of nightly application. The goal is to strengthen lashes so they hold curl better when you use mechanical or heated curlers.
Common Mistakes When Curling Lashes
Most people make the same curling mistakes repeatedly. Recognizing these patterns helps you avoid them.
The first mistake is using a curler with worn-out pads. Worn silicone has hardened and grips unevenly, which can damage lashes by pinching some while barely bending others. Replace pads regularly.
The second mistake is curling wet or damp lashes. Your lashes are most vulnerable when wet because the protein structure is softened. Curling them in this state can cause permanent damage or breakage. Always curl dry lashes.
The third mistake is using too much pressure. Harder pressure doesn't equal better curl, it damages lashes and creates a harsh, fake-looking crimp. Gentle, consistent pressure with the pump technique is far more effective.
The fourth mistake is not replacing your curler. Even with new pads, a curler used for years loses its spring tension. A new curler costs very little and makes a noticeable difference.
The fifth mistake is curling the same lashes every single day without breaks. Curling 5 days a week instead of 7 significantly extends lash health and longevity.
Troubleshooting Droopy Lashes and Curl Retention
If your lashes won't hold curl, several factors could be at play.
First, assess your lash hair type. If you have naturally straight, thick lashes, a mechanical curler alone might not be strong enough. A heated curler is more effective. If even that doesn't work, a semi-permanent lash lift is the realistic solution.
Second, check your application technique. Many people aren't positioning the curler at the base of the lash, where the curl originates. Use the three-step approach: base, middle, tip.
Third, evaluate your lash health. Weak, damaged lashes won't hold curl because the protein structure is compromised. Use castor oil nightly for 4-6 weeks, reduce curling frequency, and avoid heat styling during recovery.
Fourth, consider environmental factors. High humidity, moisture exposure, and natural skin oils break down curl quickly. Accept that you might need to curl more frequently, or invest in a heated curler for longer-lasting results.
Fifth, examine your curler itself. An old curler with weak spring tension won't apply enough pressure to set a lasting curl. Replacing it might be the simplest fix.
Achieving a natural lash curl that lasts requires understanding your specific lash type, mastering the right technique, and maintaining lash health through consistent care. Whether you choose mechanical curling, heated tools, or semi-permanent lash lifts, the foundation is the same: work with your genetics, not against them, and prioritize lash strength over aggressive curling.
At Kyro Beauty, we understand that salon-quality lash enhancement doesn't require a salon visit. Our professional-grade lash kits are designed with the same principles in mind, gentle application, long-lasting results, and lash-safe formulations. Whether you're maintaining naturally curled lashes or preparing for a lash lift, our all-in-one kits support your lash health while delivering the polished look you want. Shop the Kit and experience how proper lash care transforms your everyday routine.
Frequently Asked Questions
Can you actually train your eyelashes to curl naturally?
Regular use of an eyelash curler or lash lift can help condition your lashes to hold a curl shape over time. Consistent gentle pressure at the base of the lash encourages the hair follicle to grow in a more curved pattern. However, your natural lash structure is largely determined by genetics. What you can do is maintain curl through proper technique, nourishing oils like castor oil, and avoiding practices that damage the lash structure, such as tugging or excessive heat.
What is the safest way to curl eyelashes daily?
Use a mechanical eyelash curler with silicone pads, applying gentle pressure for 2-3 seconds at the base, middle, and tip of the lash. Never force the curler or leave it clamped for more than a few seconds. If using heat-based curlers, ensure they're at a safe temperature and never hold them against the lash longer than recommended. Always remove makeup before curling, and condition your lashes daily with a nourishing serum to prevent breakage and maintain lash health.
How long does a professional lash lift last?
A professional lash lift typically lasts 6-8 weeks, depending on your natural lash growth cycle and how well you maintain them. The semi-permanent curl gradually relaxes as new lashes grow in and older ones shed naturally. DIY lash lift kits offer similar longevity when applied correctly, though results may vary based on your lash type and the specific product used. Proper aftercare, including gentle handling and moisture-rich serums, helps extend curl retention throughout the wearing period.
Do heated eyelash curlers provide better results than manual ones?
Heated eyelash curlers can set a curl more effectively than mechanical curlers alone, as gentle warmth helps the lash hold its shape longer. However, they carry a higher risk of heat damage if used incorrectly or too frequently. Manual curlers with proper pump technique deliver excellent results for daily use and are safer for sensitive eyes. Many people use both: a mechanical curler for daily shaping and a heated curler occasionally for enhanced, longer-lasting curl intensity. Choose based on your lash type and sensitivity.
