
Supercilium vs DIY Brow Lamination Kits

Table of Contents
- Supercilium vs DIY Brow Lamination Kits: Quick Comparison
- What Is Brow Lamination?
- How Does the Brow Lamination Process Work?
- Brow Lamination Processing Times Across Hair Types
- How to Use Brow Lamination Kits Safely
- Brow Lamination Aftercare Tips
- Professional Grade vs. DIY: What Actually Differs
- Supercilium for Beginners: Is It Realistic?
Last Updated: August 30, 2026
Supercilium vs DIY Brow Lamination Kits: Quick Comparison
When deciding between professional-grade brow lamination and DIY kits, the choice comes down to treatment count, cost per application, and whether you want salon-quality results at home. Supercilium dominates the professional market with up to 40 treatments per kit, while DIY kits like Kyro Beauty deliver multiple applications at a fraction of the upfront investment.
What Each Option Delivers
Supercilium's starter kit is built for professionals and freelance stylists treating multiple clients. It includes a 2-in-1 formula for brows and lashes, with solutions designed for durability across different hair types: relaxing solution, laminating compound, nourishing elixir, and bonding serum. Results last 4-8 weeks (peer-reviewed research).
Kyro Beauty's DIY kit is a 3-step system: perming solution, fixing agent, and nourishing mask. The vegan, cruelty-free formula is designed for at-home application with a beginner-friendly process. Results last up to 8 weeks.
The real difference: Supercilium assumes you're treating clients repeatedly. Kyro Beauty assumes you're treating yourself.
Pricing and Treatment Count
Supercilium's starter kit costs €166.00 (excluding VAT) and delivers approximately 40 treatments, roughly €4 per treatment. This is excellent value for salons or stylists treating clients regularly.
Kyro Beauty's kit includes multiple treatments. For personal use, Kyro Beauty's cost per application is higher in isolation, but you avoid professional-grade equipment and training investment. For salon owners treating clients regularly, Supercilium's per-treatment cost is unbeatable.
What Is Brow Lamination?
Brow lamination is a semi-permanent chemical treatment that straightens and lifts eyebrow hairs, creating a fuller, more defined appearance lasting 4-8 weeks. The process uses a keratin-based perming solution to restructure the hair cuticle, then a neutralizing lotion to set the new shape.
The result is groomed brows that lie flat and uniform, giving the appearance of denser, more sculpted brows. Dermatological research on chemical hair treatments shows that keratin-based formulations strengthen hair fibers when properly neutralized, reducing breakage. This is why aftercare matters, as the hair cuticle remains slightly more porous for 24-48 hours post-treatment.
How Does the Brow Lamination Process Work?
The brow lamination process follows a consistent three-phase sequence.
Phase one is the perming stage. A lifting solution containing alkaline compounds is applied to the brows for 10-15 minutes. This solution opens the hair cuticle and breaks down disulfide bonds, allowing the hair to be reshaped.
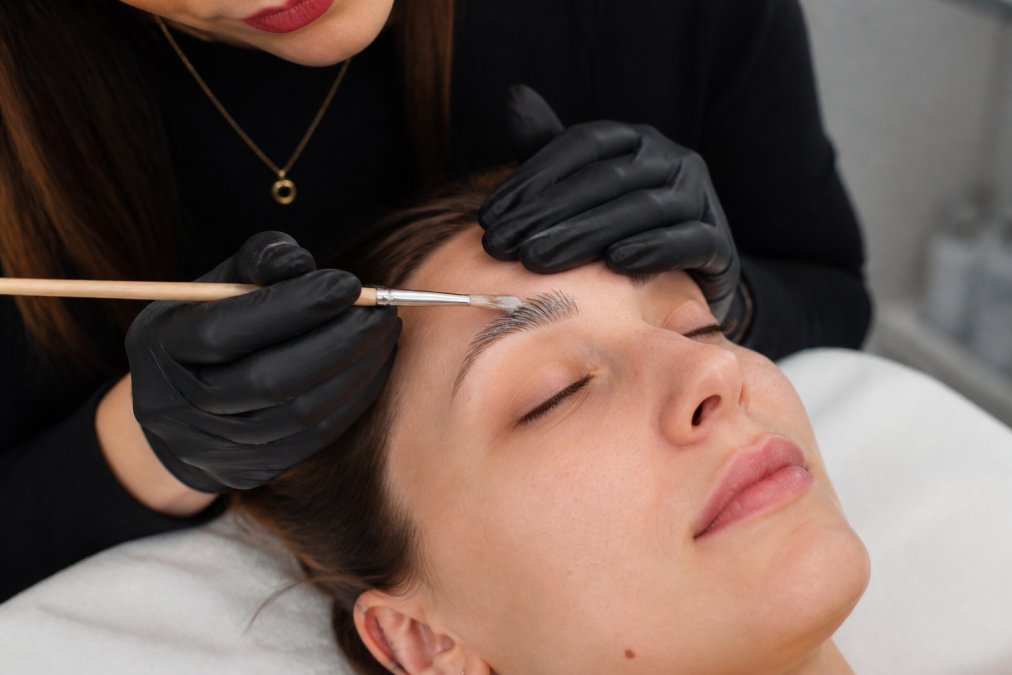
Phase two is the laminating stage. After rinsing, a laminating compound is brushed through the brows in the desired direction, typically upward and outward, and held for 5-10 minutes. This is where the visual transformation occurs.
Phase three is neutralization and nourishment. A neutralizing lotion stops the chemical process and closes the hair cuticle, locking in the new shape. A nourishing mask restores moisture and strengthens the hair, preventing brittleness and maintaining longevity.
The entire process typically takes 30-45 minutes. Supercilium's professional formula works efficiently across multiple sessions, while Kyro Beauty's DIY kit is formulated for single-user application with clear timing indicators.
Brow Lamination Processing Times Across Hair Types
Processing time varies significantly by hair texture, density, and pigmentation. Many DIY users apply the same timing to all hair types and end up with underprocessed or overprocessed results.
Fine or light-colored hair typically processes in 8-12 minutes. The thinner cuticle is more porous, so the alkaline solution penetrates quickly. Overprocessing causes breakage.
Medium-textured hair, the most common type, usually requires 12-15 minutes. This is the baseline most kits are formulated around.
Thick or coarse hair needs 15-20 minutes. The denser cuticle requires more time for the alkaline solution to penetrate fully. Rushing this step means the lift won't hold through the full 4-8 week cycle.
Supercilium's professional formulation includes guidance for adjusting processing times by hair type. Kyro Beauty's DIY kit provides a standard timing window, which works well for medium-texture hair but requires judgment otherwise. Hair type assessment before application takes 30 seconds and prevents most failures.
How to Use Brow Lamination Kits Safely
Safety starts before opening the kit. The alkaline compounds in brow lamination solutions are safe when used as directed, but they can cause irritation if they contact the eye or sit on skin longer than recommended.
Patch Testing and Chemical Sensitivity
A patch test is essential, especially if you have sensitive skin or a history of reactions to hair treatments. Perform the patch test 24-48 hours before application by applying a small amount of lifting solution to the inside of your elbow or behind your ear for the same duration you'll use during treatment (typically 12-15 minutes).
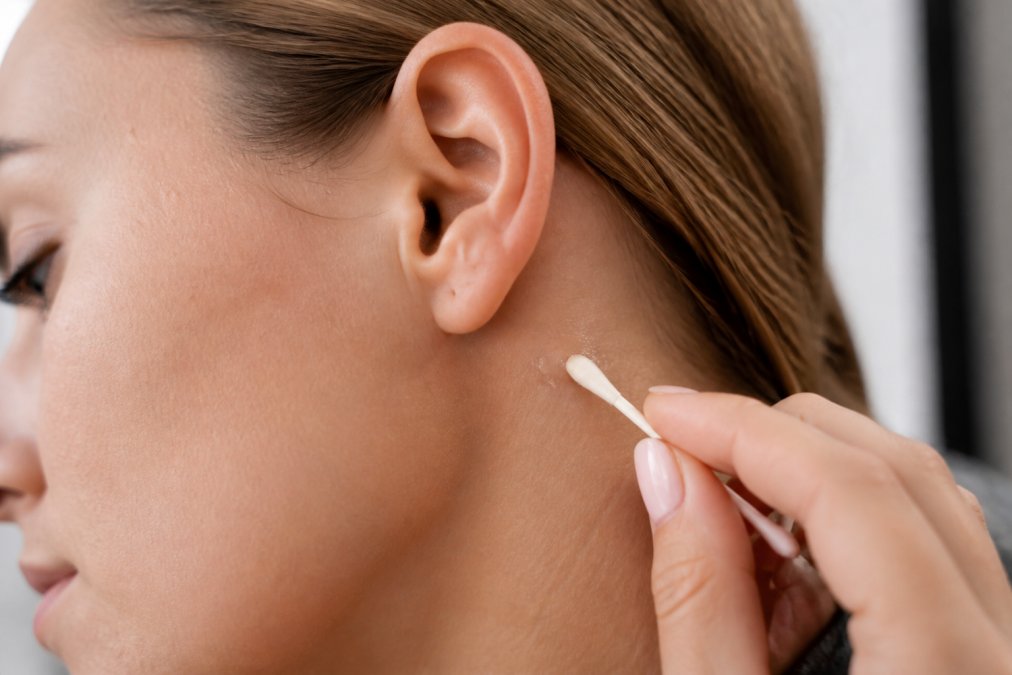
Watch for redness, itching, swelling, or burning sensation over the next 24 hours. If you experience any reaction, do not proceed. Kyro Beauty's formula is designed for sensitive eyes, but sensitivity varies individually.
Common Application Mistakes to Avoid
The most frequent mistake is uneven application. The lifting solution must contact every hair evenly, or results will be asymmetrical. Apply with a spoolie brush methodically from inner brow outward, using consistent pressure.
The second mistake is leaving the solution on too long. Overprocessed hair becomes brittle and breaks during combing. Set a timer and stick to it.
The third mistake is skipping the nourishing mask phase. This step closes the hair cuticle and restores moisture that the alkaline solution removed. Skipping it leads to dull, fragile brows within a week.
The fourth mistake is applying the laminating compound in the wrong direction. The laminate should follow your desired brow direction, typically upward and slightly outward for a lifted appearance.
Brow Lamination Aftercare Tips
The 24 hours after brow lamination are critical. Your hair cuticles are still settling, and the shape is stabilizing.
Avoid water contact for the first 24 hours, including washing your face or heavy sweating. Water rehydrates the hair cuticle before it's fully set, weakening the lamination's hold.
Skip makeup on the brows for at least 12 hours. Apply a nourishing oil or serum twice daily for the first week to maintain hydration.
Brush your brows gently in the desired direction every morning with a soft spoolie. This daily maintenance extends the lamination's visible lifespan from 4 weeks to 6-7 weeks.
Avoid harsh shampoos and hot water on your face for the first week. Use lukewarm water and gentle cleansers. By week two, your brows are fully set and you can return to your normal routine.
Professional Grade vs. DIY: What Actually Differs
Professional-grade kits like Supercilium and consumer DIY kits like Kyro Beauty differ in formulation strength, treatment count, and application guidance.
Professional-grade formulas are designed for efficiency across diverse hair types and multiple client sessions. Supercilium's relaxing solution is stronger and works faster, reducing processing time from 15+ minutes to 10-13 minutes. The neutralizing solution is also more potent, ensuring consistent results.
Consumer DIY kits use slightly gentler alkaline compounds and longer processing windows, giving you more margin for error. Professional formulas have narrower margins because stylists are trained to time precisely.
Supercilium includes solutions for combining brow lamination with lash lifting in a single session. DIY kits typically focus on brows alone.
The treatment count difference is significant: Supercilium delivers 40 treatments; Kyro Beauty delivers multiple treatments. This is a use-case difference, not a quality difference. Professionals buy in bulk and spread costs across clients.
The chemical mechanism is identical: both use keratin-based perming solutions, both require neutralization, and both produce semi-permanent results lasting 4-8 weeks. Where DIY kits sometimes fall short is consistency. A professional stylist applies lamination to hundreds of brows annually, developing muscle memory for even application. A DIY user does it once every 8 weeks.
Supercilium for Beginners: Is It Realistic?
Supercilium's starter kit is marketed toward professionals and salons, not individual consumers. The kit includes no instructional video, no beginner guidance, and no allowance for learning curves.
If you're a complete beginner considering Supercilium, you face three barriers. First, the €166 cost is a significant investment if you're unsure whether you'll use it. Second, the formulation is stronger and less forgiving than consumer kits. Third, you'll need to source application tools separately.
Kyro Beauty's DIY kit is explicitly designed for beginners. It includes step-by-step instructions, tutorial video access, reusable application tools, and a gentler formulation that tolerates minor timing variations. The price point makes trying it feel like a reasonable experiment.
If you're new to brow lamination, start with Kyro Beauty. The learning curve is gentler, the cost is lower, and the kit includes everything you need. Once you've done 2-3 applications, you can evaluate whether upgrading to a professional-grade kit makes sense.
Choosing between Supercilium and DIY brow lamination kits depends on whether you're treating yourself or running a salon. For personal use, Kyro Beauty's DIY kit delivers professional-grade results with a beginner-friendly process and realistic price point. The all-in-one formula, reusable tools, and tutorial support mean you can achieve salon-quality lifted brows at home without the learning curve professional kits demand. Consumer safety guidelines for at-home beauty treatments recommend starting with kits designed for individual use before investing in professional equipment. Shop the Kit and discover how simple brow lamination can be when it's designed with your needs in mind.
Frequently Asked Questions
Q: What's the real difference between Supercilium professional kits and at-home DIY brow lamination kits?
A: Supercilium kits are formulated for professional stylists and deliver up to 40 treatments per kit, making them cost-effective for salons. DIY kits like Kyro Beauty's offer multiple treatments designed for home users with simplified application steps. Professional kits contain stronger formulations and larger solution volumes, while DIY kits prioritise ease of use and safety for untrained hands. Both achieve semi-permanent results lasting 4-8 weeks, but professional kits require training for optimal results.
Q: Can I really achieve salon-quality brows at home with a DIY brow lamination kit?
A: Yes, but results depend on your application technique and hair type. DIY kits like Kyro Beauty include step-by-step guides and tutorial videos designed for beginners. The key is following instructions precisely, performing a patch test first, and timing each step correctly. Professional kits demand more experience. If your brows are naturally unruly or you have sensitive skin, starting with a DIY option lets you test the process without committing to professional training.
Q: What safety precautions matter most when using brow lamination kits at home?
A: Always perform a patch test 24-48 hours before full application to check for allergic reactions. Avoid contact with eyes and mucous membranes. Follow processing times exactly, leaving solutions on too long damages hair and skin. Use the application tools provided and wear gloves. If you have sensitive eyes or a history of reactions to beauty products, consult a dermatologist first. Never mix solutions or substitute ingredients. Stop immediately if you experience burning, redness, or swelling.
Q: How long does brow lamination actually last, and does the kit choice affect durability?
A: Both professional and DIY brow lamination kits deliver results lasting 4-8 weeks, depending on your hair growth cycle and aftercare. Processing time varies by hair type: fine hair may need 10-15 minutes, while coarse hair requires 20-30 minutes. Durability is similar between kit types if application is correct. What matters most is proper aftercare: avoiding water for 24 hours, using nourishing serums, and not brushing aggressively. Kyro Beauty kits include nourishing elixirs to extend results.
Q: What happens if my DIY brow lamination doesn't work the first time?
A: Results vary based on starting hair texture, application technique, and processing time. If your first attempt feels underprocessed, the effect will fade within 4-8 weeks and you can retry with adjusted timing. Never reapply immediately, wait at least 2 weeks to avoid hair damage. If you over-process (hair becomes too straight or brittle), use intensive conditioning treatments and let hair recover before retreating. Many users improve their technique on the second application. Kyro Beauty includes reusable tools and multiple treatments per kit for practice.
This article was written using GrandRanker
