
Do At-Home Lash Lifts Look Natural? A Complete Guide

Table of Contents
- What Is a Lash Lift and How Does It Work?
- Can At-Home Lash Lifts Look Natural?
- How to Do a Lash Lift at Home Safely
- Best Lash Lift Kits for Beginners
- How Long Do Lash Lifts Last?
- Lash Lift vs. Lash Extensions: Key Differences
- Lash Health and Aftercare
- Frequently Asked Questions
Last Updated: September 3, 2026
What Is a Lash Lift and How Does It Work?
A lash lift is a semi-permanent treatment that enhances your natural lashes by curling them from the root upward, creating the appearance of longer, more lifted lashes without extensions. The process uses a lifting solution, silicone rod, and neutralizing lotion to reshape the lash structure chemically. A trained technician applies the lifting solution to your lashes wrapped around a silicone rod, which breaks down the disulfide bonds in the keratin structure, allowing them to be reshaped. After processing, a neutralizing lotion locks the new curl into place, creating a lifted, open-eye effect that lasts several weeks.
The appeal is clear: salon-quality results without the commitment, cost, or maintenance of extensions. Your lashes look fuller and more defined, you can apply mascara for extra drama, and you don't need daily touch-ups.
Can At-Home Lash Lifts Look Natural?
Yes, at-home lash lifts can look completely natural if you understand the variables that determine success. The key difference between a natural-looking lift and an overdone one comes down to three factors: pad selection, processing time, and lash health.
A natural-looking lift enhances your eye shape without creating an artificial, over-processed appearance. This means choosing a silicone rod size that matches your lash length and desired curl intensity, not automatically reaching for the smallest pad.
Many people rush the application or leave the lifting solution on too long, creating a crispy, frizzy texture that looks damaged rather than enhanced. Under-processing leaves lashes barely lifted. The sweet spot requires precision and patience.
Healthy, undamaged lashes take a lift beautifully and hold the curl longer. Brittle, over-processed lashes may appear frizzy or uneven after lifting, compromising the entire result.
How to Do a Lash Lift at Home Safely
Performing a lash lift at home is achievable if you follow a structured process and respect the chemical nature of the treatment. Success depends on preparation, timing, and technique.
What You'll Need Before Starting
Gather all materials before beginning: the lash lift kit (lifting solution, neutralizing lotion, silicone pads in multiple sizes), tint if desired, petroleum jelly or protective barrier cream, microbrush applicator, timer, and lint-free wipes. Have everything within arm's reach before you start.
Prepare your work area with good lighting, natural daylight or a ring light works well. Wear gloves if your skin is sensitive, and have a patch test done 24 hours before your first application if you've never used these products.
Choose your silicone pad size before beginning. Hold each pad against your lash line and observe the curl it would create. The pad should sit comfortably without pulling or creating tension.
Step-by-Step Application Process
Step 1: Cleanse and Prime (5 minutes)
Start with a clean lash line free of makeup, oils, and debris. Use a gentle cleanser and pat dry completely. Apply a thin layer of petroleum jelly or protective barrier cream around your eye area to prevent the lifting solution from contacting your skin.
Step 2: Apply the Lifting Solution (2-3 minutes)
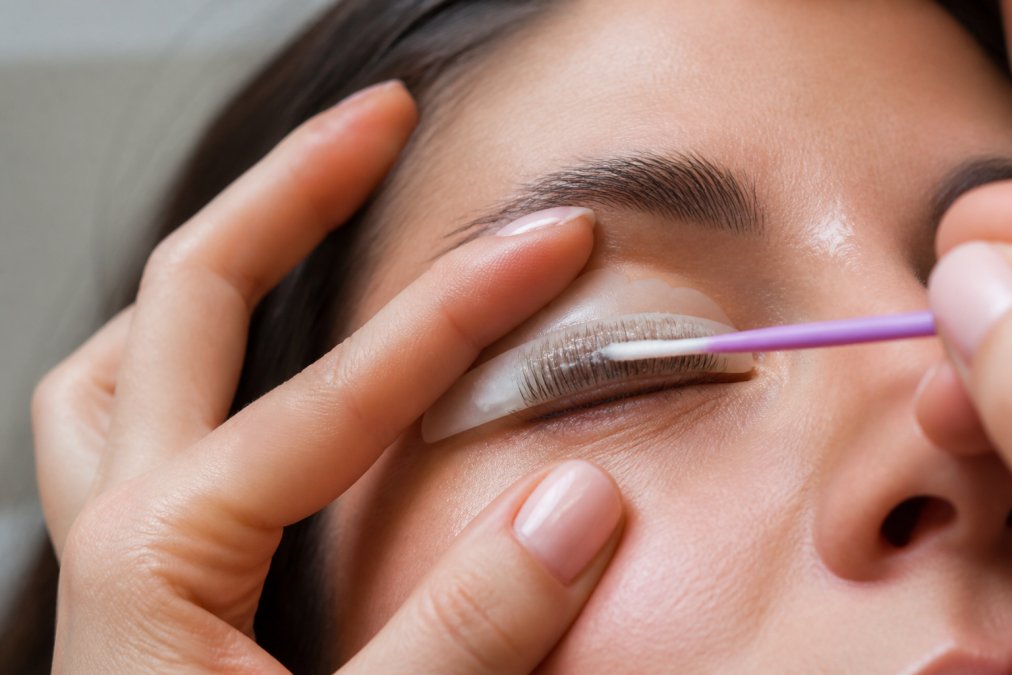
Using the microbrush provided, apply the lifting solution to your lashes, starting at the root and working toward the tip. Saturate the lashes thoroughly but avoid getting solution directly in your eye.
Step 3: Secure the Silicone Pad (1 minute)
Gently press the silicone pad against your upper eyelid, positioning it so your lashes wrap smoothly around it. Press down gently to ensure good contact.
Step 4: Process the Lifting Solution (8-12 minutes)
Set your timer. Processing time depends on your lash type: fine or thin lashes need 8-10 minutes, average lashes need 10-12 minutes, and very thick lashes may need up to 15 minutes (peer-reviewed research). Do not exceed the recommended time. Check your lashes at the halfway point by gently lifting a corner of the pad to see how the curl is developing.
Step 5: Remove the Lifting Solution (2-3 minutes)
Using a damp cotton pad, gently wipe away the lifting solution. Be thorough but gentle. The lashes should still be wrapped around the silicone pad.
Step 6: Apply the Neutralizing Lotion (5-8 minutes)
The neutralizing lotion locks the curl into place. Apply it generously to the lashes while they're still wrapped around the pad. Set a timer for 5-8 minutes depending on your product instructions.
Step 7: Remove the Pad and Finish (3-5 minutes)
Gently peel away the silicone pad. Your lashes should now be beautifully curled. Apply a conditioning serum or lash oil if your kit includes one.
Common Mistakes That Make Lash Lifts Look Unnatural
Choosing the wrong silicone pad size is the most frequent error. People often pick the smallest pad thinking it creates the most dramatic result, but this creates an overly tight curl that looks artificial and can stress your lash roots. Match the pad to your actual lash length.
Inconsistent application is another culprit. If you apply the lifting solution unevenly, you'll get patchy results where some lashes lift beautifully while others barely move.
Over-processing is the fastest way to destroy a lash lift's appearance. Leaving the lifting solution on longer than recommended creates brittle, frizzy lashes that look damaged. Set a timer and stick to it.
Skipping the patch test or neutralizing lotion step are safety mistakes that also create poor results. Without proper neutralization, your lashes gradually lose their curl and may become weak.
Best Lash Lift Kits for Beginners
When selecting a kit, prioritize safety, ease of use, and ingredient quality. Kyro Beauty offers professional-grade lash lifting kits designed specifically for at-home application, with clear instructions and all-in-one components. Their kits include multiple silicone pad sizes, allowing you to choose the right curl intensity for your lash type.
Look for kits that include detailed instructions with timing guides for different lash types. Some kits provide tinting solution, which darkens your lashes for additional definition. Check the ingredient list: products formulated to be gentle on sensitive eyes are worth the investment.
The best kits for beginners include everything you need in one package: lifting solution, neutralizing lotion, silicone pads in multiple sizes, applicators, and aftercare serum.
How Long Do Lash Lifts Last?
A professional or well-executed at-home lash lift typically lasts 6-8 weeks, aligning with your natural lash growth cycle (peer-reviewed research). Your lashes naturally shed and regrow continuously, and as new lashes emerge without the lift treatment, the overall effect gradually diminishes.
Proper aftercare extends the lifespan significantly. Avoiding oil-based products near the lash line, not rubbing your eyes excessively, and using a lash-nourishing serum all help maintain the curl longer. By week 4-5, you'll likely notice the curl relaxing slightly. By week 8, most people see enough regrowth that a refresh becomes desirable.
Lash Lift vs. Lash Extensions: Key Differences
A lash lift enhances your natural lashes by curling them. No synthetic fibers are added. Your lashes look fuller and more defined because the curl opens up your eye. You can still wear mascara if you want extra drama. Maintenance is minimal.
Lash extensions involve gluing individual synthetic lashes to your natural lashes, creating immediate fullness and length that a lift cannot match. Extensions require biweekly fills and careful handling to prevent damage.
A lash lift takes 30-45 minutes and costs less than extensions. Extensions take 2-3 hours and are more expensive, with ongoing fill costs. Extensions can cause traction alopecia (lash loss) if applied too heavily (the American Academy of Dermatology). A lash lift poses no such risk if done correctly.
Choose a lash lift if you want a natural-looking enhancement and minimal maintenance. Choose extensions if you want maximum drama and don't mind the cost and upkeep.
Lash Health and Aftercare
Proper aftercare directly impacts how long your lift lasts and whether your lashes remain healthy for future treatments.
For the first 24-48 hours after a lash lift, avoid water, steam, and moisture. The neutralizing lotion needs time to fully set the curl. After this window, you can resume normal activities, but continue to be mindful of your lash line. Avoid oil-based makeup removers and cleansers, as oils break down the lift. Use a gentle, water-based cleanser instead.
Apply a nourishing lash serum or oil 3-4 times per week to keep your lashes conditioned and prevent brittleness. Avoid waterproof mascara if possible, as it's harder to remove and can stress your lashes. Limit lash curler use, as your lashes are already curled and excessive curling can cause breakage.
If you notice lashes becoming brittle, breaking easily, or thinning noticeably, take a break from lash treatments and focus on conditioning and recovery.
At Kyro Beauty, we understand that achieving salon-quality results at home requires both the right tools and the right knowledge. Our professional-grade lash lifting kits are designed for beginners, with clear guidance on pad selection, processing times, and aftercare to help you achieve a natural-looking curl that lasts. When you do at-home lash lifts look natural? When you respect the process, choose the right silicone rod size, and follow proper aftercare. Shop the Kit and discover how simple it is to transform your lashes in under an hour.
Frequently Asked Questions
Q: Is it safe to perform a lash lift at home?
A: Yes, when you follow the instructions carefully and use a quality kit designed for at-home use. The key is doing a patch test 24 hours before application to check for sensitivity, avoiding contact with the lifting solution and neutralizing lotion, and using the correct processing time. Never rush the steps or leave products on longer than recommended. If you have very sensitive eyes or a history of chemical reactions, consult a dermatologist first.
Q: What are the common mistakes that make lash lifts look unnatural?
A: The biggest mistakes are choosing the wrong silicone rod size for your lash length, leaving the lifting solution on too long (causing over-processing and frizzy lashes), and applying the treatment unevenly. Improper pad placement also creates an uneven curl. Many people also skip the patch test and rush through application. The most natural results come from matching your pad size precisely to your lash length and following exact timing for each step. Taking your time during application is more important than speed.
Q: How long do lash lifts last when done at home?
A: At-home lash lifts typically last 6 to 8 weeks, though this depends on your natural lash growth cycle and how well you care for them. The lifting effect gradually fades as your lashes grow out and shed naturally. To extend the results, avoid rubbing your eyes, use a gentle cleanser, and apply lash serums or conditioning treatments. Sleeping on your back rather than your side can also help preserve the curl longer.
Q: Can I use a lash lift kit on sensitive eyes?
A: Many at-home lash lift kits are formulated to be gentle on sensitive eyes, but you must always do a patch test first. Apply a small amount of the lifting solution to your inner arm or behind your ear 24 hours before your full application to check for allergic reactions or irritation. If you have a history of chemical burns or severe eye sensitivity, start with a kit specifically labeled for sensitive skin and consider doing a test on just a few lashes first. Avoid getting any solution directly in your eye, and rinse thoroughly if contact occurs. If you experience redness, swelling, or burning during application, stop immediately and rinse with plenty of water.
This article was written using GrandRanker
