
Easy DIY Brow Lamination Tips: Step-by-Step Guide

Table of Contents
- What Is Brow Lamination and Why Try It at Home?
- What You'll Need: Tools and Supplies for DIY Brow Lamination
- Brow Lamination Safety Precautions and Patch Testing
- Step-by-Step Application Process for DIY Brow Lamination
- How Long Does Brow Lamination Last?
- Best Brow Lamination Kits for Home Use
- Aftercare Tips and Common Mistakes to Avoid
- Frequently Asked Questions
Last Updated: August 14, 2026
What Is Brow Lamination and Why Try It at Home?
Brow lamination is a chemical treatment that straightens and lifts eyebrow hairs to create a fuller, more groomed appearance. The process uses a lifting solution to relax the hair cuticle, allowing you to set brows in an upward position before neutralizing the chemical action. Unlike microblading or tinting alone, brow lamination works with your natural hair to reshape it semi-permanently.
At Kyro Beauty, we've noticed a surge in at-home brow lamination interest among busy professionals who want salon-quality results without the salon price tag or appointment scheduling. The appeal is straightforward: fluffy, lifted brows that stay shaped for weeks, achieved in under an hour from your bathroom.
But here's what matters: brow lamination is a chemical process that requires respect. The lifting solution has a specific pH balance designed to open the hair cuticle without causing damage. Get the timing or technique wrong, and you risk over-processing, which weakens the hair and can lead to breakage or irritation. The good news? At-home kits have improved dramatically, and the process itself is learnable. Thousands of people successfully laminate their brows at home every month. The key is understanding the chemistry, respecting the safety precautions, and following the steps precisely.
What You'll Need: Tools and Supplies for DIY Brow Lamination
A complete DIY brow lamination kit typically includes a lifting solution, a neutralizing lotion, brow adhesive, and a setting lotion. Some kits add a tinting option, though tinting is optional and separate from the lamination itself.
Beyond the kit, you'll need tools: a spoolie brush (a clean mascara wand works in a pinch, but a dedicated spoolie gives better control), a small mixing bowl or palette, a timer, and cotton pads or applicators.
Kyro Beauty's all-in-one kits are designed to eliminate guesswork, containing pre-measured solutions and including the spoolie and applicators you need. Using the wrong concentration of lifting solution or applying it with an unsuitable tool can cause uneven processing, which leads to patchy results or over-processing in certain areas.
Keep a mirror, good lighting (natural light or a bright LED lamp), and a clean towel nearby. A patch test kit or at least a small sample of the lifting solution is non-negotiable, you'll need this 24-48 hours before your full application to check for allergic reactions.
Brow Lamination Safety Precautions and Patch Testing
Always perform a patch test 24-48 hours before your first lamination. Apply a small amount of the lifting solution to the inside of your wrist or behind your ear. Wait 24-48 hours. If you see redness, swelling, itching, or any irritation, do not proceed with brow lamination. Brow lamination uses chemicals strong enough to alter hair structure, meaning they can cause allergic reactions or chemical burns if your skin is sensitive.
During application, avoid contact with the eyes and skin. The lifting solution should touch only the brow hair itself. If it drips onto the eyelid or sensitive skin near the eye, rinse immediately with cool water.
Never exceed the processing time listed in your kit. The lifting solution works on a timer. Leaving it on longer doesn't create better results; it causes over-processing, making brows brittle and prone to breakage. The neutralizing lotion is what stops the chemical reaction, so timing is everything.
Wear gloves during application to prevent accidental contact with your hands or face. Latex-free gloves are ideal if you have a latex sensitivity.
Ensure good ventilation by opening a window or using a fan. Keep the neutralizing lotion within arm's reach in case of unexpected irritation or solution in the eye.
Step-by-Step Application Process for DIY Brow Lamination
Step 1: Prepare Your Brows
Start with clean, dry brows. Wash your face with a gentle cleanser and pat dry completely. Any moisture or oil on the brow hair will interfere with how the lifting solution bonds to the hair cuticle.
Comb through your brows with your spoolie in the direction you want them to lay. If your brows are very long or unruly, trim any strays that extend beyond your natural brow line conservatively.
Apply a thin barrier of petroleum jelly or a protective balm around the brow area, along the top of the brow bone and below the brow line. This prevents the lifting solution from spreading to skin where you don't want it.
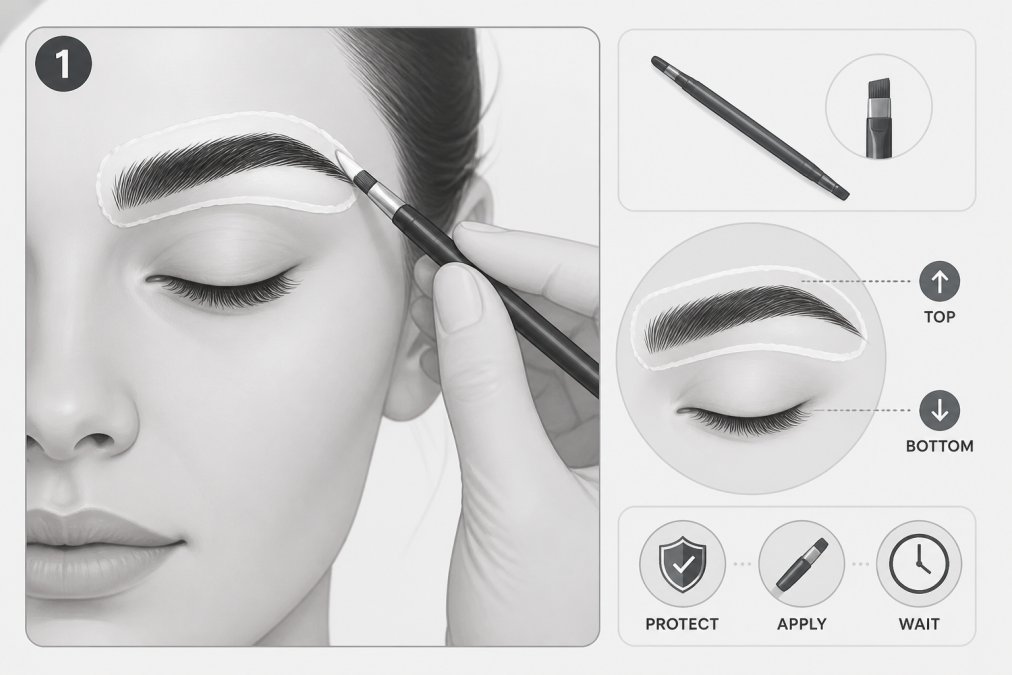
Step 2: Apply the Lifting Solution
Mix the lifting solution according to your kit's instructions, stirring thoroughly until you have a smooth, consistent paste. Lumps mean uneven application.
Using your spoolie, apply the lifting solution to the brow hair, starting at the inner brow and working toward the tail. Saturate the hair completely but avoid pooling solution on the skin.
Comb the brows upward into your desired shape while the solution is still wet. The lifting solution relaxes the hair cuticle, making it pliable for reshaping.
Set your timer for the processing time specified in your kit, most require 10-15 minutes. Do not guess or assume. While waiting, keep the area undisturbed.
Step 3: Set and Neutralize
When the timer goes off, rinse the lifting solution away with cool water using a gentle stream and clean cotton pad. Pat dry with a clean towel, excess water dilutes the neutralizing lotion and reduces its effectiveness.
Apply the neutralizing lotion according to your kit's instructions, saturating the brow hair completely. Comb the brows upward into your desired shape while the neutralizing lotion is wet.
Set your timer for the neutralizing time, typically 5-10 minutes. When the time is up, rinse thoroughly with cool water until no product remains.
Step 4: Apply Brow Adhesive and Shape
The brow adhesive holds the brows in their lifted position as they dry and set into their new shape.
Apply the adhesive to the brows using your spoolie, working from the inner brow outward. Comb the brows upward one final time, positioning them exactly where you want them to stay.
Hold the brows in position for 2-3 minutes while the adhesive sets. Some kits include a brow lift or mold to hold the shape hands-free.
Step 5: Tint (Optional) and Finish
Tinting is entirely optional. If you'd like darker or more defined brows, a brow tint can enhance the result.
Wait at least 24 hours after lamination before applying tint. Your hair cuticle has just been through a chemical process and needs time to fully close and stabilize.
Apply the tint according to the product instructions, usually leaving it on for 10-15 minutes. Rinse with cool water and pat dry.
How Long Does Brow Lamination Last?
Brow lamination typically lasts 6-8 weeks, though this varies based on your hair growth cycle, how well you follow aftercare, and the quality of the products used. Some people report results lasting up to 10 weeks; others see fading by week 5.
Your brow hairs grow on a natural cycle. As new hair grows in and old hair sheds, the laminated hairs gradually lose their set. The adhesive and neutralizing lotion don't permanently alter the hair structure; they reshape it temporarily. As the hair grows out, it reverts to its natural growth pattern.
This is actually an advantage. Unlike permanent treatments, brow lamination is reversible. To maximize longevity, follow the aftercare tips in the next section.
Best Brow Lamination Kits for Home Use
When choosing a DIY brow lamination kit, look for safety, ease of use, and consistent results.
Kyro Beauty's all-in-one kits are designed to eliminate guesswork, containing pre-measured solutions and including the spoolie and applicators you need.
When evaluating a kit, check whether it includes a patch test sample (non-negotiable), whether the instructions are detailed and clear, and whether the brand offers any guarantee or return policy.
Aftercare Tips and Common Mistakes to Avoid
Your lamination doesn't end when you finish the application. The first 48 hours are critical for setting the result.
Immediate aftercare (first 48 hours):
Avoid water on your brows for at least 24 hours, preferably 48. This means no washing your face directly over your brows, no swimming, no steam rooms. Water softens the adhesive and can cause the brows to lose their shape before the lamination fully sets.
Avoid oil-based products on or near the brows. Oils break down the adhesive and shorten the lamination's lifespan. Use water-based products only.
Don't brush or comb your brows aggressively. Sleep on your back or on a pillowcase that won't press against your brows.
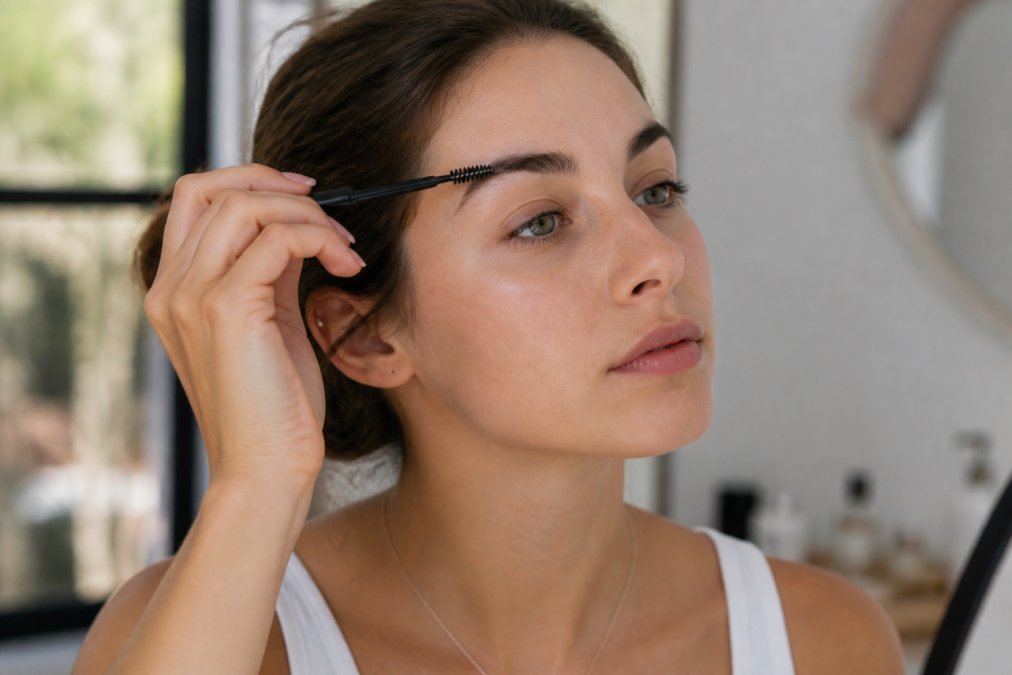
Ongoing aftercare (weeks 1-8):
Apply a hydrating serum or castor oil to your brows daily, starting from day 3 onward. Use a clean spoolie to apply the serum, combing it through gently. Hydrated hair holds its shape better than dry, brittle hair.
Comb your brows upward gently each morning and evening to reinforce the lifted shape. Avoid excessive heat near your brows, as hair dryers, saunas, and prolonged sun exposure can weaken the adhesive.
Common mistakes that ruin results:
Skipping the patch test causes allergic reactions or chemical burns. Over-processing by leaving the lifting solution on too long damages brows. Applying the lifting solution unevenly leads to patchy results. Washing your brows too soon causes you to lose the lamination. Using the wrong tools gives uneven application. Neglecting aftercare shortens how long your lamination lasts. Tinting too soon can cause uneven color and irritation.
The bottom line: DIY brow lamination is achievable for anyone willing to follow the process precisely.
Start with a reputable kit like Kyro Beauty's, which removes guesswork and includes everything you need. Follow the steps exactly, don't skip the patch test, and treat your brows gently during the critical first 48 hours. Done right, you'll have fluffy, lifted brows that last weeks and cost a fraction of what a salon charges.
Frequently Asked Questions
Can I really do DIY brow lamination myself without professional training?
Yes, DIY brow lamination is achievable for most people if you follow the steps carefully and patch test first. The process involves applying a lifting solution, neutralizing lotion, and brow adhesive in sequence. Start with a quality kit designed for home use, read all instructions thoroughly, and take your time with each step. Most users succeed on their first attempt when they follow the processing times exactly and avoid rushing through the application.
What are the main safety precautions I should take before starting DIY brow lamination?
Always perform a patch test 24-48 hours before full application to check for allergic reactions or skin sensitivity. Wear gloves when handling the lifting solution and neutralizing lotion. Avoid getting the products in your eyes; if contact occurs, rinse immediately with water. Work in a well-ventilated area, follow the exact processing times given in your kit, and never leave the lifting solution on longer than recommended, as over-processing can damage hair follicles and cause chemical irritation.
How long does DIY brow lamination typically last?
DIY brow lamination usually lasts 4-6 weeks, depending on your hair growth cycle and aftercare routine. The keratin treatment and shape gradually relax as new hair grows and natural oils return to the brow area. Proper hydration with castor oil or aloe vera, avoiding excessive exfoliation, and using a gentle spoolie for styling can extend the results toward the upper end of that range. Some users see results lasting up to 8 weeks with excellent maintenance.
Which brow lamination kits work best for home use?
Look for kits specifically designed for at-home application that include clear, easy-to-follow instructions, pre-measured solutions to avoid over-processing, and all necessary tools like applicators and spoolies. The best kits for home use feature gentle formulas suitable for sensitive skin, pH-balanced solutions that protect the hair cuticle, and include both lifting solution and neutralizing lotion. Kits with built-in safety guides and patch test instructions are ideal for beginners. Choose options from brands known for professional-grade results with user-friendly packaging.
This article was written using GrandRanker
