
How to Choose Press-On Lashes for Beginners: 2026 Guide

Table of Contents
- What You'll Need Before You Start
- Press-On Lashes vs Glue Lashes: Which Suits Beginners?
- Choosing Lash Styles for Eye Shapes
- How to Apply Press-On Lashes: Step-by-Step for Beginners
- Lash Mapping and Alignment for a Natural Look
- Maintenance, Removal, and Reusability
- Allergy and Sensitivity Testing for Press-On Lashes
- Conclusion
- Frequently Asked Questions
Last Updated: September 15, 2026
What You'll Need Before You Start
Choosing press-on lashes for beginners comes down to three things: the right format, the right style for your eye shape, and a clean, dry surface. Get those right and application takes minutes, not the twenty-minute glue battle most people remember.
This guide from Kyro Beauty walks through the full selection process, from reading a lash band to mapping clusters so they look natural rather than costume-like. The global false eyelash market is projected to reach $1.70 billion in 2026, according to Fortune Business Insights' false eyelashes market report, which tells you how many options now compete for your attention. Most of them are not beginner-friendly.
Here is what separates a good first pair from a frustrating one:
- Pre-bonded clusters rather than loose strips you glue yourself
- A flexible, thin lash band that follows the curve of your eyelid
- Short-to-medium lash length for daytime wear
- A pointed tweezer for placement accuracy
- Oil-free cleanser for removal
Press-On Lashes vs Glue Lashes: Which Suits Beginners?
Press-on lashes win for beginners, and it is not close. The pre-bonded, glue-free format removes the hardest variable in lash application: an even line of adhesive without clumping.
Traditional glue lashes require you to wait for the adhesive to turn tacky, position the strip before it sets, and correct mistakes within a narrow window. Miss it and you start over. Press-on clusters skip that entirely. Industry consensus identifies glue-free, pre-bonded clusters as the most forgiving and quickest option for novices aiming for a natural look (Hanadolly's guide to press-on lash formats).
| Feature | Press-On Lashes | Glue Lashes |
|---|---|---|
| Adhesive | Pre-applied, no glue | Separate lash glue |
| Application time | A few minutes | Longer, timing-dependent |
| Skill needed | Low | Moderate to high |
| Reusability | Several wears with care | Usually one to two wears |
| Best for | Beginners, travel, quick touch-ups | Full-strip dramatic looks |
One honest caveat: some users find self-adhering, pre-glued varieties harder to remove than traditional strip lashes (Who What Wear on press-on lash removal). That is a technique problem, not a product flaw, and the removal section below covers it properly.
Choosing Lash Styles for Eye Shapes
Eye shape is the primary selection criterion for press-on lashes, ahead of colour, length, or brand. The inner corner, centre, and outer corner all read differently, so a style that flatters one shape can close off another.
A lash cluster adds visual weight wherever you place it. Put weight where the lid is already heavy and the eye closes down; put weight where the lid is open and the eye lifts. The same set can look elegant on one person and heavy on another, the variable is where the length lands.
A useful starting reference for beginners, measured in millimetres from the lash line:
| Eye shape | Inner corner | Centre | Outer third | Outer corner | Curl |
|---|---|---|---|---|---|
| Hooded | 6-7 mm | 9-10 mm | 10-11 mm | 8-9 mm | C or CC, lifted |
| Monolid | 6-7 mm | 8-9 mm | 10-12 mm | 9-10 mm | C or D, strong |
| Round | 7-8 mm | 8-9 mm | 10-11 mm | 9-10 mm | CC, winged |
| Almond | 7-8 mm | 9-10 mm | 10-11 mm | 9-10 mm | C, balanced |
| Downturned | 6-7 mm | 8-9 mm | 10-11 mm | 11-12 mm | CC or D, lifted |
Treat the numbers as a starting point, not a prescription: 10 mm may be dramatic on short lashes and subtle on long ones.
Hooded Eyes
Hooded eyes have a fold of skin covering part of the mobile lid, and heavy, dense lashes disappear into it. Choose a lifted curl with the longest clusters at the centre and outer third, keep the inner corner short, and leave small gaps so the lid shows through.
Monolid Eyes
Monolid eyes have little or no visible crease, so straight, flat styles vanish against the lid. A strong C or D curl with graduated length from inner to outer corner creates visible lift; avoid uniform-length strips, which flatten the eye. With no crease to catch shadow, the lash line does the framing, so a slightly denser outer third reads as more defined.
Round Eyes
Round eyes suit winged styles that elongate horizontally: keep the centre short and build longer clusters toward the outer corner. The goal is horizontal length, not vertical height, a high curl with even length makes the eye look rounder, not larger.
Almond Eyes
Almond eyes are the most forgiving shape and carry almost any mapping. The natural version keeps length close to even across the centre and outer third with a gentle taper at both ends; for more drama, extend the outer third by one length rather than increasing the curl.
Downturned Eyes
Downturned eyes slope downward at the outer corner, and placing the longest lashes at the very edge exaggerates that line. Instead, place the longest cluster slightly before the outer corner, angle it upward, then step back down at the edge. A CC or D curl physically lifts the lash direction.
Asymmetrical Eyes
Most faces are not perfectly symmetrical, and beginners often notice this only once lashes are on. Map each eye separately rather than mirroring one set onto both: if one eye is more hooded or sits lower, use a slightly shorter centre cluster and a slightly longer outer third on that side. Differing by one length is normal.
How to Apply Press-On Lashes: Step-by-Step for Beginners
Applying press-on lashes takes about five minutes once you have the sequence down. Order matters more than speed.
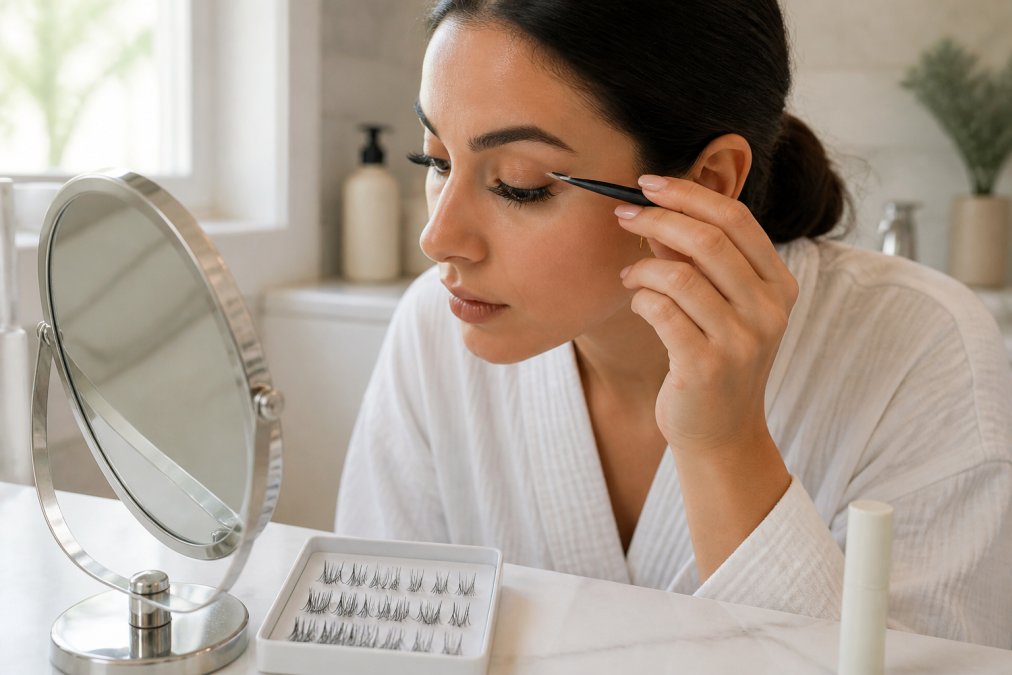
- Cleanse the lash line. Remove all oil, moisturiser, and makeup. Adhesive will not hold on a slick surface.
- Curl your natural lashes. A light curl blends your own lashes with the cluster and hides the band.
- Map the placement. Lay clusters along the lash line without pressing to check the spacing.
- Start at the outer corner. Place your longest cluster first, angled slightly upward.
- Work inward. Add shorter clusters toward the inner corner, overlapping slightly.
- Press and hold. Apply gentle pressure for a few seconds along the band.
- Check alignment. Look straight ahead in a mirror and adjust any cluster sitting low.
Expected result: a lash line that follows your natural eye contour with no visible gaps and no heaviness at the inner corner.
Lash Mapping and Alignment for a Natural Look
The four zones and what each one does
Why the step-down matters
Mapping for your specific eye shape
A dry-run method that saves wasted clusters
Alignment checks after application
Maintenance, Removal, and Reusability
Allergy and Sensitivity Testing for Press-On Lashes
Conclusion
Frequently Asked Questions
Which lashes are best for beginners?
Pre-bonded, glue-free press-on clusters are the most forgiving option for beginners. Industry consensus in 2026 identifies them as the quickest and easiest way to achieve a natural look without the mess of traditional lash glue. Major beauty publications now evaluate lashes on ease of application, weight, wear, and appearance, and press-on styles consistently score highest on ease for novices. Look for lightweight clusters with a flexible lash band, and start with shorter lengths before experimenting with volume or dramatic curl.
How do I know which lash style suits my eye shape?
Eye shape is the primary selection criterion. Almond eyes suit most styles, while round eyes benefit from winged styles that elongate the eye. For hooded eyes, choose a curl that opens the eye rather than weighs it down. Monolid eyes work well with a curl that adds lift at the outer corner. Experts recommend mapping lashes before application and placing shorter segments at the outer corners for the most natural result. Trying a few styles in different lengths is the fastest way to find your match.
Are press-on lashes safe for sensitive eyes?
Press-on lashes that skip traditional lash glue are generally gentler because there is no wet adhesive near the lash line. If you have had reactions to lash glue before, look for brands that state their products are gentle on sensitive eyes and check for reviews from users with similar concerns. Always do a patch test on your inner wrist 24 hours before full application. Remove lashes gently and never pull at the lash line to avoid irritation or damage to natural lashes.
How long do press-on lashes typically last?
Wear time depends on the product, your natural lash density, and how well you prep your lash line. Pre-bonded clusters are designed for single-day or multi-day wear, and shower-proof formulas hold up through humidity and daily routines. To extend longevity, clean your natural lashes before application, avoid oil-based products near the eyes, and store reusable clusters in their tray. Some press-on styles can be worn several times if removed carefully and kept free of makeup residue.
