
How to Prevent Nail Damage From At-Home Kits

Table of Contents
- Why At-Home Gel Manicures Cause Nail Damage
- At-Home Gel Nail Kit Safety: What to Check Before You Start
- Step-by-Step: How to Apply Gel Polish Without Damaging Nails
- How to Remove Gel Polish Without Damaging Nails
- At-Home Gel Manicure Mistakes That Weaken Natural Nails
- How to Repair Damaged Nails at Home
- When to See a Professional or Doctor About Nail Damage
- Conclusion: A Damage-Prevention Routine Between Manicures
- Frequently Asked Questions
Last Updated: October 4, 2026
Why At-Home Gel Manicures Cause Nail Damage
At-home gel kits promise salon results for a fraction of the cost. A review published in "Nail health in women" warns that UV-light gel kits can pose a real health threat when they are unregulated and used by untrained people, citing Gatica-Ortega et al. (2018).
That finding flips the usual assumption on its head. "It's just a home kit" does not mean "it's automatically safe."
The damage usually comes from three places: rough filing that thins the nail plate, gel that never fully cures, and removal that rips layers off the nail. Each one is preventable with better technique.
At-Home Gel Nail Kit Safety: What to Check Before You Start
At-home gel nail kit safety starts before you open the box. The first thing to check is whether the kit gives you clear, written instructions for the lamp and the gel together.
Look for these basics:
- A lamp matched to the gel, with a stated cure time
- Ingredient lists on every bottle
- A warning about skin contact and allergic reactions
- Clear soak-off removal steps
- A note on how often to take a break
If a kit skips any of these, treat that as a red flag. Untrained use of unregulated kits is exactly the combination the PMC review flags as risky. Cheap kits often cut corners on cure times, and that is where undercured gel and lifting begin.
Step-by-Step: How to Apply Gel Polish Without Damaging Nails
Good gel application is mostly about being gentle. Most nail damage happens in the prep and removal stages, not the colour itself. But there is a second, quieter cause that competitors rarely explain: gel that looks cured but is not. The steps below cover both.
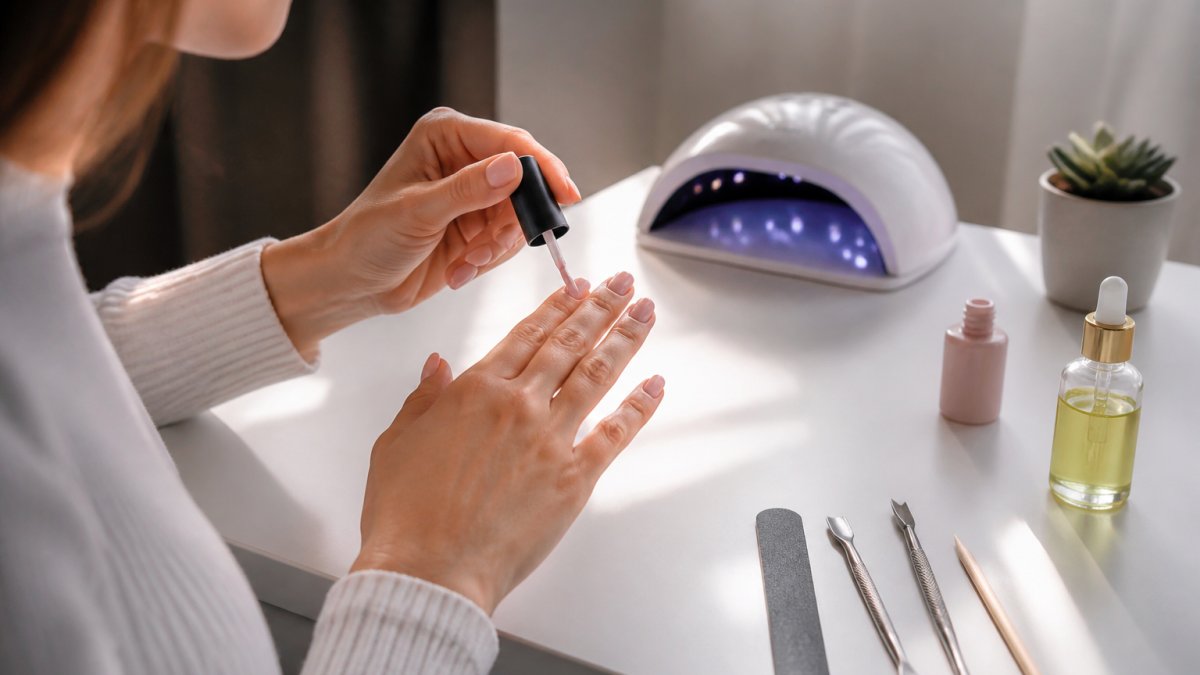
Nail Preparation and Avoiding Over-Filing
Nail preparation sets the tone for everything that follows. The goal is a clean, dry surface, not a scuffed one.
A common mistake is over-filing or over-sanding the nail plate to make gel stick. This thins the nail and leaves it weak and prone to breakage. The nail plate is only a few tenths of a millimetre thick on most fingers, so a few passes with a coarse grit removes a meaningful share of it.
Do this instead:
- Clean nails with soap and water, then dry fully. Any oil left on the plate stops the gel bonding.
- Push back cuticles gently with a cuticle stick or pusher. Never cut them, the cuticle is a seal, and breaking it opens a route for infection.
- Lightly buff the shine off the surface only, using a fine-grit buffer rather than a coarse file.
- Wipe with a lint-free pad to remove dust and oil. A quick swipe with a prep or cleanser solution is better than water alone.
- Keep the file away from the nail plate edge and never file back and forth across the surface.
Stop the moment the surface looks matte. That is enough grip for the gel. If you can see ridges or the nail feels warm, you have gone too far.
Curing Gel Polish Properly: Lamp and Gel Compatibility
Curing gel polish properly comes down to one rule: the lamp and the gel must be made for each other.
Here is the mechanism. Gel polish contains photoinitiators, molecules that only start the hardening reaction when they absorb light at a specific wavelength.
That soft underlayer is why gel lifts at the edges within days, and why uncured gel touching the skin can sensitise you over time.
Follow these steps:
- Read the gel's stated cure time and lamp type, and use the lamp the manufacturer specifies. If the kit does not state a cure time, treat that as a red flag.
- Cure each coat for the full stated time, not a guess, and not a shortened time because the polish looks set.
- Keep fingers flat and still under the lamp. Moving them mid-cure is a common cause of patchy hardening.
- Cure the thumb separately. On most lamps the thumb sits at the edge of the light field and receives less energy than the other fingers.
- Wipe the tacky layer only after full curing. The dispersion layer is normal; wiping it early does not fix an undercured coat.
A practical check: after curing, press a fingernail into the surface. If it dents or smudges, the coat is not fully cured. Cure it again for the full time.
How to Remove Gel Polish Without Damaging Nails
The safe way to remove gel polish is to soak it off, never to pick or peel it. Picking lifts layers of the nail plate with the polish, and that is how nails become thin and brittle.
Here is the soak-off method:
- File the top coat to break the seal.
- Soak a cotton pad in acetone.
- Place the pad on the nail and wrap with foil.
- Wait 10 to 15 minutes without rushing.
- Gently push off softened gel with a cuticle stick.
- Never scrape or force gel that has not softened.
If the gel will not budge, re-wrap and wait longer. Forcing it means damage.
At-Home Gel Manicure Mistakes That Weaken Natural Nails
At-home gel manicure mistakes tend to repeat. Most people make the same handful, and each one chips away at nail health.
The biggest offenders:
- Peeling or picking polish instead of soaking it off
- Over-filing the nail plate before application
- Using a lamp that does not match the gel
- Skipping cuticle oil and moisturising
- Applying gel to the skin around the nail
- Never giving nails a break between sets
Skin contact is worth calling out on its own. Gel that touches the skin can trigger an allergic reaction over time, and repeated exposure makes it worse. Keep polish on the nail only.
How to Repair Damaged Nails at Home
Repairing damaged nails at home is about patience, not products. Nails grow slowly, so recovery takes time and consistency.
Start with the basics:
- Keep nails short while they recover.
- Moisturise daily with cuticle oil.
- Avoid acetone until nails feel stronger.
- Skip gel and polish for a few weeks.
- Wear gloves for cleaning and washing up.
Brittle nails, peeling nails, and nail breakage all improve when you stop the habits that caused them. A short break between manicures gives the nail plate room to recover.
When to See a Professional or Doctor About Nail Damage
Most nail complaints after at-home gel use are cosmetic and settle on their own once you stop the habits causing them. A smaller number are not, and the difference matters. This section is a triage guide: what you can manage at home, what needs a professional, and what needs a doctor.
Signs you can manage at home
- Dryness, flaking, or white patches on the surface after removal
- Peeling at the free edge that improves as the nail grows out
- Slight thinning or flexibility after several back-to-back gel sets
- Mild tenderness around the cuticle that fades within a day or two of stopping gel
For these, the fix is usually a break from gel, daily cuticle oil, and keeping nails short while they recover. If it improves over two to three weeks, you are on the right track.
Signs that need a professional nail technician
- Gel that will not soak off after a full 15 minutes under wraps
- A lifted or partially detached enhancement you cannot remove safely
- A nail that has split or torn and needs careful shaping
- Repeated lifting at the same spot, which usually points to a lamp or prep problem rather than the nail itself
A technician can remove stubborn product without scraping the plate. Do not try to force it off yourself, that is how nails get thinned.
Signs that need a doctor
See a doctor rather than a salon if you notice any of the following:
- Redness, swelling, itching, or a rash around the nails or on the fingertips, these are the classic signs of an allergic reaction to uncured gel, and repeated exposure makes them worse, not better.
- Pain that persists after the gel is removed, or pain that is worsening rather than settling.
- Discolouration that does not grow out, yellow, green, brown, or black patches, especially if the nail is also thickened or crumbling.
- The nail lifting from the nail bed without trauma, or a nail that is loose.
- Signs of infection: warmth, pus, a bad smell, or spreading redness into the finger.
- Any change that has not improved after several weeks of careful home care.
What to tell a professional
Whoever you see, bring specifics: which products you used, how long each set stayed on, whether you cured with the lamp supplied in the kit, and when the symptoms started. That detail is what lets a technician or doctor tell the difference between a technique problem, a product reaction, and something that needs separate treatment.
Conclusion: A Damage-Prevention Routine Between Manicures
A damage-prevention routine between manicures is what keeps natural nails strong. Use this simple table to stay on track:
| When | Action | Why It Helps |
|---|---|---|
| Daily | Apply cuticle oil | Keeps nails flexible |
| After washing | Moisturise hands | Prevents dryness |
| Every 2-3 weeks | Take a gel break | Lets nails recover |
| Before gel | Light buff only | Avoids over-filing |
| At removal | Soak, never pick | Protects the nail plate |
Frequently Asked Questions
Are at-home gel kits safe?
They can be safe when you follow product instructions and use proper technique. A review in PMC's "Nail health in women" warns that UV-light gel kits pose a health threat when they are unregulated and used by untrained people, citing Gatica-Ortega et al. (2018). Choose kits with clear curing instructions, avoid skin contact with gel, and never peel polish off. If you notice irritation or a rash, stop using the kit and seek advice.
How should I remove gel polish without damaging my nails?
File the top layer lightly, soak a cotton pad in acetone, place it on the nail, and wrap with foil for 10 to 15 minutes. Gently push away softened gel with a cuticle stick. Never scrape or pick at polish that has not fully softened, as this removes layers of the nail plate and causes peeling and breakage. Follow with cuticle oil to restore moisture.
How long should you wait between gel manicures?
Give natural nails a break of at least one to two weeks between gel manicures. This allows the nail plate to recover from filing and acetone exposure. During the break, keep nails short, moisturise daily with cuticle oil, and avoid using them as tools. If nails feel weak or look thin, extend the break until they grow out stronger.
Can gel nail polish damage your natural nails?
Gel polish itself does not damage nails, but the application and removal process can. Over-filing, peeling polish off, and leaving undercured gel on the nail plate are common causes of thinning, peeling, and breakage. Proper technique and breaks prevent this.
Nail damage from at-home kits is almost always a technique problem, not a product problem. Fix your prep, curing, and removal, and your nails will thank you. At Kyro Beauty, we build beauty kits that make safe, simple routines easier, with gentle formulas and clear steps so you can care for your nails and your look without guesswork. Explore our all-in-one kits and bundle options to get salon-quality results at home. Shop the Kit and start your damage-free routine today.
