
Is At-Home Brow Lamination Worth It? An Honest Review

Table of Contents
- At-Home vs. Salon Brow Lamination: The Real Cost Difference
- How We Tested and Evaluated the Kits
- The Best At-Home Brow Lamination Kits Compared
- How Long Does Brow Lamination Last at Home?
- Understanding Brow Lamination Side Effects and Risks
- Step-by-Step: How to Laminate Your Brows Safely at Home
- Crucial Brow Lamination Aftercare Tips for Long-Lasting Results
- The Verdict: Is It Worth It for You?
- Frequently Asked Questions
Last Updated: September 6, 2026
The promise is tempting: spend a fraction of a salon visit and walk away with the same fluffy, brushed-up brows you see all over social media. At-home brow lamination kits promise salon-quality results for a fraction of the price, but the reality is more nuanced. The honest answer to whether at-home brow lamination is worth it depends entirely on your skill level, your brow hair texture, and how much risk you are willing to accept when applying chemical processing near your eyes. We break down the real costs, the actual risks, and the step-by-step process so you can decide if the DIY route is a smart save or a costly mistake.
Most guides treat this as a simple money-saving hack. The truth is that brow lamination is a chemical treatment that reshapes the brow hair structure, and doing it wrong can lead to over-processing, brittle hair, or even a chemical burn. Below, we will show you exactly what the results actually look like, and the specific safety protocols you must follow to avoid damaging your brows or the skin around them.
At-Home vs. Salon Brow Lamination: The Real Cost Difference
The cost gap between a salon appointment and a DIY kit is the single biggest reason people search for at-home brow lamination in the first place. A professional brow lift typically costs between EUR 40 and EUR 70 per session, and because the results fade as your hair growth cycle turns over, most people book again every six to eight weeks. That recurring expense adds up quickly over a year.
A single-use or multi-use kit, by contrast, costs between EUR 18 and EUR 55 and includes enough product for several treatments. The math is compelling on paper, but the comparison misses what you are actually paying for at a salon: a trained professional who has performed the procedure hundreds of times, knows exactly how long to leave the setting lotion on your specific brow hair texture, and can troubleshoot problems before they become damage.
What most cost comparisons ignore is the failure rate. If you over-process your brows at home and end up with brittle hair or patchy results, the corrective salon visit will cost more than you saved. The real question is not whether the kit is cheaper, but whether you can execute it safely enough to avoid needing a professional fix.
How We Tested and Evaluated the Kits
The Best At-Home Brow Lamination Kits Compared
| Kit |
|---|
| Kyro Beauty Brow Kit |
| Mylee The Brow Wow |
| RefectoCil Brow Lamination Kit |
| Fleeky Browlift Kit |
| Iconsign Brow Lamination Kit |
Our Top Pick for Beginners
For most people, the safest entry point into at-home brow lamination is a kit that prioritizes clear instruction and gentle formulas over raw lifting power. A good kit balances professional-grade results with a formula gentle enough for sensitive eyes, and it includes everything you need for shaping and tinting in one box. The application process should be designed to be forgiving, which matters when you are learning to judge processing time by feel rather than experience.
The Premium Option for Hair Health
The Budget-Friendly Kit
How Long Does Brow Lamination Last at Home?
At-home brow lamination results typically last between four and six weeks, though some kits claim up to eight weeks with strict aftercare (healthline.com). The duration depends less on the kit and more on your brow hair texture and your hair growth cycle. Coarse, thick hairs hold the lift longer, while fine, sparse hairs tend to relax back to their natural position sooner.
The chemical processing breaks and reforms the disulfide bonds in the hair, which is why the results are not permanent. As new hairs grow in at the root, they revert to their natural direction, creating the "regrowth" look that signals it is time for a touch-up. Most people find the lift looks best in the first two to three weeks and gradually softens after that.
guidance on hair care notes that any chemical treatment alters the hair shaft, and the new growth is completely untreated, which is why the effect fades as the hair cycle progresses.
Understanding Brow Lamination Side Effects and Risks
Brow lamination side effects range from mild irritation to serious chemical burns, and the risk increases significantly when the procedure is done by an untrained hand. The most common issues are skin sensitivity, redness, and a tingling sensation during processing. More serious problems include over-processing, which leaves the brow hair brittle and prone to breakage, and chemical burns if the lifting solution contacts the skin for too long.
A patch test is not optional. It is the only way to know whether your skin will react to the chemical processing before you apply the product across your entire brow area. Apply a small amount of the lifting solution behind your ear or on your inner arm 24 to 48 hours before your planned treatment. If you experience any redness, itching, or burning, do not proceed with the lamination.
Step-by-Step: How to Laminate Your Brows Safely at Home
Performing at-home brow lamination safely requires patience, precision, and a clean workspace. Rushing any step increases the risk of over-processing or uneven results. Set aside 45 to 60 minutes where you will not be interrupted, and read the entire instruction manual before you open any product.
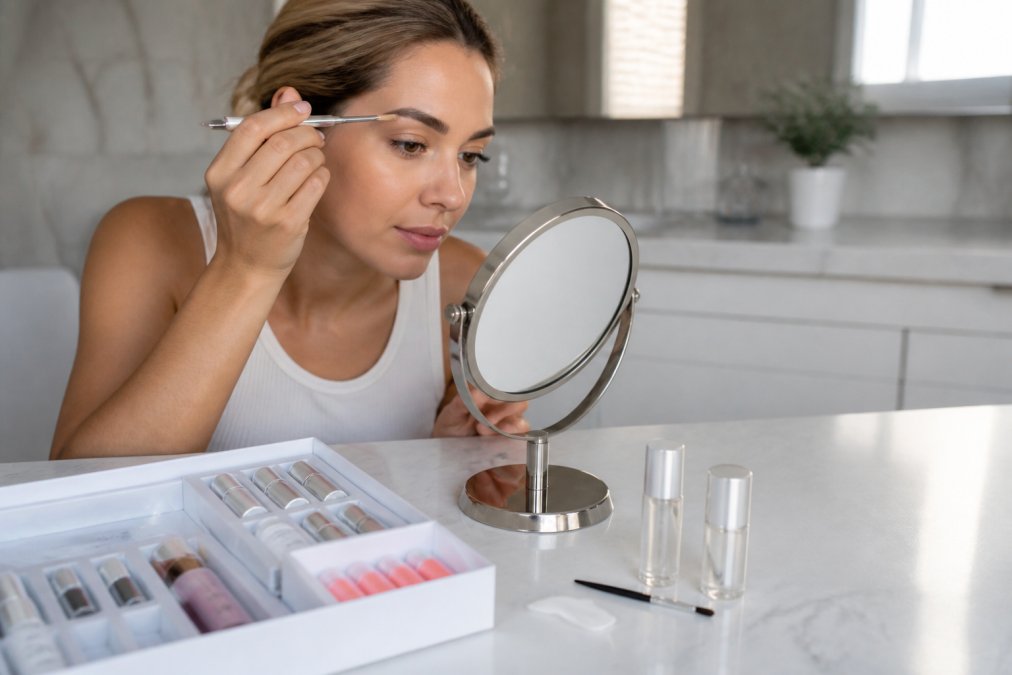
- Cleanse and prep. Remove all makeup and oil from your brows using the cleanser included in your kit. Dry the area completely. Residual oil creates a barrier that prevents the lifting solution from penetrating the hair shaft.
- Apply the brow adhesive. Brush your brow hairs upward with the spoolie and apply a thin layer of brow adhesive to hold them in place. This sets the shape you want the lamination to lock in.
- Apply the lifting solution. Using the applicator brush, coat each hair evenly with the lifting solution. Start the timer immediately. Do not let the solution touch the skin beneath the brows.
- Check the processing time. The lifting solution is what breaks the bonds in the hair. Processing time varies by kit, usually 5 to 10 minutes. Check the hairs every two minutes by gently lifting one hair to see if it holds its new shape.
- Neutralize. Once the hairs hold their shape, apply the neutralizing lotion for the time specified in your instructions. This step reforms the bonds and locks the hairs into their new position.
- Rinse and nourish. Rinse thoroughly with cool water and apply the nourishing serum or hydration oil included in the kit. This replenishes moisture lost during chemical processing.
The most common mistake is leaving the lifting solution on too long because the hairs did not look "done" yet. Trust the timer, not your eyes. Over-processing leads to brittle hair that snaps off, and the damage will not repair itself until the hair grows out completely.
Crucial Brow Lamination Aftercare Tips for Long-Lasting Results
Brow lamination aftercare tips are simple, but ignoring them is the fastest way to shorten the life of your lift. For the first 24 hours, your brows are still setting, and the bonds are not fully hardened. Keep them completely dry, avoid steam, and do not touch or brush them.
After the 24-hour mark, follow these rules to extend your results:
- Keep them dry for 24 hours. No washing your face, no sweating, no rain exposure. Water will relax the newly formed bonds.
- Brush daily. Use a clean spoolie each morning to brush your brows upward into their laminated position. This reinforces the shape and trains the hairs.
- Avoid oil-based cleansers. Oil breaks down the brow adhesive residue and can soften the lift. Use a gentle, water-based cleanser around the brow area.
- Apply a hydration serum. A daily brow serum or a drop of nourishing oil keeps the hairs conditioned and prevents brittleness as the chemical processing wears off.
The Verdict: Is It Worth It for You?
At-home brow lamination is worth it if you are willing to treat it as a skill to learn, not a shortcut to save money. The kits that produce the best results share three qualities: clear instructions, quality ingredients, and a realistic expectation of what the process involves. If you are patient, follow the timing exactly, and commit to a patch test, you can achieve salon-quality results at a fraction of the cost.
If you are not willing to read instructions carefully, or if you have very sensitive skin or a history of allergic reactions to beauty products, the salon is the safer choice. The cost difference is real, but it is not worth risking a chemical burn or permanent damage to your brow hair for the sake of a few euros.
For most people, the answer is a qualified yes. The learning curve is real, but the savings compound with every treatment, and the convenience of doing your brows at home on your own schedule is hard to beat. Kyro Beauty builds its brow kits around this exact tradeoff, offering professional-grade formulas with an application process designed for people who have never performed a brow lift before. The shower-proof, long-lasting results hold up through daily life, and the gentle formulation is suited to sensitive eyes.
Frequently Asked Questions
What are the potential risks of DIY brow lamination?
The main risks of DIY brow lamination are over-processing, which can make brow hairs brittle and prone to breakage, and skin irritation or chemical burns if the solutions touch the skin without a patch test. Choosing a kit with gentler, keratin-enriched formulas and strictly following the timing instructions lowers these risks. Always perform a patch test 24 hours before applying any product near your eyes.
How long does at-home brow lamination typically last?
At-home brow lamination typically lasts between 4 and 6 weeks, depending on the product and your hair growth cycle. As new hairs grow in, they will not have the same lifted shape, gradually returning to their natural direction. Using a nourishing serum and following aftercare instructions can help maintain the results and keep your brow hairs healthy until the lamination grows out completely.
Is it safe to use brow lamination kits on sensitive skin?
It can be safe if you choose a kit specifically formulated for sensitive skin and perform a patch test first. Many professional-grade kits, like those with dermatologically tested formulas, are designed to minimize irritation. However, if you have a known allergy or skin condition, you should consult a dermatologist before use. Avoid kits with harsh chemicals and always follow the neutralizing steps to stop the processing action.
What should I do if my at-home brow lamination goes wrong?
If your brows look over-processed, feel brittle, or the hair has fallen out, stop using the kit immediately. Apply a nourishing oil or hydrating brow serum to help restore moisture and support follicle health. If you experience severe irritation, redness, or swelling, wash the area with cool water and seek medical advice. For future attempts, choose a gentler formula and reduce the processing time.
Achieving the perfect laminated brow at home comes down to preparation, patience, and using a kit you can trust. Kyro Beauty offers all-in-one brow kits that deliver salon-quality shaping and tinting without the salon price tag, with formulas that are gentle on sensitive eyes and results that last. Get started with Kyro Beauty and master your brow maintenance from the comfort of your own bathroom.
