
Salon Quality Nails at Home: Step by Step Guide 2026

Table of Contents
- Why Salon Quality Nails at Home Beats the Salon in 2026
- Best Tools for Home Manicure: What You Actually Need
- How to Prep Nails for Long-Lasting Polish
- Step-by-Step Application for Salon Quality Nails
- How to Prevent Nail Polish Chipping
- Safe Removal and Nail Health Aftercare
- Conclusion
- Frequently Asked Questions
Last Updated: September 30, 2026
Why Salon Quality Nails at Home Beats the Salon in 2026
Rising salon costs have pushed more people to build their own routine, and a step by step guide to salon quality nails at home is the practical answer to a €60 appointment that eats an evening. When the at-home kit is genuinely good, the salon becomes optional. The catch is technique, most disappointing DIY manicures fail on preparation and curing, not polish.
Best Tools for Home Manicure: What You Actually Need
The best tools for home manicure are a 180/240 grit file, a cuticle pusher, a nail buffer, a lint-free wipe, a nail dehydrator, and a curing lamp matched to your gel system. Everything else is optional:
- Grit file (180/240): shapes the free edge without shredding the nail plate
- Cuticle pusher: moves cuticle tissue back, never cuts it away
- Nail buffer: lightly smooths the nail bed for adhesion
- Nail dehydrator: strips oils so the base coat can grip
- Curing lamp: LED lamp matched to your polish brand's specification
A mismatched lamp is the most common reason a home gel manicure stays tacky or peels within days. Buy the lamp the polish manufacturer specifies, not the cheapest listing.
Budget Tools vs Professional-Grade: What's Worth It
Spend on the curing lamp and the dehydrator; save on files and buffers. Professional-grade lamps deliver consistent output across the whole unit, which matters because under-cured gel polish is both a durability problem and a skin-sensitivity risk. Budget files and buffers do the same job. A mid-range brush set is a reasonable upgrade once you're applying thin layers confidently.
How to Prep Nails for Long-Lasting Polish
How to prep nails for long-lasting polish starts with removing every trace of oil and old product from the nail plate. Prep is roughly 70% of the result, and the step most people rush. Work through it in order:
- Remove any existing polish with acetone and a lint-free pad.
- Wash hands, then dry thoroughly.
- Push cuticles back with a cuticle pusher, gently, without cutting.
- Shape the free edge with your grit file in one direction.
- Buff the nail bed lightly to break the shine.
- Wipe each nail with a nail dehydrator and let it evaporate fully.
Shaping, Filing and Cuticle Care
File in one direction rather than sawing back and forth, which frays and splits the free edge. Keep the shape consistent across all ten nails, and check length from the palm side, where unevenness is easiest to spot.
Step-by-Step Application for Salon Quality Nails
Salon quality nails are built in thin layers, not thick ones. A single heavy coat pools at the cuticle, cures unevenly and lifts at the edges within days.
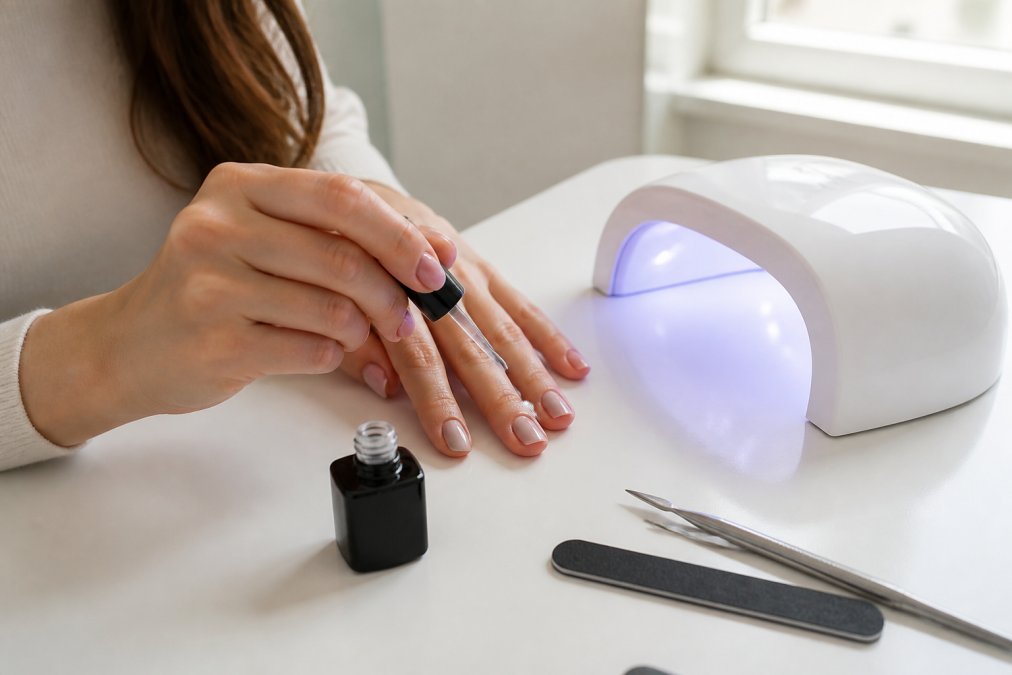
Follow this sequence:
- Apply a thin base coat, capping the free edge.
- Cure under your LED lamp for the time your polish specifies.
- Apply colour in two or three thin coats, curing between each.
- Apply a top coat, again capping the free edge.
- Cure the top coat fully, then wipe off the dispersion layer if your system requires it.
Base Coat, Thin Layers and Curing
The base coat is the bond between your nail plate and the colour, so it deserves the same care. "Thin" means the polish looks slightly translucent on the first pass; if it looks fully opaque, you've applied too much.
How to Prevent Nail Polish Chipping
How to prevent nail polish chipping comes down to three habits: cap the free edge, keep layers thin, and keep your nails dry for the first hour. Chipping is almost never random, and almost never the polish's fault.
Why Your Manicure Failed: A Diagnostic Walkthrough
Most guides hand you a table and move on. What actually helps is reading the failure, because each pattern points at a different step in the sequence. Work backwards from the symptom.
The Ingredient Angle Most Guides Skip
If your manicures keep failing the same way no matter how carefully you prep, the formula may be the variable. Gel and traditional polishes use different solvent and monomer systems, and some people's nails simply don't hold certain formulations well.
| Symptom | Likely Cause | Fix |
|---|---|---|
| Peels off in one clean sheet | Oily nail plate, no dehydrator, or skipped buffing | Re-prep fully with a nail dehydrator |
| Lifts at the cuticle first | Product flooded onto the skin | Leave a hairline gap at the cuticle |
| Sticky, soft polish after curing | Under-cured gel or mismatched lamp | Check lamp spec, extend cure time |
| Chips at the tip | No free-edge cap | Cap the free edge on every layer |
| Lifting after a few days | Layers applied too thick | Use two to three thin coats |
| Dull, scratched finish | Skipped or under-cured top coat | Add a top coat and cure fully |
| Whole set lifts after a week | Cumulative water exposure | Wear gloves, oil daily |
Safe Removal and Nail Health Aftercare
Safe removal means soaking, not pulling. Gel polish is a soak-off product, and forcing it off takes layers of your nail plate with it.
What You Are Actually Removing
A gel manicure is not a coating sitting on top of the nail; it is a cured polymer network bonded to the nail plate, and acetone works by swelling and breaking that network down from the edges inward. That is why the foil wrap matters: it keeps the solvent in contact with the product long enough to work, rather than evaporating off the surface.
Giving Your Nails a Recovery Window
Give your nails a break between gel applications. A week without polish lets the nail plate recover and makes the next manicure last longer. Nail health is cumulative: the condition of your nail bed in six months depends on how gently you remove polish today.
Aftercare That Actually Matters
Aftercare is not a single step at the end of the manicure; it is the routine between manicures. The three things that matter most are oil, gloves and patience.
- Cuticle oil, daily. The skin around the nail and the hyponychium under the tip are the parts most exposed to acetone and mechanical stress. Oil keeps them supple and reduces the ragged edges that tempt you to pick.
- Gloves for wet work. Prolonged water exposure softens the nail plate and works its way under the free edge, which is the usual starting point for lifting.
- Patience between sets. The single biggest cause of long-term nail thinning is removing gel too soon and too aggressively. If a set is lifting badly, soak it off properly rather than picking at the loose edges.
Conclusion
The gap between a salon manicure and a home one is technique, not equipment, and the technique is learnable in an afternoon. If you're already building an at-home routine, Kyro Beauty's all-in-one kits follow the same principle for lashes and brows: professional-grade results, no glue required for the press-on lash range, shower-proof formulas, and a process gentle enough for sensitive eyes.
Shop the Kit and bring the salon home.
Frequently Asked Questions
How long does a DIY salon-quality manicure last?
A salon quality nails at home gel manicure typically lasts 10 to 14 days when you follow proper prep and curing steps. Using a nail dehydrator, applying thin layers, and curing each coat fully under an LED lamp are the main factors that extend wear. Avoid soaking your hands in water for long periods and apply cuticle oil daily to keep the free edge sealed.
What are the essential tools for a professional home manicure?
The best tools for home manicure include a 180/240 grit file, a cuticle pusher, a nail buffer, a nail dehydrator, a base coat, a top coat, gel polish, and a curing lamp. Add cuticle oil for aftercare. Professional-grade tools last longer and give more consistent results than budget sets, but a mid-range kit covers everything you need for salon quality nails at home.
Should you push your cuticles back on your fingernails?
Yes, gently pushing back the cuticles is part of nail prep. Use a cuticle pusher after softening the cuticles with warm water or a cuticle remover. Never cut the cuticle completely, as it protects the nail bed from infection. Push back only the dead skin on the nail plate, then wipe with a nail dehydrator to remove oils before applying base coat.
How do I prevent nail polish from chipping after a few days?
To prevent nail polish chipping, cap the free edge with each coat, keep layers thin, and make sure every layer is fully cured. Avoid using your nails as tools to open packages or scrape labels. Apply a top coat every two to three days and use cuticle oil to keep the nail plate flexible. These habits add several days of wear.
Is it cheaper to do gel nails at home than at a salon?
At-home gel kits usually cost less per manicure than salon visits when you spread the cost of the lamp and polish over multiple uses. Salon prices have risen with supply costs and labor shortages, so the savings grow with each DIY session. Check Kyro Beauty's website for current kit pricing.
How do I remove gel polish safely without damaging my nails?
File the top coat lightly, soak a cotton pad in acetone, place it on the nail, and wrap with foil for 10 to 15 minutes. Gently push off the softened polish with a cuticle pusher. Never peel gel polish off, as it removes layers of the nail plate. Follow with cuticle oil and a hydrating hand cream to restore moisture.
