



Do Press-On Lashes Look Natural? A Complete Guide

Table of Contents
- What Makes Press-On Lashes Look Natural
- How to Apply Press-On Lashes for Beginners
- Blending False Lashes With Your Natural Lash Line
- How Long Do Press-On Lashes Last
- Removing Press-On Lashes Safely
- Cluster Lashes vs. Strip Lashes for a Natural Look
- Press-On Lashes for Sensitive Eyes and Daily Wear
- Conclusion
Last Updated: August 26, 2026
What Makes Press-On Lashes Look Natural
The difference between natural-looking press-on lashes and obvious falsies comes down to three core factors: lash band visibility, lash density, and fiber taper. A lash band that's too thick or visible will betray the application, no matter how perfectly you position it. The seamless application technique hides the band entirely by tucking it beneath your natural lashes so only the fibers show.
Lash band visibility and seamless application
A transparent or ultra-thin band disappears against your lash line when applied correctly. The under-lash technique accomplishes this by applying adhesive to the underside of the band, then pressing it upward into your natural lash line rather than downward onto your lid. This positioning keeps the band hidden beneath your natural lashes while the tapered fibers extend outward seamlessly.
Lash density and tapered fibers
Natural lashes taper toward the tips, thicker at the base and gradually thinning out. Synthetic fibers that maintain uniform thickness throughout look plastic by comparison. Tapered fibers mimic this natural gradient, creating dimension that reads as authentically voluminous rather than obviously enhanced.
Density should match your eye shape and natural lash thickness. The goal isn't maximum volume, it's proportional enhancement that makes your lashes look like an amplified version of themselves, not a completely different set.
How to Apply Press-On Lashes for Beginners
Applying press-on lashes for beginners requires understanding lash mapping and mastering the fundamental steps. The process takes 3-5 minutes when you know what you're doing (the American Academy of Dermatology).
Preparation and lash mapping
Lash mapping means identifying where each lash cluster or strip should sit on your eye to create a cohesive, natural look. Your eye shape determines the ideal placement. Almond-shaped eyes can handle lashes across the entire lid. Hooded eyes benefit from concentration at the outer corner to lift the eye. Round eyes look better with lashes heavier toward the outer edge.
Before touching adhesive, examine your natural lash line and mark gaps mentally where you want extra volume. Clean your eyelid with an oil-free makeup remover, then let it dry completely. Any moisture or residual makeup prevents adhesive from bonding properly. If you're wearing eyeshadow, apply it before lashes.
Step-by-step application with tweezers
Step 1: Apply adhesive correctly. Use a small drop of lash glue along the entire band. A thin, even line is all you need. Wait 30 seconds for the adhesive to become tacky, this is crucial.
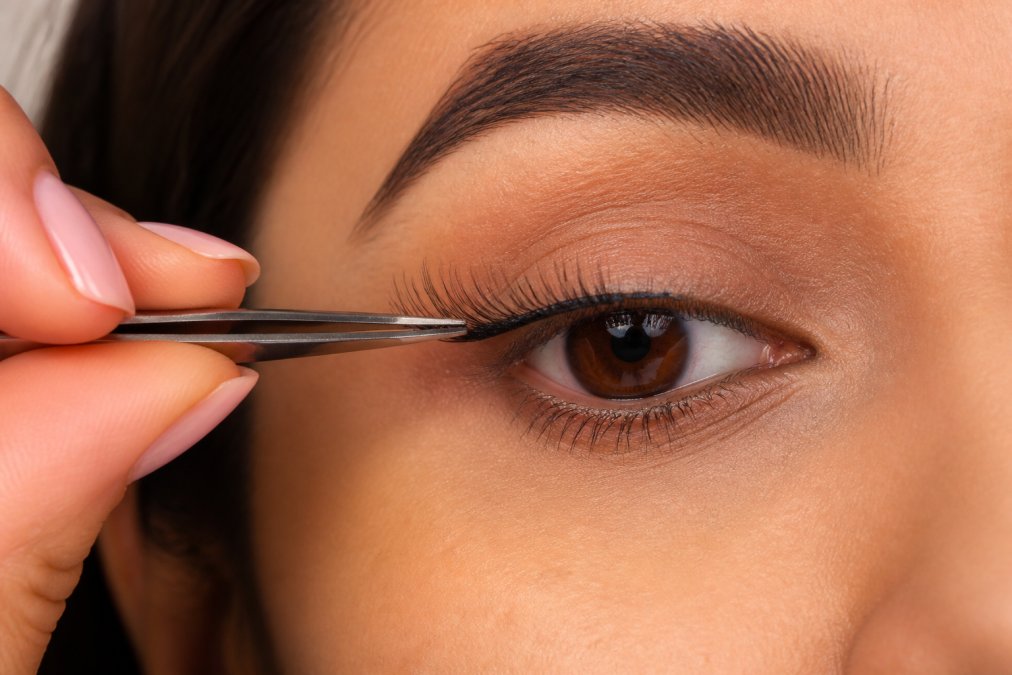
Step 2: Position with tweezers. Hold the lash cluster or strip with tweezers at the center, then approach your eye from above at a 45-degree angle. Lower the outer corner first, then the center and inner corner, pressing each section into place.
Step 3: Secure the bond. Press along the entire band with your finger or a lash applicator tool for 10-15 seconds to ensure full contact between the band and your natural lash line.
Step 4: Blend with your natural lashes. Use a clean spoolie brush to comb through your natural and false lashes together. This step is essential for a natural look, separating fibers that may have clumped during application.
Common application mistakes to avoid
The most frequent mistake is applying lashes too low on the eyelid, creating a gap between your natural lash line and the false lashes. Position the band directly on your natural lash line, not below it.
Another common error is using too much adhesive. Excess glue becomes visible and can cause irritation. A thin line along the band is sufficient. Many people also apply lashes while the adhesive is still wet, then watch them shift as the glue sets. The 30-second wait allows tacky adhesive to grip immediately.
Skipping the blending step leaves false lashes looking separate from your natural ones. A quick comb-through with a spoolie takes 10 seconds and transforms the result from "wearing false lashes" to "naturally full lashes."
Blending False Lashes With Your Natural Lash Line
The under-lash technique is the professional method that makes natural-looking press-on lashes achievable. It requires positioning the lash band beneath your natural lashes rather than on top of them.
Under-lash technique for seamless integration
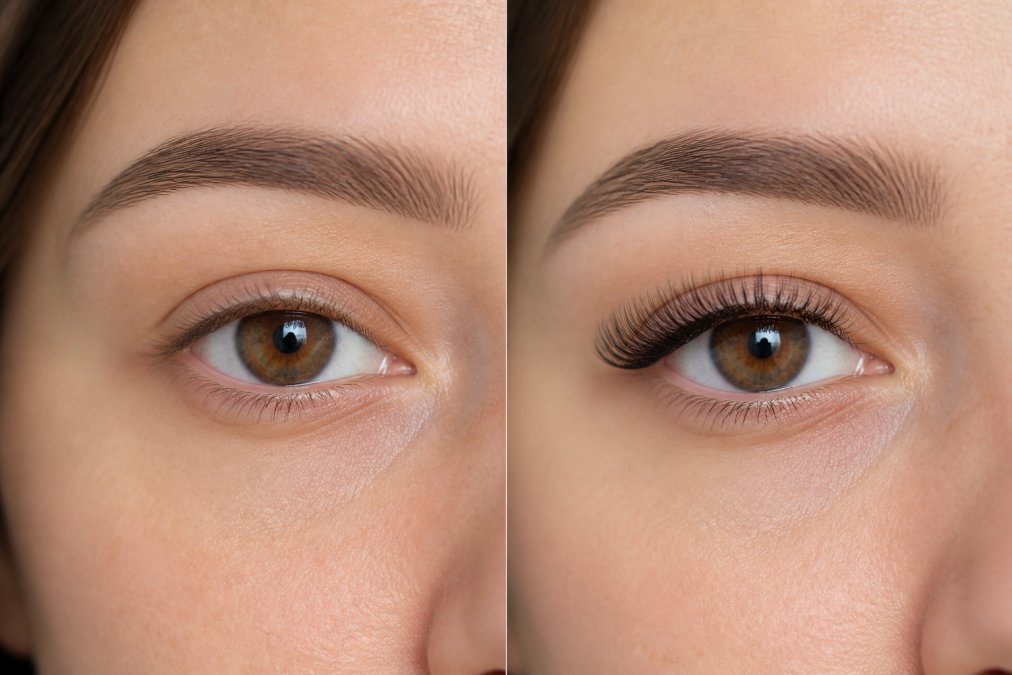
The under-lash method works by applying adhesive to the underside of the lash band, then lifting your natural lashes and sliding the false band underneath them. Your natural lashes then rest on top of the false lash band, creating a unified appearance where both sets of lashes grow from the same line.
To execute this technique, hold your natural lashes up with a lash applicator or clean spoolie. Apply a thin line of adhesive to the underside of the false lash band. Wait for tackiness. Position the false lash band so it sits just below your natural lash base, then release your natural lashes, allowing them to settle on top of the false band. Press gently along the entire band to secure.
This positioning hides the lash band completely beneath your natural lashes, creates a natural graduation of lash length and density, and allows light to hit both sets of lashes at the same angle, creating unified dimension rather than the flat, obvious look of lashes sitting on top of skin.
Choosing lash curl and length for your eye shape
Lash curl dramatically affects how lashes interact with your eye shape. A tight curl (C or D curl) lifts the eye and works well for hooded or downturned eyes. A gentler curl (J or B curl) creates a more natural, less dramatic effect.
Length should complement your natural lash length while providing noticeable volume. If your natural lashes are short and fine, jumping to extra-long lashes creates an obvious contrast. A moderate length increase looks more believable.
For almond-shaped eyes, full-length lashes across the entire lid work beautifully. Round eyes benefit from lashes concentrated at the outer corners to create a subtle lift. Hooded eyes look best with lashes heaviest at the outer third. Monolid eyes can handle denser, longer lashes because the lid shape naturally creates definition.
How Long Do Press-On Lashes Last
The longevity of press-on lashes depends on the quality of the adhesive bond, your daily habits, and how well you care for them.
Lash retention and adhesive bond strength
A properly applied press-on lash typically lasts 5-7 days with normal daily wear. Some high-quality applications hold for up to 10 days if you're careful with them. The adhesive bond weakens gradually as oils from your skin, moisture from showering, and friction from eye rubbing accumulate.
Premium waterproof adhesives hold longer than budget options. A clean, dry lash line creates a stronger bond than one with residual makeup or natural oils. Precise application with full contact between the band and your lash line ensures the bond distributes evenly.
Most lashes begin showing wear around day 5-6. At this point, you can either reinforce with a tiny amount of fresh adhesive or remove and reapply. Quality waterproof adhesives handle showers and swimming without failing immediately, though prolonged water exposure weakens the bond.
Cost-per-wear comparison with salon treatments
A single salon lash extension appointment costs between €80-150 and lasts 3-4 weeks with maintenance appointments every 2-3 weeks (the American Academy of Dermatology). Over a year, salon treatments cost €600-900 in appointment fees alone.
A quality press-on lash kit costs significantly less upfront and provides multiple applications. If you reuse lashes 3-5 times with proper care, the cost per wear drops substantially. You control the frequency, applying lashes only when you want them rather than maintaining a standing appointment schedule.
A salon appointment takes 2-3 hours. Applying press-on lashes takes 5 minutes. Over a year, salon visits consume 24-36 hours.
Removing Press-On Lashes Safely
Removing press-on lashes incorrectly causes damage to your natural lashes and lid skin. The removal process is as important as application for maintaining lash health.
Oil-based cleanser removal process
An oil-based cleanser is the safest removal method. Oil breaks down the adhesive bond without harsh pulling or chemical exposure. Apply a generous amount of oil-based cleanser (micellar water, makeup remover oil, or coconut oil) directly to your lash line and let it sit for 30-60 seconds (the American Academy of Dermatology).
Gently massage the oil into your lash line, working the cleanser between your natural and false lashes. The adhesive will begin loosening. After a minute or two of gentle massage, the false lashes should release easily. If they're still stuck, apply more oil and wait longer rather than pulling.
Once the lashes release, remove them completely before rubbing your eyes. Use tweezers to gently lift each lash away from your lid once it's loose enough to move. After removal, cleanse your entire lid with your regular makeup remover to eliminate residual oil and adhesive. Avoid applying new lashes for at least 24 hours.
Lash damage prevention during removal
The biggest damage risk is pulling lashes out while adhesive is still bonded. This yanks out natural lashes along with the false ones. The oil-based cleanser method prevents this by dissolving the bond rather than breaking it.
Never use acetone, rubbing alcohol, or other harsh solvents to remove lashes. These damage both false and natural lashes and are irritating to sensitive eye areas.
If you wear lashes frequently, give your natural lashes a break every 1-2 weeks. Continuous lash wear, even with perfect technique, eventually causes thinning and breakage.
Cluster Lashes vs. Strip Lashes for a Natural Look
Cluster lashes consist of small groups of fibers fused together, typically 3-5 fibers per cluster. You apply multiple clusters across your lash line, spacing them to match your natural lash pattern. This format allows customization, you can add clusters only where you want volume or concentrate density at the outer corners.
Strip lashes are continuous bands of fibers that cover your entire lash line from inner to outer corner. You apply one strip per eye, creating uniform coverage. Strip lashes offer faster application and consistent density but less customization.
For a natural look, cluster lashes have a significant advantage. They mimic how natural lashes actually grow, in small groups with varying lengths and angles. You can arrange clusters to follow your natural lash pattern, creating an enhanced-but-believable appearance. Spacing clusters also prevents the "obviously false" density that full strip lashes sometimes create.
Strip lashes work best for dramatic looks where the goal is obvious enhancement rather than natural appearance. If your goal is natural-looking press-on lashes, cluster lashes are the superior choice.
Press-On Lashes for Sensitive Eyes and Daily Wear
Sensitive eyes require careful consideration when selecting lash products and application methods. Many people assume they can't wear false lashes due to irritation from lash glue, but the right approach makes daily wear comfortable.
Sensitivity typically stems from three sources: adhesive ingredients, improper application creating tension, and lash band material. Waterproof adhesives tend to be more irritating than water-based options. If you have sensitive eyes, try a gentler, water-based adhesive formula first. Allow extra time for the adhesive to set, a fully cured bond creates less tension on your lid.
Application tension is often overlooked. If your lash band is positioned too tightly or pulled too hard during application, it creates constant low-level irritation. A properly positioned band should feel weightless.
Lash band material matters as well. Silicone bands are gentler than traditional plastic bands. They're more flexible and conform better to your eye shape, reducing pressure points.
At Kyro Beauty, we've designed our press-on lash kits with sensitive eyes in mind. Our lashes feature a gentle adhesive formula and flexible silicone bands that minimize irritation while maintaining excellent retention. The super-fast application process means less time with products near your eyes.
For daily wear, limit consecutive wear to 5-7 days, then give your eyes a 24-hour break. This rhythm allows your lash line and lid skin to recover without constant adhesive exposure. If irritation persists despite these adjustments, consult an eye care professional.
Conclusion
Do press-on lashes look natural? The answer is unequivocally yes, when you understand lash band visibility, apply with precision using the under-lash technique, and choose cluster lashes that match your eye shape. The difference between believable results and obvious falsies comes down to technique, not product quality alone.
The real question is whether you're willing to invest 5 minutes in proper application. Kyro Beauty's press-on lash kits are designed for exactly this, professional-grade results delivered through super-fast, gentle application that works for sensitive eyes and busy schedules. With our all-in-one kits, salon-quality lash enhancement becomes something you control, not something you book appointments for.
Ready to experience the difference? Shop the Kit and discover why thousands of customers trust Kyro Beauty for natural-looking, long-lasting lash enhancement at home.
Frequently Asked Questions
Can press-on lashes really look natural, or will people always notice they're fake?
Press-on lashes can look completely natural when applied correctly using cluster lashes with tapered fibers and proper lash mapping. The key is choosing a style that matches your natural lash density and curl, then using the under-lash technique to blend them seamlessly with your lash line. Many people wear them daily without anyone noticing, especially when you prioritize lash band visibility and avoid overly dramatic volumes for everyday wear.
How long do press-on lashes last with daily wear and showers?
Quality press-on lashes typically last 5-7 days with proper adhesive bond maintenance, though some can extend to 2 weeks depending on your natural lash cycle and how gently you handle them. With waterproof adhesive and careful removal using oil-based cleansers, you can reapply them multiple times before replacing the lashes. This makes the cost-per-wear significantly lower than professional salon treatments, especially when you factor in the convenience of at-home application.
Are press-on lashes safe for sensitive eyes, or will the adhesive cause irritation?
Press-on lashes are suitable for sensitive eyes when you use a gentle, waterproof adhesive formulated for sensitive skin and avoid applying glue directly to your eye area. Always perform a patch test first, and look for products specifically designed for sensitive eyes. If you experience any irritation during wear, remove them immediately using an oil-based cleanser and allow your natural lashes to recover for a day before reapplying.
What's the difference between cluster lashes and strip lashes for achieving a natural look?
Cluster lashes offer more control over placement and blending, allowing you to customize density and position for a natural appearance tailored to your eye shape. Strip lashes provide full coverage but can look less seamless if the lash band visibility isn't carefully managed. For a natural look, many prefer starting with cluster lashes and the under-lash technique, which creates a more gradual, integrated result compared to traditional strip applications.
This article was written using GrandRanker
