



How to Get Salon Lashes at Home: A DIY Guide

Table of Contents
- What Are DIY Lash Extensions and How Do They Compare to Salon Results?
- Best DIY Lash Extension Kits: What to Look For
- Step-by-Step Guide to Applying Salon-Quality Lashes at Home
- How Long Do DIY Lash Extensions Last and What Affects Retention?
- DIY Lash Extension Safety Tips and Eye Health Considerations
- Lash Extension Removal at Home: Safe Methods and Aftercare
- Maintaining Salon-Quality Results: Aftercare and Lash Health
- Conclusion
Last Updated: August 3, 2026
What Are DIY Lash Extensions and How Do They Compare to Salon Results?
DIY lash extension systems use pre-made lash segments and user-friendly applicators that simplify professional application. The key difference lies in precision and consistency: salon technicians work under magnification with hands trained through hundreds of applications, while DIY systems demand patience and a steady hand from you. Salon extensions last 4-6 weeks; DIY segments typically hold for 1-3 weeks depending on application technique and aftercare.
Semi-permanent lash segments vs. salon-applied extensions
Semi-permanent lash segments are individual clusters designed to bond to your natural lash line using adhesive. Professional salon adhesives contain cyanoacrylate compounds engineered for slower cure times, allowing precise positioning before bonding. Consumer-grade adhesives cure faster, sometimes within seconds, which speeds application but leaves less room for adjustment.
Research shows professionally applied extensions retain 85-90% of their original fullness after two weeks, while carefully applied DIY segments retain 70-80% under the same conditions.
Press-on lashes vs. adhesive-applied segments
Press-on lashes come pre-glued and require no adhesive application, lasting 24-48 hours, ideal for events. Adhesive-applied segments demand more technique but deliver longer wear, taking 15-30 minutes for a full set versus 2-3 minutes for press-ons.
Choose press-ons for frequent travel or sporadic events. Choose adhesive-applied segments if you want to replace salon visits with a sustainable at-home routine.
Best DIY Lash Extension Kits: What to Look For
Every functional DIY lash kit should include: lash segments or strips, adhesive, tweezers, a spoolie brush, and a lash applicator tool. Some kits add lash primer, adhesive sealant, or oil-based cleansers for removal.
Professional-grade tweezers have a fine, angled tip that lets you grip individual lash segments without crushing them. The spoolie brush separates your natural lashes before application and combs through extensions after bonding to remove excess adhesive.
Evaluating adhesive quality and lash material
Adhesive is where DIY kits either succeed or fail. Look for adhesives labeled hypoallergenic or formulated for sensitive eyes, with lower formaldehyde levels. The adhesive should be black so you can see where you've applied it and cure to a matte finish.
Lash material quality affects both comfort and appearance. The best DIY lashes are made from synthetic fibers that mimic human hair, they're lightweight and flexible. Professional salon lashes are typically 10-14mm in length; light volume (30-50 fibers per cluster) looks more natural.
Step-by-Step Guide to Applying Salon-Quality Lashes at Home
Getting salon lashes at home comes down to mastering a few critical steps: preparation, lash mapping, precise adhesive application, and proper positioning.
Preparation and lash mapping for your eye shape
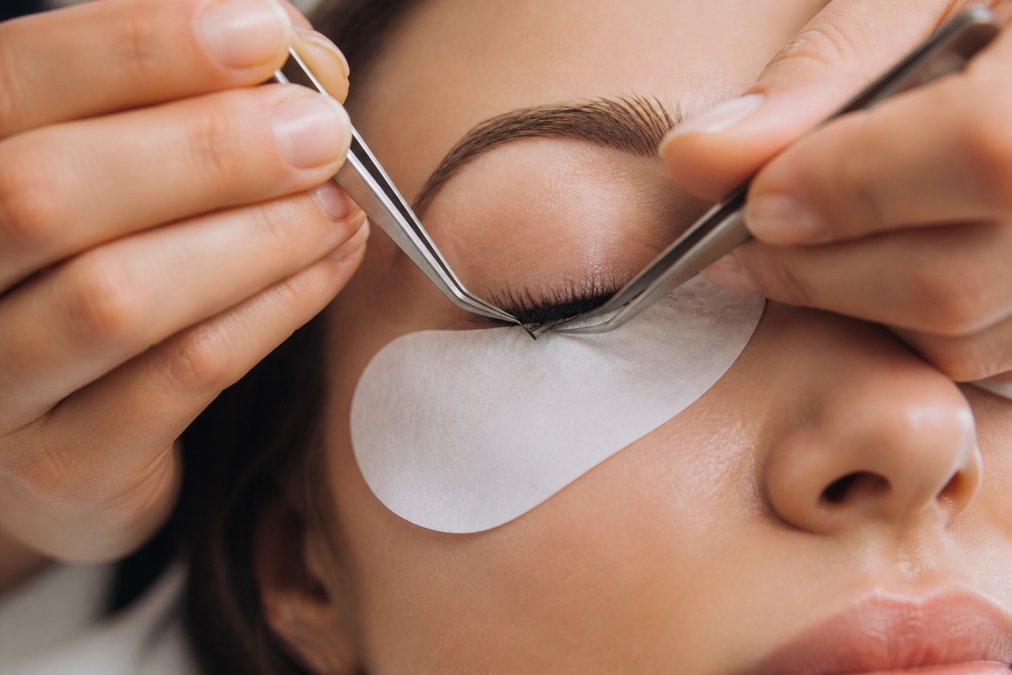
Before touching any adhesive, spend 5-10 minutes prepping your lids and planning lash placement. Cleanse your lash line thoroughly with a gentle, oil-free cleanser. Pat your lids completely dry, moisture is the enemy of lash adhesive.
Lash mapping means deciding where each segment will go based on your eye shape. Most people benefit from a simple three-zone approach: inner zone (8-10mm), center zone (11-12mm), and outer zone (12-13mm). This creates a natural gradient that enhances your eye shape.
Application process with tweezers and applicator tools
Pick up a small amount of adhesive with your applicator tool, about the size of a sesame seed. Using precision tweezers, pick up a lash segment and hold it at a 45-degree angle to your natural lash line.
Gently position the segment against your natural lash, starting about 1-2mm from the inner corner of your eye. Press down for 10-15 seconds to allow the adhesive to begin bonding. Continue working from the inner corner toward the outer corner, spacing segments about 2-3mm apart. Most people apply 8-12 segments per eye for a full, natural look.
Use your spoolie brush to comb through both your natural lashes and extensions, removing excess adhesive and ensuring lashes aren't stuck together.
Sealing and setting the bond for lasting wear
Once all segments are in place, apply a lash sealant if your kit includes one. Wait 30-60 seconds after application before using the sealant.
Allow the full set to cure for at least 4-6 hours before getting your lashes wet. The adhesive continues strengthening over the first 24 hours, so avoiding moisture significantly improves longevity.
How Long Do DIY Lash Extensions Last and What Affects Retention?
Your natural lashes go through a growth cycle lasting 4-8 weeks. When you apply extensions to your natural lashes, they're bonded to hairs already scheduled to shed.
DIY lash extensions typically last 1-3 weeks, depending on adhesive quality, application technique, aftercare, and your natural lash shedding rate.
Lash growth cycle and natural shedding patterns
Your natural lashes shed at a rate of about 1-5 lashes per eye per day. By day 7 of wearing extensions, you've naturally lost 7-35 lashes per eye. By day 21, you're down to perhaps 50-60% of your original extension set.
Shedding accelerates if you sleep face-down, rub your eyes frequently, or use harsh makeup removers. Hormonal changes, stress, and lack of sleep can also trigger premature shedding.
Cost-benefit analysis over six months
A salon lash appointment costs 80-150 euros and lasts 4-6 weeks. Over six months, that's 4-5 appointments totaling 320-750 euros. A quality DIY kit typically costs 25-60 euros and includes enough materials for multiple applications.
If you apply DIY lashes every 2-3 weeks for six months, you'll spend 25-60 euros upfront plus perhaps 15-30 euros in additional adhesive and supplies, roughly 40-90 euros total.
| Timeline | Salon Visits (4-5 per 6 months) | DIY Kit Approach | Time Investment |
|---|---|---|---|
| Cost per cycle | 80-150 EUR | 10-15 EUR (materials) | DIY: 20-30 min/cycle |
| 6-month total cost | 320-750 EUR | 60-90 EUR | Salon: 5-7.5 hours total |
| Consistency | Professional every time | Improves with practice | DIY: 2-3 hours total |
| Longevity per set | 4-6 weeks | 1-3 weeks | Learning curve: 3-5 attempts |
DIY Lash Extension Safety Tips and Eye Health Considerations
Applying lash extensions at home carries real risks if you skip safety precautions. Your eyes are sensitive, and adhesives contain chemicals that can cause irritation or allergic reactions. These risks are entirely manageable with proper technique and product selection.
Patch testing and managing allergic reactions
Before applying a full set of lashes, perform a patch test with your adhesive. Apply a small amount to the inside of your wrist or behind your ear and wait 24 hours. If you develop redness, itching, or swelling, you're likely allergic to a component in the adhesive.
The most common culprit is formaldehyde, a preservative in many adhesives. Formaldehyde-free adhesives are worth seeking out if you have sensitive eyes.
If you develop an allergic reaction, remove your lashes immediately using an oil-based cleanser. Don't peel them off, this damages your natural lashes. Instead, saturate the lashes with oil, wait 10-15 minutes, and gently roll them off.
Sanitization protocols and hypoallergenic adhesives
Every tool that touches your eye area should be clean. Before each application, wipe your tweezers and spoolie brush with rubbing alcohol or a clean, lint-free cloth.
Hypoallergenic adhesives are formulated to minimize irritation, typically with lower formaldehyde levels and reduced volatile organic compounds. If you have sensitive eyes, hypoallergenic adhesives are worth the extra cost.
Common mistakes to avoid during application
First, applying adhesive directly to your natural lash instead of the extension segment. Apply adhesive to the underside of the lash segment, then press it against your natural lash.
Second, applying lashes too close to the lash line or too far away. Lashes should sit about 1mm from your skin, not touching the lid itself.
Third, applying too much adhesive. Use the smallest amount necessary, about the size of a sesame seed per segment.
Fourth, not allowing proper curing time. Rushing to wet your lashes before the adhesive sets will cause premature shedding.
Fifth, applying lashes at the wrong angle. Your natural lashes curve slightly upward and outward. DIY segments should follow this same curve at a 45-degree angle.
Lash Extension Removal at Home: Safe Methods and Aftercare
Removing DIY lash extensions improperly can damage your natural lashes. The correct removal method takes patience but protects your lash health.
Oil-based cleanser removal techniques
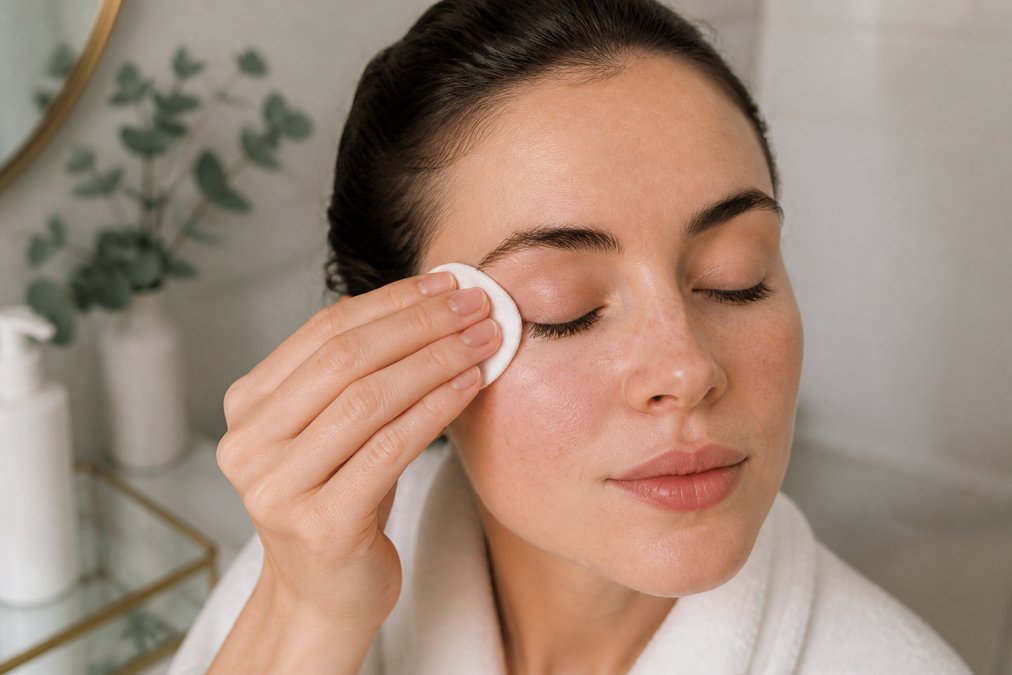
Oil is the safest way to dissolve lash adhesive without damaging your natural lashes. Use a dedicated oil-based makeup remover, coconut oil, or baby oil.
Saturate a cotton pad or soft cloth with your chosen oil. Hold the pad gently against your lash line for 10-15 minutes to allow the oil to penetrate the adhesive bond. After the initial soak, gently roll the extensions off your lash line using a downward rolling motion, not a pulling motion. If an extension doesn't come off easily, apply more oil and wait another 5 minutes.
Continue until all extensions are removed. Then cleanse your lash line with a gentle, oil-free cleanser to remove residual oil. The entire removal process should take 20-30 minutes.
Protecting natural lashes during removal
Your natural lashes are at their most vulnerable during and immediately after removal. Avoid applying new extensions for at least 5-7 days after removal to give your natural lashes time to recover.
During this recovery period, avoid heavy mascara, waterproof eyeliner, and harsh eye makeup. Keep your lash line clean and moisturized. Natural lashes regrow within 4-8 weeks.
Maintaining Salon-Quality Results: Aftercare and Lash Health
Proper aftercare extends wear time and protects your natural lash health.
Daily maintenance routines and lash retention strategies
Treat your extensions gently for the first 48 hours. Avoid water, steam, and heavy sweating. After 48 hours, you can shower and swim, but minimize direct water pressure on your lashes.
Avoid sleeping face-down. Pressure on your lashes while you sleep can weaken the adhesive bond. Sleep on your back or on your side, with your lashes facing away from the pillow.
Brush your lashes daily with a spoolie brush using gentle downward strokes. This removes dust and keeps lashes separated. Avoid oil-based makeup and skincare products on or near your lash line, as oils dissolve lash adhesive. Don't use waterproof mascara on your extensions; use regular mascara on your lower lashes only.
When to reapply and refresh your lash style
Most DIY lash sets need refreshing every 2-3 weeks. By this point, natural shedding has reduced your extension set to about 50-60% of the original fullness. You can either remove all extensions and start fresh, or add new segments to fill in gaps.
Adding new segments takes about 15-20 minutes instead of 30-40 minutes for full removal and reapplication. If you're satisfied with your lash style, reapply the same lash length and volume. If you want to change your look, now's the time to experiment.
Getting salon-quality lashes at home is achievable with the right technique, products, and patience. Kyro Beauty offers professional-grade lash kits designed to simplify this process, featuring hypoallergenic adhesives formulated for sensitive eyes, precision tweezers, and pre-segmented lashes. With proper application and aftercare, you'll achieve results that rival professional treatments at a fraction of the cost. Shop the Kit and join thousands of people who've successfully transitioned from salon visits to at-home lash enhancement.
Frequently Asked Questions
Can I achieve professional-grade salon lashes at home without special training?
Yes, with the right DIY lash extension kit and careful attention to application steps. The key is using quality tools (tweezers, applicator tools, spoolie), understanding lash mapping for your eye shape, and applying the lash adhesive properly to the bond point. Most people see salon-quality results after their first or second attempt. Start with press-on options if you're nervous, then progress to adhesive-applied segments once you're comfortable.
How long do DIY lash extensions typically last compared to salon appointments?
DIY lash extensions generally last 4 to 8 weeks, depending on your natural lash growth cycle and aftercare. Since natural lashes shed every 6 to 8 weeks, you'll notice gaps as your lashes grow out. With proper maintenance (avoiding oil-based products near the bond, using a spoolie daily, and protecting them during showers), you can extend retention. Many people find DIY options cost-effective because they can reapply more frequently than salon visits.
Are DIY lash extension kits safe for sensitive eyes, and what should I do if I have a reaction?
Most modern DIY kits use hypoallergenic lash adhesives formulated for sensitive eyes. Always perform a patch test 24 hours before full application by applying a small amount of adhesive to your inner arm or behind your ear. If you experience redness, swelling, or itching, stop use immediately and rinse thoroughly with water. Choose kits with latex-free, low-fume formulas. If reactions persist, consult a healthcare provider before trying another product.
What's the safest way to remove DIY lash extensions at home without damaging natural lashes?
Use an oil-based cleanser or dedicated lash extension remover, never pull or pick at the segments. Apply the oil-based product to the bond (where the extension meets your natural lash) and let it sit for 1 to 2 minutes to soften the adhesive. Gently roll the extension away from your lash line using a spoolie or soft brush. Avoid tugging or applying pressure to your natural lashes. After removal, cleanse your lashes and apply a nourishing lash serum to support lash health during recovery.
How much can I save by doing lash extensions at home instead of visiting a salon?
Savings depend on salon pricing and how frequently you apply lashes. A quality DIY kit typically covers multiple applications, spreading the cost over several months. Most users report significant savings after 2 to 3 applications compared to professional salon visits. Since you control reapplication timing and can refresh your look as often as you like, you can achieve more treatments per year at a lower total cost, making DIY particularly valuable for frequent travelers and busy professionals.
What's the difference between press-on lashes and adhesive-applied DIY extensions?
Press-on lashes (no-glue options) offer faster application and easier removal, making them ideal for travel and quick touch-ups. Adhesive-applied segments provide longer wear (4 to 8 weeks) and a more customizable, salon-like finish since you apply individual or cluster lashes to your natural lash line. Press-ons work best for occasional wear; adhesive extensions suit those wanting sustained, professional-looking results. Many people use both depending on their schedule and occasion.
Can I do lash extensions at home if I have naturally thin or short lashes?
Yes, but approach it carefully. Thin lashes require lighter lash segments and careful adhesive application to avoid strain. Focus on lash health first: use nourishing serums and avoid heavy extensions that could cause breakage. Lash mapping becomes even more important for thin lashes, apply segments strategically to enhance without overloading. Consider starting with press-on options or lighter cluster lashes, then progress to individual segments once your natural lashes feel stronger. If concerned, consult a lash professional before starting.
This article was written using GrandRanker
