



Long Lasting At-Home Nail Extension Tips That Work

Table of Contents
- Why At-Home Nail Extensions Fail (and What Actually Lasts)
- The Nail Prep Routine for Gel Extensions That Prevents Lifting
- Choosing the Best Nail Glue for Long Lasting Extensions
- How to Prevent Nail Lifting at Home: 5 Fixes That Work
- Gel vs. Glue: Which At-Home Extension Method Lasts Longer?
- Safe Removal and Post-Care for Healthier Nails
- Frequently Asked Questions
Last Updated: September 28, 2026
Why At-Home Nail Extensions Fail (and What Actually Lasts)
The global artificial nails market is valued at $1.68 billion in 2026 and is projected to reach $2.72 billion by 2034, according to Fortune Business Insights artificial nails market report. That growth is driven largely by people who want salon results without the salon schedule. But most long lasting at home nail extension tips fail for one reason: the nail plate was never prepped to hold anything. This guide from Kyro Beauty breaks down the prep routine, adhesive choices, and aftercare that separate a two-week peel from a month of wear.
Here's the core tension running through every method: adhesion is chemistry, not willpower. A full cover tip bonded to an oily, unprimed nail will lift no matter how carefully you press it. Get the surface right and even a basic kit performs.
Below, we'll show you exactly how to prep, apply, and maintain extensions so they survive showers, dishes, and a full workweek.
The Nail Prep Routine for Gel Extensions That Prevents Lifting
A proper nail prep routine for gel extensions is the single biggest predictor of wear time. Skip it and you lose weeks. Nail prep removes the natural oils and invisible surface texture that stop gel and adhesive from bonding to the nail plate.
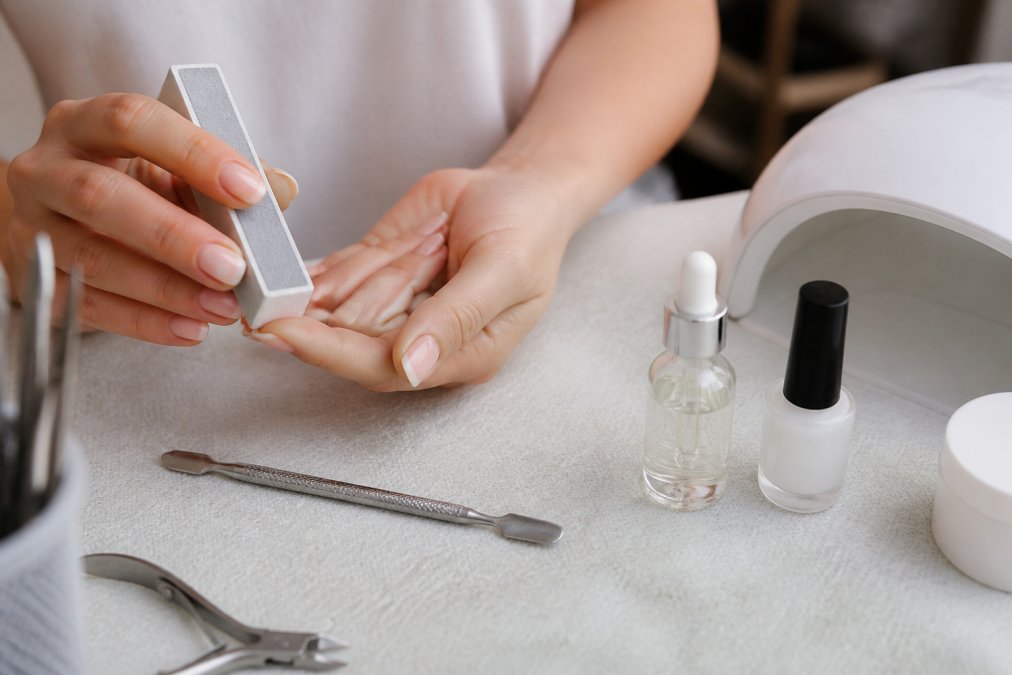
Step 1: Shape, Buff, and Push Back
Start dry. Push back the cuticle, then buff the nail plate with a fine-grit file to break the shine. Work gently near the sidewalls and hyponychium, the skin under the free edge, since over-filing there causes sensitivity and weakens the bond.
Step 2: Dehydrate and Prime
Wipe each nail with a dehydrator to strip lingering oils, then apply an acid-free primer if your system calls for one. Dehydrator and primer are not the same product and they are not interchangeable. One cleans, the other creates a bonding layer.
Choosing the Best Nail Glue for Long Lasting Extensions
The best nail glue for long lasting extensions is one matched to your application method and your nail plate, not the strongest bottle on the shelf. Two chemistries dominate at-home kits, and they behave very differently once cured.
Cyanoacrylate (traditional glue). Ethyl cyanoacrylate sets in seconds when it meets trace moisture on the nail plate. The bond is rigid and strong in shear but brittle in flex: it cracks at the sidewall when the natural nail bends, and that crack becomes a lifting edge.
Match viscosity to tip style
- Full cover tips: medium-viscosity gel adhesive. Thin enough to spread, thick enough not to flood the cuticle.
- Standard half tips: thin gel or glue applied sparingly at the free edge only, the tip's well does the rest of the work.
- Press-on systems: pre-applied adhesive tabs for temporary wear, or a flexible gel bond if you want multi-day hold.
A common mistake is over-application. More adhesive does not mean a stronger hold. Excess product cures unevenly, traps solvent, and creates the exact lifting you are trying to avoid. One thin, even layer beats three thick ones every time.
The safety angle most guides skip
If you are layering gel products, read the ingredient list for HEMA (2-hydroxyethyl methacrylate) and other methacrylate monomers. Repeated skin contact with uncured monomer is the leading cause of allergic contact dermatitis in at-home nail users, and once sensitised, you stay sensitised. Symptoms start as itching or redness around the cuticle and sidewalls, then progress to peeling and blistering. HEMA-free and hypoallergenic gel lines exist specifically for this reason, and they are worth the premium if you apply extensions weekly.
Practical rules that reduce risk:
- Never let uncured gel touch skin. Clean the sidewalls and cuticle line before curing.
- Cure fully. Under-cured gel leaves residual monomer on the nail and on your skin.
- Do not use a product that has caused itching, even once. Sensitisation is cumulative.
- Keep adhesive off the eponychium and lateral folds; a toothpick or fine brush helps.
| Method | Typical Wear Time | Best For |
|---|---|---|
| Builder gel overlay | 4-6 weeks | Strongest, most durable finish |
| Gel-X style extensions | 2-4 weeks | At-home, no-drill systems |
| Standard nail tips | 1-2 weeks | Quick, budget application |
| Professional gel manicure | 2-3 weeks | Low-effort, salon finish |
How to Prevent Nail Lifting at Home: 5 Fixes That Work
Nail lifting almost always traces back to moisture, oil, or an incomplete cure. Fix the cause and the tip stays put.
- Cap the free edge. Seal the tip of each nail with your top coat to close the bond against water.
- Cure fully. Undercured gel stays tacky and peels. Follow your lamp's stated curing time exactly.
- Keep nails dry for the first hour. Water exposure before a full cure undermines adhesion.
- Avoid cuticle oil on the bond line. Moisturise the surrounding skin, not the seam.
- Re-press lifting edges early. A lifted corner left alone collects water and spreads.
Picking or peeling a lifting tip tears layers off the nail plate. That damage takes weeks to grow out and makes every future application harder.
Gel vs. Glue: Which At-Home Extension Method Lasts Longer?
Gel wins on durability, glue wins on speed, but the real answer depends on your nail bed, your budget, and how much time you will actually invest per set.
Match the method to your nail bed shape
Most guides treat all nails the same. They are not.
- Flat nail beds: full cover tips and gel adhesive sit flush and hold well. Glue also works here because there is no c-curve to fight.
- Strongly curved nail beds: a rigid glued tip will pop off the apex within days because the tip cannot follow the curve. Use a flexible gel adhesive or a soft-gel full cover tip that moulds to the nail.
- Bitten or short nail beds: there is little free edge to anchor a half tip. Full cover soft-gel tips that extend over the fingertip, or a builder gel overlay built directly on the natural nail, hold far better than glue-on tips.
- Wide or fan-shaped nails: size up and file the sidewalls to fit rather than forcing a narrow tip, which stresses the bond line.
Cost per manicure: the number that actually decides it
A DIY gel kit, lamp, builder gel or soft-gel tips, dehydrator, primer, file, and top coat, is a one-time outlay that then costs a few euros per set in consumables. Spread across a year of fortnightly sets, the per-manicure cost drops well below a single salon appointment. Glue-on tips are cheaper per box but you replace them more often, and the wear time is shorter, so the per-week cost is not as low as it looks.
Is gel or glue safer for your nails?
Gel is generally gentler when removed correctly, because it lifts with an acetone soak rather than pulling. Glue bonds aggressively and can take surface layers with it if you force removal. Self-application of extensions can lead to infections when hygiene and technique slip, so prep and patience matter more than the product you choose. Whichever method you pick, the safety rules are the same: keep uncured product off the skin, cure fully, and never peel a lifting tip.
Safe Removal and Post-Care for Healthier Nails
The bond is only as good as the nail underneath it. Healthy, hydrated natural nails hold extensions longer than damaged ones every time.
For lash and brow routines that follow the same long-wear logic, Kyro Beauty's all-in-one kits deliver salon-quality results at home with gentle, shower-proof formulas.
Frequently Asked Questions
How can I make my at-home nail extensions last longer?
Start with a thorough nail prep routine: wash hands, push back cuticles, buff the nail plate, then apply a dehydrator and acid-free primer. Choose full cover tips or builder gel, and use a quality gel adhesive. Cure fully under a UV/LED lamp. Avoid water for the first hour and moisturize cuticles daily. With this approach, extensions can achieve long-lasting wear.
What is the best glue for long lasting nail extensions at home?
For gel extensions, a gel adhesive that requires UV/LED curing creates a stronger, more flexible bond than traditional cyanoacrylate glue. Look for a product labeled for full cover tips or gel-x systems. Proper application matters more than brand: apply thin, even layers and press the tip firmly for 10-15 seconds to eliminate air pockets that cause lifting.
How do I prevent nail lifting at home?
Lifting often starts at the sidewalls or free edge. Prevent it by prepping the nail plate thoroughly, avoiding cuticle contact with the extension, and keeping the extension's c-curve matched to your natural nail. File the tip's sidewalls to blend seamlessly. After application, keep nails dry for the first hour and moisturize cuticles daily. If lifting begins, file away the lifted area and fill with gel adhesive rather than peeling, which damages the nail plate.
Can at-home gel extensions really last two weeks or more?
Yes, with proper prep and application. With proper prep and application, at-home extensions can achieve significant wear time. The key is in the prep: a clean, dehydrated nail plate and a correctly cured gel adhesive make all the difference. Following a consistent aftercare routine also extends wear time.
Long lasting at home nail extension tips come down to prep, the right adhesive, and honest aftercare. If you want the same convenience and staying power in your lash and brow routine, Kyro Beauty builds all-in-one kits with no-glue press-on lashes, shower-proof formulas, and super-fast application that's gentle on sensitive eyes. Backed by 2000+ five-star reviews, Kyro Beauty makes salon-quality results a home habit. Shop the Kit and get a flawless look that lasts.
