



Prepare Eyebrows for Lamination at Home

Table of Contents
- What Is Brow Lamination and Why Preparation Matters
- What You'll Need Before Starting
- Brow Lamination Contraindications: When to Skip Treatment
- Step-by-Step Preparation Before Application
- Brow Lamination Aftercare Tips for Long-Lasting Results
- How Long Does Brow Lamination Last and Maintenance Schedule
- Common Mistakes to Avoid
- Frequently Asked Questions
Last Updated: September 17, 2026
What Is Brow Lamination and Why Preparation Matters
Brow lamination is a chemical treatment that lifts and sets eyebrow hairs in a fluffy, upward position for weeks, and learning how to prepare eyebrows lamination is essential for success. The process uses a perming solution to reshape the hair cuticle, followed by a neutralizing lotion to lock in the new shape. Think of it as a perm for your eyebrows, it's semi-permanent styling that removes the daily need for brushing and grooming.
The reason preparation matters so much is simple: your skin and hair are about to undergo chemical processing. Proper preparation prevents irritation, allergic reactions, and disappointing results. The difference between a great lamination and a mediocre one often comes down to what happens in the week before treatment.
Most people skip preparation steps because they seem unnecessary. They're not. A clean canvas, healthy skin barrier, and undamaged hair cuticles make the chemicals work more effectively. You're setting yourself up for success.
What You'll Need Before Starting
Essential Tools and Supplies
You'll need specific items to prepare your brows properly and apply the lamination treatment safely. Here's what goes into a complete at-home brow lamination kit:
Cleansing and preparation supplies:
- Gentle facial cleanser (fragrance-free, non-stripping)
- Soft-bristled brush or spoolie for gentle exfoliation
- Makeup remover or micellar water
- Clean cotton pads or soft cloths
Application supplies:
- The lamination kit itself (perming solution, neutralizing lotion, setting balm)
- Precision applicator brush or spoolie included in kit
- Small mixing bowl (plastic or glass, not metal)
- Patch test supplies (included in most kits)
Aftercare supplies:
- Gentle moisturizing balm or serum
- Clean spoolie brush for daily grooming
- Brow styling gel (optional but helpful)
Quality matters here. Cheap tools lead to messy application and uneven results. Kyro Beauty's all-in-one solutions, including press-on lashes and lifting kits, provide a safe, simple, and stylish way to enhance your natural beauty.
Patch Testing for Brow Lamination Safety
A patch test is non-negotiable before your first lamination. This is where you apply a small amount of the perming solution and neutralizing lotion to test for allergic reactions.
Here's why it matters: some people have sensitivity to the chemical components in lamination solutions. Reactions can range from mild redness to chemical burns. A patch test catches this before it affects your visible eyebrows.
How to patch test:
- Choose a small, hidden area (inner arm or behind ear works well)
- Apply a tiny amount of perming solution to the test area
- Wait the full processing time listed in your kit instructions
- Apply neutralizing lotion and rinse thoroughly
- Wait 24 hours and check for any reaction
If you see redness, swelling, itching, or burning, skip the lamination. Your skin is telling you this treatment isn't right for you right now. Even mild irritation suggests sensitivity that could worsen with full-strength application on thinner facial skin.
Allure's safety guidance on pre-treatment skin preparation emphasizes that avoiding chemical exfoliants before treatment is essential. This same principle applies to patch testing, give your skin a clean baseline to react from.
Brow Lamination Contraindications: When to Skip Treatment
Some conditions mean you should not laminate your brows at home, no matter how careful you are. Understanding contraindications protects your skin and prevents regret.
Skip lamination if you have:
- Active skin conditions on or near the eyebrows (eczema, psoriasis, dermatitis, acne)
- Open cuts, wounds, or recent piercings in the brow area
- A known allergy to any ingredient in the lamination solution
- Extremely thin or fragile eyebrow hair (often from over-plucking or trichotillomania)
- Recent chemical peels or laser treatments on the face
- Sunburned skin anywhere on your face
- A history of severe allergic reactions to hair products
Pregnancy is a gray area. Some sources suggest avoiding chemical treatments during pregnancy as a precaution, even though lamination solutions aren't systemically absorbed. If you're pregnant, consult your healthcare provider first.
Recent eyebrow tinting (within 2 weeks) can also be problematic. The tint already stressed your hair, and adding lamination too soon increases breakage risk.
Step-by-Step Preparation Before Application
Week Before: Stop Plucking and Chemical Treatments
One full week before lamination, stop all eyebrow grooming. This means no plucking, waxing, threading, or tweezing. You need every hair you have for the lamination to work properly.
Why the full week? Plucking creates micro-tears in the skin. These tiny wounds are invisible but real. When you apply lamination chemicals to freshly plucked skin, irritation intensifies. The chemical can seep into the damaged follicles and cause burning or swelling.
Also stop using any chemical treatments on your face during this week. This includes:
- Retinol or retinoids
- Alpha hydroxy acids (AHAs)
- Beta hydroxy acids (BHAs)
- Vitamin C serums
- Benzoyl peroxide
- Any prescription acne treatments
These compounds thin the skin barrier and increase sensitivity to the lamination chemicals. London Brow Company's pre-treatment guidelines specifically recommend avoiding all chemical exfoliants for at least one week prior to treatment.
Think of your skin barrier as a protective wall. Chemical treatments weaken it. Lamination chemicals are strong. A weakened barrier plus strong chemicals equals irritation.
48 Hours Before: Avoid Exfoliants and Retinol
In the final 48 hours before lamination, tighten your routine even more. No physical exfoliation (scrubs, brushes, or cleansing devices). No chemical exfoliants. No retinol.
Your skin needs to be in its calmest, strongest state.
Day of Treatment: Cleanse and Map Your Brows
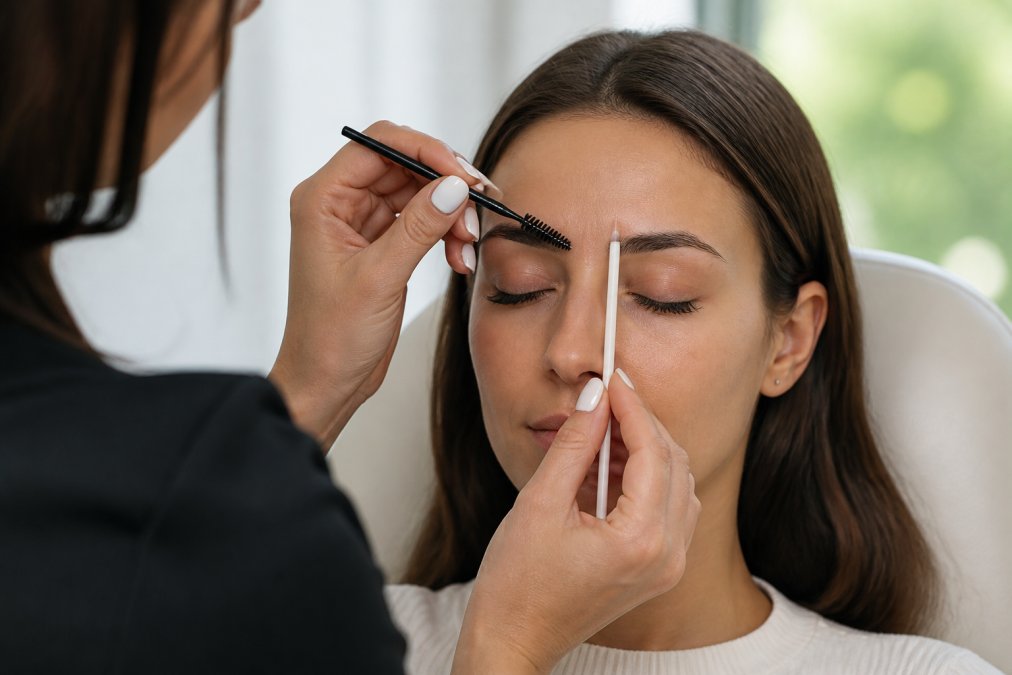
On the day of treatment, start with a thorough cleanse, this is a critical step to prepare eyebrows lamination properly. Use your gentle cleanser and a soft brush to remove all traces of makeup, oil, and debris from the eyebrow area and surrounding skin.
Mapping steps:
- Hold a spoolie vertically against your nose's inner edge, this marks where your brow should start
- Angle the spoolie from your nostril toward your pupil, this marks the arch
- Angle from your nostril toward the outer corner of your eye, this marks the tail
- Brush all hairs upward and note which ones fall outside your desired shape
Brow Lamination Aftercare Tips for Long-Lasting Results
After lamination, your brows need gentle care for the first 24 hours. This is the critical window when the hair cuticle is still setting into its new shape.
First 24 hours, the golden rules:
- Don't wet your eyebrows at all
- Don't apply makeup or skincare products near the brows
- Don't touch or brush your brows
- Sleep on your back if possible (side-sleeping can flatten one brow)
- Avoid steam, saunas, and hot showers
Daily maintenance routine:
How Long Does Brow Lamination Last and Maintenance Schedule
Brow lamination results typically last between 6 to 8 weeks. This timeframe varies based on your hair growth cycle, maintenance habits, and how well you followed preparation steps.
Timeline of results:
- Weeks 1-2: Peak results. Maximum lift and fluffiness.
- Weeks 3-4: Still strong. Minimal fading visible.
- Weeks 5-6: Noticeable softening. Some hairs may start to relax.
- Weeks 7-8: Results fading. Ready for a refresh treatment.
Your maintenance schedule should align with this timeline:
Weeks 1-4: Daily spoolie brushing and occasional serum application.
Common Mistakes to Avoid
Mistake 1: Skipping the patch test. You think you won't react. Then you do. Patch testing takes 24 hours but prevents days of regret.
Frequently Asked Questions
What should you not do before brow lamination?
Avoid plucking, waxing, or threading for at least one week before treatment, as these can increase skin sensitivity. Skip chemical exfoliants, retinol, and alpha hydroxy acids (AHAs) for 48 hours beforehand. Don't apply makeup, oils, or serums to the brow area on treatment day. Wet eyebrows can interfere with solution absorption, so keep the area dry until you're ready to begin. Avoid any other chemical treatments or procedures in the same area during the preparation period.
Why is a patch test important before brow lamination?
A patch test checks for allergic reactions or skin sensitivity to the lamination solution before treating your entire brow area. Apply a small amount of the perming solution to a discreet spot (like behind your ear or on your inner arm) and wait 24-48 hours. If you experience redness, itching, swelling, or irritation, do not proceed with full treatment. This precaution prevents chemical burns and adverse reactions, especially if you have sensitive skin or a history of product sensitivities.
How long does brow lamination last, and what maintenance is needed?
Professional and at-home brow lamination results typically last 6 to 8 weeks. To maintain the lifted shape, brush your brows gently upward each morning using a clean spoolie. Apply a gentle brow serum daily to keep hairs hydrated and maintain the treatment's longevity. Avoid excessive moisture, harsh products, and rubbing during the first 24 hours post-treatment. As results fade, the brows gradually return to their natural texture and position, and you can repeat the treatment when desired.
Are there any conditions that mean I shouldn't do brow lamination at home?
Avoid brow lamination if you have active skin conditions like eczema, psoriasis, or dermatitis in the brow area, as chemical exposure can worsen these. Do not proceed if you have a known allergy to any ingredient in the lamination kit. Avoid treatment if you've had recent eyebrow tattoos or microblading (wait at least 4 weeks). If you have very sensitive skin or a history of severe allergic reactions to beauty products, consult with a professional before attempting at-home treatment.
Preparing eyebrows for lamination at home requires patience and attention to detail, but the results justify the effort. Clean skin, undamaged hair, and a careful application process set you up for fluffy, lifted brows that last weeks. Kyro Beauty's professional-grade kits include everything you need to prepare properly and achieve salon-quality results at home. Skip the guesswork and invest in a kit designed for success, your brows will thank you.
