
How to Apply Press-On Lashes with Glasses (2026 Guide)

Table of Contents
- What You'll Need Before You Start
- Step-by-Step: How to Apply Press-On Lashes with Glasses
- Best Lash Length for Glasses: Frame Clearance and Curl
- How to Prevent Lashes from Touching Glasses
- Tools That Make Application Easier with Glasses
- How to Remove Press-On Lashes Safely
- Common Mistakes to Avoid
- Conclusion
- Frequently Asked Questions
Last Updated: September 18, 2026
What You'll Need Before You Start
Applying press-on lashes with glasses comes down to three things: lash length, curl, and a clear view.
Here's what to gather:
- A magnifying mirror with a stand, so both hands stay free
- Precision tweezers with a curved tip for placing the band
- A lint-free cloth to clean your natural lashes first
- Your glasses, worn during a practice run so you can check clearance
- Press-on lash strips in a short-to-medium length with a thin band
Step-by-Step: How to Apply Press-On Lashes with Glasses
Work on one eye at a time and keep your glasses within reach.
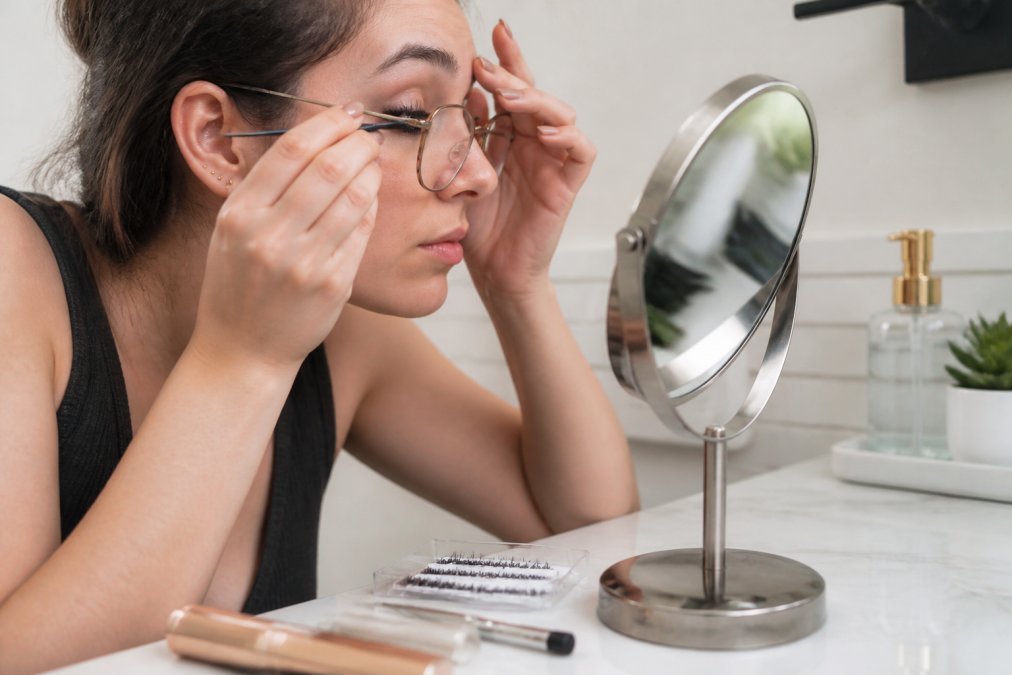
- Clean your lash line. Wipe away oil and old makeup with a lint-free cloth. Oils stop the band from gripping.
- Curl your natural lashes with a gentle curler. This blends them into the press-on strip.
- Measure the strip against your eye and trim from the outer edge if it's too long.
- Apply the adhesive or liner according to your kit's instructions. Let it go tacky.
- Place the strip at the center of your lash line first, then press the inner and outer corners down.
- Wait 30 seconds before opening your eye fully.
- Put your glasses on and blink. Check for contact with the lens.
The Spec Perching Method for Poor Vision
Spec perching is the workaround for anyone who can't see well enough to place a lash accurately. Perch your glasses low on your nose, tip your head down, and look through the top edge of the lens or just over it. This gives a magnified, close-up view of your lash line with both hands free, angle your head, not your glasses.
- Perch the frame low on the bridge of your nose
- Tilt your chin down toward the mirror
- Look through the top of the lens for the close-up view
- Keep your elbow braced on the counter for stability
Magnetic vs. Adhesive Press-On Lashes
| Feature | Magnetic | Adhesive |
|---|---|---|
| Application speed | Slower, liner must dry | Faster, band goes straight on |
| Glasses clearance | Slightly heavier band | Thinner band, less lens contact |
| Removal | Wipes off with oil-based remover | Gentle peel from outer corner |
| Best for | Beginners who dislike glue | Daily wear and sensitive eyes |
For glasses wearers, press-on lashes with a thin band usually win.
Best Lash Length for Glasses: Frame Clearance and Curl
The best lash length for glasses is 8 to 12 mm with a C or CC curl. Longer lashes and tighter curls push tips into the lens; shorter lashes with a soft curl stay behind the frame.
Band thickness is the variable nobody talks about
Band thickness determines how far the strip sits from your lash line, and therefore how much of the tip protrudes toward the lens. A thick, stacked band, common on dramatic strip lashes and some magnetic sets, adds roughly 1 to 2 mm of forward projection before the hairs even start, the difference between clearance and constant ticking.
Match lash shape to frame shape
Frame shape changes where the lens sits relative to your lashes, so the same set can work on one pair and fail on another:
- Oversized frames with a low bridge: the lens sits further from the eye, so medium lengths (10-12 mm) and a C curl are usually safe.
- Cat-eye frames: the outer corner of the lens angles up and away, which gives the outer lash room. A cat-eye lash shape, short inner, longer outer, follows that angle and stays clear. Avoid heavy centre volume.
- Round or small frames: the lens curves close to the eye across the whole lid. Stick to 8-10 mm and a soft C curl, and keep volume even rather than clustered.
- Wire-rim and rimless frames: minimal frame depth means nothing blocks the lash from the lens. Treat these as the tightest clearance case and go short.
- Thick acetate frames: the frame itself sits proud of the lens and shields the lash line, so you have more length freedom than the lens position alone suggests.
Measure your own clearance in 30 seconds
A common mistake is buying the longest, most dramatic set, on a glasses wearer, that's the one most likely to smudge.
How to Prevent Lashes from Touching Glasses
To prevent lashes from touching glasses, control three variables: length, curl, and how close your frames sit to your face. When contact is already happening, the tick-tick-tick of a lash tip flicking the lens on every blink, work through these steps and stop at the one that solves it. Adjusting your lash placement ensures a clear view, much like the precision required for preventing lipstick smudges when maintaining a polished look throughout the day.
Step 1: Identify the contact point
Put your glasses on and blink slowly in front of a mirror. Three common patterns, each with a different fix:
- Outer-corner tick: the longest hairs sit at the outer third and swing into the lens edge. Fix: trim the outer third down by 1-2 mm, or switch to a shorter outer profile.
- Centre brush: volume is clustered in the middle and pushes straight forward. Fix: redistribute, trim the centre, keep length at the outer edge.
- Whole-lash drag: the entire strip sits too far forward, usually because of a thick band or a tight curl. Fix: change the band or soften the curl, not the length.
Step 2: Adjust the curl before the length
A tight curl (D or above) points tips forward and up, straight into the lens; a softer C or CC curl angles them up and back, following the natural lash direction. If you're between two lengths, drop one curl level before dropping a length, you'll keep more of the look and solve the contact.
Step 3: Fix the frame fit
If your glasses slide down your nose, they sit closer to your lashes than they should, and no lash adjustment fully compensates. Two adjustments help:
- Nose pads: widening or replacing them increases the vertex distance and pulls the lens away from the lash line.
- Temple arms: a tighter fit at the ear keeps the frame from creeping down through the day.
Step 4: Control oil and transfer
Even with clearance, oil from the lash line can migrate to the lens and smudge it. Blot the lash line before applying, use smudge-resistant mascara on natural lashes only, and avoid layering product on the press-on strip, added weight pulls tips forward. Keep a microfibre cloth for quick wipes, and clean lenses with a lens-safe spray rather than your breath, which adds moisture and streaks.
Step 5: If contact persists, change the lash type
Some lash constructions are simply incompatible with close-set frames. If you've worked through steps 1 to 4 and still get ticking, the strip is the problem: switch to a thinner band, a shorter length, or a softer curl. Adhesive press-on lashes with a thin band are more reliable for tight clearance.
Tools That Make Application Easier with Glasses
The right tools matter more when you wear glasses, because you're working at a distance from the mirror. Standard tweezers suit sharp near vision; for everyone else, they're the wrong tool.
- Magnifying mirror with LED light: the single biggest upgrade for close-up work
- Curved precision tweezers: hold the strip without crushing the band
- Lash applicator wand: a longer handle keeps your hand out of your line of sight
- A small suction or silicone applicator: good for anyone with a hand tremor
- Counter-mounted mirror stand: keeps both hands free and steady
How to Remove Press-On Lashes Safely
To remove press-on lashes safely, soften the adhesive first, then peel from the outer corner inward. Pulling straight off can tug natural lashes loose.
- Gently wiggle the strip from the outer corner
- Peel slowly, working toward the inner corner
- Clean the strip if your kit allows reuse, and store it in its tray
Common Mistakes to Avoid
These mistakes cause almost every problem glasses wearers run into, and each has a simple fix.
| Mistake | Why It Happens | The Fix |
|---|---|---|
| Lashes brush the lens | Strip is too long or curl too tight | Trim to 8-12 mm, use C or CC curl |
| Lenses smudge by midday | Oily lash line or heavy band | Clean lashes first, use a thin band |
| Strip lifts at the corner | Adhesive not tacky enough | Wait longer before placing |
| Natural lashes pull out | Removing without softening | Use remover, peel from outer corner |
| Look feels bulky up close | Too much volume for the frame | Choose a lighter, shorter style |
Conclusion
The gap between a lash set that works with glasses and one that fights them comes down to length, curl, and band thickness.
Frequently Asked Questions
Can you wear fake eyelashes if you wear glasses?
Yes, you can wear fake eyelashes with glasses, but the key is choosing the right length and curl. Lashes that are too long or too curled will press against your lenses, causing smudges and discomfort. Opt for shorter lengths (8-10mm) and a subtle curl to maintain clearance. Press-on lashes are a good option because they sit close to your natural lash line.
What are the best fake eyelashes to wear with glasses?
The best fake eyelashes for glasses are press-on lashes with a thin band and shorter length. Look for styles with a subtle curl, as these extend outward rather than upward, reducing contact with your lenses. Avoid dramatic, long, or highly curled lashes. Press-on lashes from Kyro Beauty are designed to be gentle, making them a comfortable choice for daily wear with glasses.
How do you prevent lashes from hitting your glasses lenses?
To prevent lashes from hitting your lenses, choose a lash length that stops just short of your frames. Measure by holding the lash strip against your eye while wearing glasses; if it touches, trim it. Also, adjust the curl: less curl means less upward projection. You can also push your glasses slightly forward on your nose or choose frames with a larger lens height. Regularly check for smudges and clean your lenses to maintain clear vision.
How to remove press on lashes safely?
To remove press-on lashes safely, never pull them off dry. Always be gentle to avoid damaging your natural lashes. Follow with a lash conditioner if needed.
